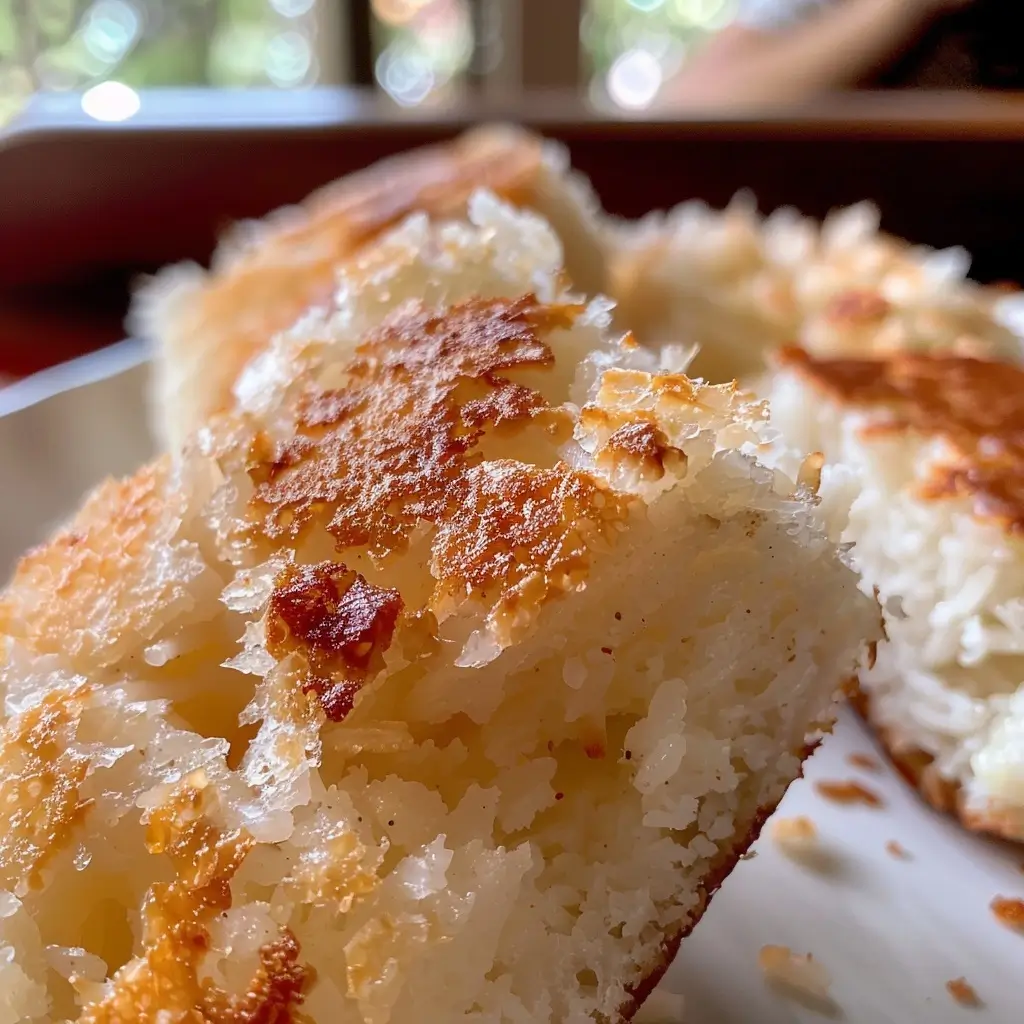
Are you looking for a quick and fluffy low carb bread that can elevate your meals? Well, you’re in for a treat! Today, I’m excited to share my recipe for Pão Low Carb de Frigideira – Rápido e Fofinho. This delightful bread is not only easy to make but also perfect for those busy weeknights when you need something delicious and satisfying. Plus, it pairs wonderfully with all your favorite easy pasta recipes!
Why You’ll Love This Recipe
Quick and easy to prepare, making it perfect for 30-minute meals.
Fluffy texture that complements any dish.
Low carb, so it fits perfectly into your healthy eating plan.
Versatile enough to be served with soups, salads, or as a sandwich base.
Great for family dinners, ensuring everyone leaves the table happy!
Ingredients
To whip up this delightful low carb bread, you’ll need just a few simple ingredients that you probably already have in your pantry. Here’s what you’ll need:
1 cup almond flour
2 tablespoons coconut flour
1 teaspoon baking powder
1/2 teaspoon salt
2 large eggs
1/4 cup water
1 tablespoon olive oil
Full ingredient list with measurements is provided in the printable recipe card below.
How to Make the Recipe
Now, let’s dive into the fun part—making the bread! Follow these simple steps:
In a mixing bowl, combine the almond flour, coconut flour, baking powder, and salt. Mix well.
In another bowl, whisk together the eggs, water, and olive oil until well combined.
Pour the wet ingredients into the dry ingredients and stir until a dough forms.
Heat a non-stick skillet over medium heat. Once hot, scoop the dough into the skillet, forming a round shape.
Cook for about 3-4 minutes on each side, or until golden brown and fluffy.
Remove from the skillet and let it cool slightly before slicing.
Pro Tips for Making the Recipe
Here are some of my favorite tips to ensure your Pão Low Carb de Frigideira turns out perfect every time:
Make sure your skillet is hot enough before adding the dough; this helps achieve that lovely golden crust.
Don’t skip the resting time after cooking; it allows the bread to firm up a bit.
Feel free to add herbs or spices to the dough for extra flavor—garlic powder or Italian seasoning works wonders!
If you want to make a larger batch, simply double the ingredients and cook in batches.
How to Serve
This fluffy low carb bread is incredibly versatile! Here are some serving suggestions:
Enjoy it warm with a pat of butter or your favorite spread.
Use it as a base for sandwiches—think turkey and avocado or a classic BLT!
Pair it with a hearty soup or salad for a complete meal.
Slice it up and serve it alongside your favorite creamy garlic pasta for a delightful dinner.
Make Ahead and Storage
If you’re like me and love to plan ahead, you’ll be happy to know that this bread can be made in advance! Here are some storage tips:
Store any leftover bread in an airtight container in the refrigerator for up to 3 days.
To reheat, simply pop it in the toaster or microwave for a few seconds.
You can also freeze the bread! Just wrap it tightly in plastic wrap and place it in a freezer bag. It will keep for up to a month.
Now that you have this fantastic recipe in your arsenal, you can easily whip up a batch of Pão Low Carb de Frigideira for your next quick family dinner. It’s a wonderful addition to your collection of weeknight dinner ideas and pairs beautifully with all those easy pasta recipes you love. So, what are you waiting for? Get in the kitchen and start baking!
Delicious low carb bread made quickly in a skillet, perfect for a healthy snack or meal.
Ingredients
group
1large eggovo grande
2tablespoonsfarinha de amêndoas
1tablespoonfarinha de coco
0.5tablespoonpsyllium (opcional)
1teaspoonfermento químico
1pinchsal
1tablespoonágua(ou até dar ponto)
Manteiga, azeite ou óleo de coco para untar
Instructions
Modo de preparo: Misture os ingredientes secos, adicione o ovo e a água até obter uma massa homogênea. Aqueça uma frigideira untada e despeje a massa, formando um pão. Cozinhe até dourar dos dois lados.
Notes
Use uma frigideira antiaderente para melhores resultados.
Have you ever felt that mid-afternoon slump, where your energy dips and you just need a little pick-me-up? I know I have! That’s why I absolutely adore making Suco de Couve com Limão e Gengibre – a vibrant, refreshing juice that not only tastes amazing but also supports my detox journey. This juice is packed with nutrients and is a fantastic way to energize your day. Plus, it’s a breeze to whip up, making it perfect for those busy weeks when I’m juggling quick family dinners and looking for easy pasta recipes to keep things interesting!
Why You’ll Love This Recipe
Boosts your detox journey with nutrient-rich ingredients.
Quick and easy to prepare, perfect for busy lifestyles.
Refreshing taste that can be enjoyed any time of the day.
Great way to incorporate more greens into your diet.
Can be a part of your 30-minute meals rotation!
Ingredients
To make this delightful juice, you’ll need the following ingredients:
1 cup kale (couve)
1 medium lemon, juiced
1-inch piece of fresh ginger, peeled
2 cups water
1 tablespoon honey (optional)
Ice cubes (optional)
Full ingredient list with measurements is provided in the printable recipe card below.
How to Make the Recipe
Making Suco de Couve com Limão e Gengibre is as easy as 1-2-3! Here’s how you can do it:
Start by washing the kale thoroughly to remove any dirt or grit.
In a blender, combine the kale, lemon juice, ginger, and water.
Blend on high until smooth and well combined.
If you prefer a smoother juice, strain the mixture through a fine mesh sieve or cheesecloth.
Sweeten with honey if desired, and serve over ice for a refreshing treat!
Pro Tips for Making the Recipe
Here are some of my favorite tips to ensure your juice turns out perfectly every time:
Use fresh, organic kale for the best flavor and nutrients.
Experiment with adding other fruits like apples or cucumbers for a twist!
Make a larger batch and store it in the fridge for up to 2 days.
For a creamier texture, consider blending in a banana or avocado.
Pair this juice with creamy garlic pasta for a delicious and nutritious meal!
How to Serve
This juice is incredibly versatile! Here are some serving suggestions:
Enjoy it as a refreshing morning drink to kickstart your day.
Pair it with your favorite weeknight dinner ideas for a nutritious boost.
Serve it at brunch alongside light snacks or salads.
Mix it into smoothies for an extra nutrient punch.
Make Ahead and Storage
If you’re like me and love to plan ahead, you’ll be happy to know that this juice can be made in advance! Here are some storage tips:
Store the juice in an airtight container in the fridge for up to 48 hours.
Give it a good shake before serving, as separation may occur.
For longer storage, consider freezing in ice cube trays and blending with other ingredients later.
Incorporating Suco de Couve com Limão e Gengibre into your routine is a delightful way to enhance your detox journey while enjoying a delicious drink. Whether you’re looking for quick family dinners or easy pasta recipes, this juice can be a refreshing addition to your meals. So, why not give it a try? I promise you’ll love it!
Suco de Couve com Limão e Gengibre – Detox e Nutritivo
Prep Time 5 minutesminutes
Total Time 5 minutesminutes
Servings 2glasses
Calories 50
Um suco detox vibrante e nutritivo, perfeito para revitalizar seu corpo com ingredientes naturais e saborosos.
Ingredients
Vegetables
2leavescouve manteiga lavadas e picadas
1limãosuco de limão (tahiti ou siciliano)
1rodelagengibre fresco (cerca de 5 g)
300mlágua filtrada ou água de coco
Adoçante natural a gosto (mel, xilitol ou stevia – opcional)adoçante natural(a gosto)
Instructions
1257 data-start="1257" data-end="1328">Faça o suco de couve com limão e gengibre.
1329 data-start="1329" data-end="1396">Higienize bem as 2 folhas de couve e pique em pedacinhos.
1397 data-start="1397" data-end="1428">Esprema o suco de 1 limão.
1429 data-start="1429" data-end="1577">Bata por cerca de 2 minutos a mistura de 2 folhas de couve, suco de limão, gengibre, água e adoçante, se desejar.
Notes
Use o suco imediatamente, sem coar, para aproveitar todas as fibras.
Are you ready to indulge in a deliciously creamy and protein-packed treat? I can hardly contain my excitement as I share with you my favorite recipe for Sorvete de Whey de Morango – Proteico e Cremoso. This delightful strawberry whey ice cream is not only a fantastic way to satisfy your sweet tooth, but it’s also a healthy option that you can whip up in no time. Perfect for those busy weeknights when you want something special without spending hours in the kitchen! And speaking of quick meals, if you’re looking for easy pasta recipes or 30-minute meals, I’ve got you covered with some fantastic ideas too!
Why You’ll Love This Recipe
It’s a guilt-free dessert that’s rich in protein.
Perfect for hot summer days or as a post-workout treat.
Quick and easy to make, with minimal ingredients.
Kids and adults alike will love the creamy strawberry flavor.
Great for meal prep and can be stored for later enjoyment.
Ingredients
To make this scrumptious Sorvete de Whey de Morango, you’ll need the following ingredients:
2 cups fresh strawberries, hulled and sliced
1 cup Greek yogurt
1 scoop vanilla whey protein powder
2 tablespoons honey or maple syrup (adjust to taste)
1 teaspoon vanilla extract
Pinch of salt
Full ingredient list with measurements is provided in the printable recipe card below.
How to Make the Recipe
Now, let’s dive into the fun part—making our creamy strawberry whey ice cream!
In a blender, combine the sliced strawberries, Greek yogurt, whey protein powder, honey (or maple syrup), vanilla extract, and a pinch of salt.
Blend until smooth and creamy. You can adjust the sweetness by adding more honey if desired.
Pour the mixture into a freezer-safe container and spread it out evenly.
Cover and freeze for at least 4 hours, or until firm.
When ready to serve, let it sit at room temperature for a few minutes to soften slightly before scooping.
Pro Tips for Making the Recipe
Here are some of my favorite tips to ensure your Sorvete de Whey de Morango turns out perfectly every time:
Use ripe strawberries for the best flavor. If they’re in season, even better!
Feel free to experiment with other fruits like bananas or blueberries for a different twist.
If you prefer a chunkier texture, reserve some chopped strawberries to fold in after blending.
For a creamier texture, you can add a splash of coconut milk or almond milk before blending.
Don’t skip the resting time before serving; it makes scooping much easier!
How to Serve
This Sorvete de Whey de Morango is perfect on its own, but here are some fun serving suggestions:
Top with fresh strawberries or a drizzle of chocolate sauce for an extra treat.
Serve it alongside a slice of your favorite cake for a delightful dessert pairing.
Use it as a filling for a smoothie bowl topped with granola and nuts.
Pair it with creamy garlic pasta for a unique and satisfying meal experience.
Make Ahead and Storage
This ice cream is perfect for meal prep! You can make it ahead of time and store it in the freezer for up to 2 weeks. Just remember to keep it tightly sealed to prevent freezer burn. If it becomes too hard, let it sit out for a few minutes before scooping. It’s a fantastic addition to your list of weeknight dinner ideas when you want to impress your family with a sweet finish!
So, what are you waiting for? Grab those strawberries and let’s make this Sorvete de Whey de Morango together! I promise you’ll love every creamy, delicious bite. And don’t forget to check out my other easy pasta recipes for those busy nights when you need quick family dinners that everyone will enjoy!
Have you ever craved something sweet yet healthy? Well, let me introduce you to Brigadeiro de Ninho Proteico! This creamy Brazilian treat is not only delicious but also packed with whey protein, making it a perfect guilt-free indulgence. As a busy woman juggling family and work, I know how important it is to find quick family dinners and easy pasta recipes that satisfy everyone. But sometimes, we need a little sweetness in our lives, and this recipe is just the ticket!
Why You’ll Love This Recipe
Quick and easy to make, perfect for busy weeknights.
Healthy alternative to traditional sweets, thanks to the whey protein.
Rich, creamy texture that melts in your mouth.
Great for satisfying sweet cravings without the guilt.
Perfect for sharing with family and friends!
Ingredients
To whip up this delightful Brigadeiro de Ninho Proteico, you’ll need the following ingredients:
1 can of sweetened condensed milk
1 cup of Ninho powdered milk
1/2 cup of whey protein (vanilla or chocolate flavor)
2 tablespoons of unsweetened cocoa powder (optional for a chocolate twist)
1 tablespoon of unsalted butter
Chocolate sprinkles for coating
Full ingredient list with measurements is provided in the printable recipe card below.
How to Make the Recipe
Making Brigadeiro de Ninho Proteico is a breeze! Here’s how to do it:
In a medium saucepan, combine the sweetened condensed milk, Ninho powdered milk, whey protein, and butter.
Cook over medium heat, stirring constantly to prevent sticking, until the mixture thickens and starts to pull away from the sides of the pan. This should take about 10-15 minutes.
If you’re adding cocoa powder for a chocolate flavor, mix it in during the last few minutes of cooking.
Once thickened, remove from heat and let it cool for a few minutes.
Once cool enough to handle, grease your hands with a little butter and roll the mixture into small balls.
Roll the balls in chocolate sprinkles until fully coated.
Place the Brigadeiros on a plate and refrigerate for at least 30 minutes to set.
Pro Tips for Making the Recipe
Here are some helpful suggestions to ensure your Brigadeiro de Ninho Proteico turns out perfectly:
Make sure to stir constantly while cooking to avoid burning the mixture.
Experiment with different flavors of whey protein to customize your Brigadeiros.
If you prefer a less sweet treat, reduce the amount of sweetened condensed milk slightly.
For a fun twist, try rolling the Brigadeiros in crushed nuts or coconut flakes instead of chocolate sprinkles.
How to Serve
These Brigadeiros are perfect for any occasion! Here are some serving suggestions:
Serve them as a sweet treat after a family dinner.
Pack them in lunchboxes for a delightful surprise.
Bring them to potlucks or gatherings as a unique dessert option.
Pair them with a cup of coffee or tea for a delightful afternoon snack.
Make Ahead and Storage
One of the best things about Brigadeiro de Ninho Proteico is that they can be made ahead of time! Here are some storage tips:
Store the Brigadeiros in an airtight container in the refrigerator for up to one week.
If you want to make them even further in advance, you can freeze them! Just make sure to separate layers with parchment paper to prevent sticking.
To thaw, simply leave them in the refrigerator overnight before serving.
So there you have it! A delicious, creamy treat that’s not only easy to make but also healthy. Brigadeiro de Ninho Proteico is a fantastic way to satisfy your sweet tooth without compromising your health goals. And if you’re looking for more quick family dinners or easy pasta recipes, don’t forget to check out my other posts for some fantastic 30-minute meals that will make your weeknight dinner ideas a breeze!
Are you looking for a quick and nutritious breakfast that will kickstart your day? Well, look no further! I’m excited to share my favorite recipe for Omelete de Whey Protein – Rápida e Proteica. This delightful omelet is not only packed with protein but is also incredibly easy to whip up, making it perfect for busy mornings. Plus, if you’re a fan of easy pasta recipes, you’ll love how versatile this dish can be!
Why You’ll Love This Recipe
Quick to prepare, perfect for busy mornings.
High in protein, keeping you full and energized.
Customizable with your favorite veggies and spices.
Great for meal prep, making it a fantastic option for quick family dinners.
Delicious and satisfying, it’s a great way to start your day!
Ingredients
To make this scrumptious omelet, you’ll need the following ingredients:
2 large eggs
1 scoop of whey protein powder (vanilla or unflavored)
1 tablespoon of milk (or a dairy-free alternative)
Salt and pepper to taste
1/4 cup of chopped vegetables (like bell peppers, spinach, or onions)
1 tablespoon of olive oil or butter for cooking
Full ingredient list with measurements is provided in the printable recipe card below.
How to Make the Recipe
Making this omelet is a breeze! Follow these simple steps:
In a mixing bowl, whisk together the eggs, whey protein powder, milk, salt, and pepper until well combined.
Heat the olive oil or butter in a non-stick skillet over medium heat.
Add the chopped vegetables to the skillet and sauté for about 2-3 minutes until they are tender.
Pour the egg mixture over the sautéed vegetables, tilting the pan to ensure even coverage.
Cook for about 3-4 minutes, or until the edges start to set. You can gently lift the edges with a spatula to allow uncooked egg to flow underneath.
Once the omelet is mostly set, fold it in half and cook for another minute.
Slide the omelet onto a plate and enjoy!
Pro Tips for Making the Recipe
Here are some tips to ensure your omelet turns out perfectly every time:
Use fresh ingredients for the best flavor.
Don’t overcook the omelet; it should be fluffy and slightly moist inside.
Experiment with different vegetables and spices to find your favorite combination.
If you’re short on time, you can prep the veggies the night before.
For a creamier texture, add a little cheese before folding the omelet.
How to Serve
This omelet is delicious on its own, but you can elevate your breakfast by serving it with:
Whole grain toast or an English muffin.
A side of fresh fruit for a sweet contrast.
Avocado slices for a creamy addition.
Hot sauce or salsa for a spicy kick.
It’s also a fantastic option for 30-minute meals or weeknight dinner ideas when you want something quick yet satisfying!
Make Ahead and Storage
If you want to prepare this omelet in advance, you can whisk the egg mixture and chop the vegetables the night before. Store them in the refrigerator until you’re ready to cook. This makes it a great option for busy mornings or even a quick dinner after a long day.
Leftover omelet can be stored in an airtight container in the fridge for up to 2 days. Simply reheat in the microwave or on the stovetop before serving.
So, what are you waiting for? Grab your ingredients and let’s get cooking! This Omelete de Whey Protein – Rápida e Proteica is sure to become a staple in your breakfast rotation. And remember, if you’re ever in the mood for something different, check out my favorite creamy garlic pasta recipes for a delightful dinner option!
A quick, protein-packed omelette perfect for a nutritious breakfast or snack.
Ingredients
group
1piecegema((18 g))
4piecesclaras((120 g))
30gwhey protein((baunilha ou neutro))
50gpeito de peru picado
30gcottage ou ricota
30mlágua
to tastesal e pimenta
1fioazeite
Instructions
Modo de preparar: Misture os ingredientes líquidos e secos, bata até obter uma mistura homogênea. Aqueça uma frigideira com azeite, despeje a mistura e cozinhe até dourar.
Notes
Para deixar mais saboroso, adicione ervas finas ou queijo ralado.
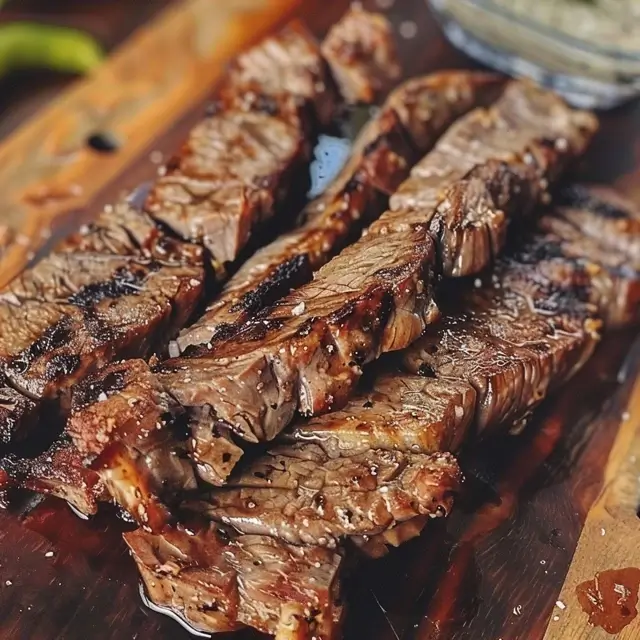
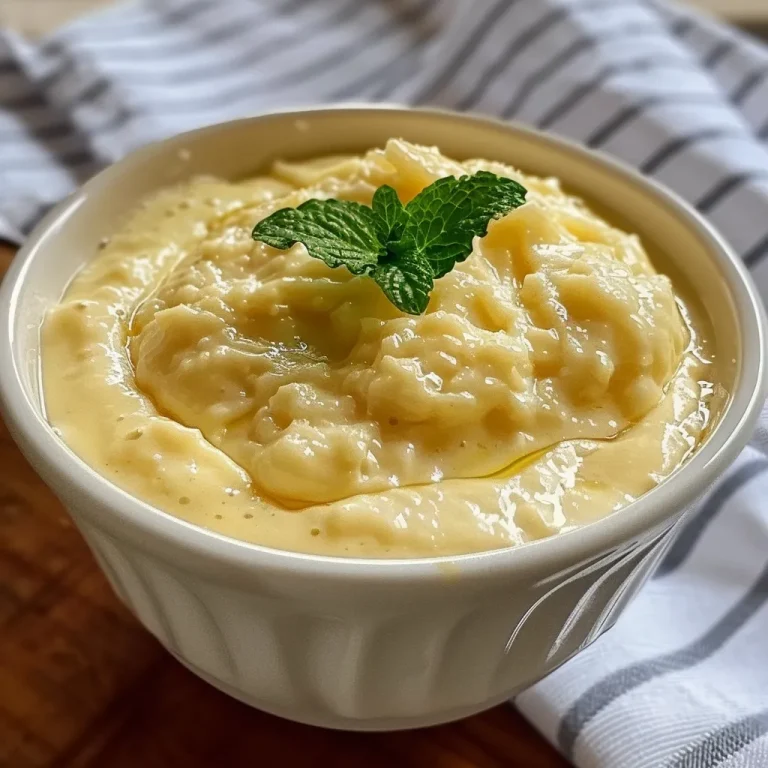
Are you ready to elevate your next barbecue with a sauce that will have your guests raving? I’m talking about the Creme de Alho Tradicional Perfeito para Churrasco! This creamy garlic sauce is not only a fantastic accompaniment to grilled meats but also a delightful addition to your easy pasta recipes. Trust me, once you try this, it will become a staple in your kitchen for quick family dinners and weeknight dinner ideas!
Why You’ll Love This Recipe
It’s incredibly easy to make, perfect for busy weeknights.
Versatile enough to pair with grilled meats, veggies, or even as a dip.
Rich, creamy flavor that enhances any dish.
Can be made ahead of time, saving you precious minutes during meal prep.
Perfect for impressing guests at your next barbecue!
Ingredients
To whip up this delicious Creme de Alho Tradicional Perfeito para Churrasco, you’ll need the following ingredients:
1 cup mayonnaise
4 cloves garlic, minced
1 tablespoon lemon juice
1 teaspoon salt
1 teaspoon black pepper
1 tablespoon fresh parsley, chopped (optional)
Full ingredient list with measurements is provided in the printable recipe card below.
How to Make the Recipe
Making this creamy garlic sauce is a breeze! Here’s how to do it:
In a medium bowl, combine the mayonnaise, minced garlic, lemon juice, salt, and black pepper.
Mix well until all ingredients are fully incorporated.
If you’re feeling fancy, stir in the chopped parsley for a pop of color and flavor.
Cover the bowl and refrigerate for at least 30 minutes to let the flavors meld together.
Serve chilled alongside your favorite grilled meats or as a dip for veggies!
Pro Tips for Making the Recipe
Here are some of my favorite tips to ensure your Creme de Alho Tradicional Perfeito para Churrasco turns out perfectly every time:
Use fresh garlic for the best flavor. If you’re short on time, pre-minced garlic can work in a pinch.
Let the sauce sit in the fridge for at least an hour before serving. This allows the flavors to develop beautifully.
Feel free to adjust the garlic to your taste. If you love garlic, add an extra clove!
This sauce can also be used as a dressing for salads or drizzled over creamy garlic pasta for a quick meal.
How to Serve
Now that you’ve made this delicious sauce, let’s talk about how to serve it! Here are some ideas:
As a dipping sauce for grilled chicken skewers or shrimp.
Drizzled over grilled vegetables for a flavorful side dish.
As a spread on sandwiches or burgers for an extra kick.
Mix it into your favorite 30-minute meals for a creamy twist.
Make Ahead and Storage
This sauce is perfect for making ahead of time! You can prepare it up to two days in advance and store it in an airtight container in the refrigerator. Just give it a good stir before serving. If you have any leftovers (which is rare because it’s so good!), it will keep in the fridge for about a week. Just remember to keep it covered!
So there you have it! The Creme de Alho Tradicional Perfeito para Churrasco is not just a sauce; it’s a game-changer for your summer barbecues and quick family dinners. I hope you enjoy making and sharing this delightful recipe as much as I do. Happy cooking!
Are you ready to elevate your meals with a sauce that’s creamy, dreamy, and oh-so-delicious? I’m talking about Molho de Alho Cremoso, a creamy garlic sauce that will make your taste buds dance! This sauce is not just for special occasions; it’s perfect for quick family dinners, slathered on grilled meats, or even as a dip for fresh bread. Trust me, once you try this recipe, you’ll want to keep it in your weekly rotation of easy pasta recipes and 30-minute meals!
Why You’ll Love This Recipe
It’s incredibly easy to make, taking just a few minutes!
Perfect for enhancing your favorite grilled dishes and weeknight dinner ideas.
Versatile enough to use in creamy garlic pasta or as a dip.
Made with simple ingredients you probably already have at home.
It’s a crowd-pleaser that will impress your family and friends!
Ingredients
To whip up this delightful Molho de Alho Cremoso, you’ll need the following ingredients:
1 cup mayonnaise
4 cloves garlic, minced
2 tablespoons lemon juice
1 tablespoon olive oil
Salt and pepper to taste
Fresh parsley, chopped (optional, for garnish)
Full ingredient list with measurements is provided in the printable recipe card below.
How to Make the Recipe
Now, let’s dive into the simple steps to create this irresistible sauce:
In a medium bowl, combine the mayonnaise, minced garlic, lemon juice, and olive oil.
Whisk everything together until smooth and creamy.
Add salt and pepper to taste, adjusting as needed.
If you like, stir in some chopped fresh parsley for a pop of color and flavor.
Transfer the sauce to a serving bowl and enjoy!
Pro Tips for Making the Recipe
Here are some of my favorite tips to ensure your Molho de Alho Cremoso turns out perfectly every time:
For a stronger garlic flavor, let the sauce sit in the fridge for at least an hour before serving. This allows the flavors to meld beautifully.
Feel free to adjust the amount of garlic based on your preference. If you love garlic, go for more!
This sauce can be made ahead of time and stored in the fridge for up to a week.
Experiment with adding other herbs like dill or chives for a unique twist!
How to Serve
Now that you have this delicious sauce ready, let’s talk about how to serve it:
Drizzle it over grilled chicken or steak for a mouthwatering flavor boost.
Use it as a dip for fresh veggies or crispy bread at your next gathering.
Mix it into your favorite creamy garlic pasta for a quick and satisfying meal.
Spread it on sandwiches or burgers for an extra layer of flavor.
Make Ahead and Storage
This Molho de Alho Cremoso is perfect for meal prep! Here’s how to store it:
Store the sauce in an airtight container in the refrigerator for up to one week.
If you want to make it ahead of time, prepare it a day or two before your event for the best flavor.
Do not freeze the sauce, as the texture may change once thawed.
So there you have it! A simple, creamy garlic sauce that will take your meals to the next level. Whether you’re hosting a barbecue or just looking for a quick addition to your weeknight dinner ideas, this Molho de Alho Cremoso is sure to impress. Give it a try, and I promise you won’t be disappointed!
There’s something truly magical about a summer barbecue, isn’t there? The smell of grilled meats, the laughter of friends and family, and the joy of sharing delicious food together. Today, I’m excited to share with you my favorite recipe for Maionese de Alho Caseira – a creamy garlic mayo that’s perfect for your next churrasco! This delightful condiment not only elevates your grilled dishes but also makes for a fantastic addition to easy pasta recipes and quick family dinners. So, let’s dive in and whip up this deliciousness!
Why You’ll Love This Recipe
It’s incredibly easy to make, taking just a few minutes!
Perfectly complements grilled meats and veggies.
Versatile enough to use in creamy garlic pasta dishes.
Great for quick family dinners or as a dip for snacks.
Can be made ahead of time, saving you precious moments during busy weeknights.
Ingredients
To make this creamy garlic mayo, you’ll need the following ingredients:
1 cup mayonnaise
3-4 cloves of garlic, minced
1 tablespoon lemon juice
1 teaspoon Dijon mustard
Salt and pepper to taste
Optional: fresh herbs like parsley or chives for garnish
Full ingredient list with measurements is provided in the printable recipe card below.
How to Make the Recipe
Making Maionese de Alho Caseira is a breeze! Follow these simple steps:
In a medium bowl, combine the mayonnaise, minced garlic, lemon juice, and Dijon mustard.
Whisk everything together until smooth and creamy.
Add salt and pepper to taste, adjusting according to your preference.
If you like, stir in some chopped fresh herbs for an extra burst of flavor.
Cover and refrigerate for at least 30 minutes to let the flavors meld together.
And just like that, you have a delicious garlic mayo ready to impress your guests!
Pro Tips for Making the Recipe
Here are some of my favorite tips to ensure your Maionese de Alho Caseira turns out perfectly:
Use fresh garlic for the best flavor. If you prefer a milder taste, roast the garlic before adding it to the mayo.
Let the mayo sit in the fridge for a few hours or overnight for an even richer flavor.
Feel free to experiment with different herbs or spices to customize the taste to your liking.
This mayo can also be used as a base for other sauces or dressings!
How to Serve
Now that you have your creamy garlic mayo ready, let’s talk about how to serve it:
As a dip for grilled meats and vegetables at your next churrasco.
Spread it on sandwiches or burgers for an extra layer of flavor.
Mix it into creamy garlic pasta for a quick and delicious meal.
Use it as a dressing for salads or as a dip for fresh veggies.
Pair it with chips or crackers for a delightful snack.
With so many options, this mayo will quickly become a staple in your kitchen!
Make Ahead and Storage
This Maionese de Alho Caseira is perfect for making ahead of time. Here are some storage tips:
Store the mayo in an airtight container in the refrigerator for up to one week.
If you want to make it even further in advance, you can freeze it! Just be sure to thaw it in the fridge before using.
Always give it a good stir before serving, as the ingredients may separate slightly during storage.
Now you’re all set to impress your family and friends with this delicious garlic mayo! Whether you’re planning a summer barbecue or looking for 30-minute meals that are sure to please, this recipe is a winner. Enjoy your cooking adventures, and don’t forget to share your creations!
Are you ready to elevate your churrasco experience with a delightful twist? I’m so excited to share my recipe for Pão de Alho sem Glúten – a gluten-free garlic bread that’s perfect for any barbecue! This recipe is not only delicious but also incredibly easy to whip up, making it a fantastic addition to your quick family dinners. Plus, it pairs beautifully with all those easy pasta recipes you love. Let’s dive in!
Why You’ll Love This Recipe
Gluten-free and delicious – perfect for everyone!
Quick and easy to make, ideal for busy weeknights.
Perfectly complements your favorite grilled meats.
Great for gatherings and family barbecues.
Can be made ahead of time for convenience.
Ingredients
To make this scrumptious Pão de Alho sem Glúten, you’ll need the following simple ingredients:
1 cup gluten-free flour
1/2 cup unsalted butter, softened
4 cloves garlic, minced
1/4 cup fresh parsley, chopped
1/2 teaspoon salt
1/4 teaspoon black pepper
1/2 teaspoon paprika (optional for a kick!)
1/4 cup grated Parmesan cheese (optional)
Full ingredient list with measurements is provided in the printable recipe card below.
How to Make the Recipe
Now, let’s get cooking! Follow these simple steps to create your Pão de Alho sem Glúten:
Preheat your oven to 375°F (190°C).
In a mixing bowl, combine the softened butter, minced garlic, chopped parsley, salt, black pepper, and paprika. Mix until well combined.
Add the gluten-free flour and Parmesan cheese (if using) to the mixture. Stir until a dough forms.
Shape the dough into a loaf or individual rolls, depending on your preference.
Place the shaped dough on a baking sheet lined with parchment paper.
Bake in the preheated oven for 20-25 minutes, or until golden brown and fragrant.
Remove from the oven and let it cool slightly before slicing.
Pro Tips for Making the Recipe
Here are some of my favorite tips to ensure your Pão de Alho sem Glúten turns out perfectly every time:
Make sure your butter is softened for easy mixing.
Feel free to experiment with different herbs like oregano or thyme for added flavor.
If you want a creamier texture, consider adding a bit of cream cheese to the butter mixture.
For a fun twist, try adding some shredded mozzarella cheese to the dough for a cheesy garlic bread!
How to Serve
This Pão de Alho sem Glúten is incredibly versatile! Here are some serving suggestions:
Serve it warm alongside your favorite grilled meats at your next barbecue.
Pair it with a fresh salad for a light lunch or dinner.
Use it as a side for your creamy garlic pasta dishes for a delightful combination.
Slice it up and serve it as an appetizer with marinara sauce for dipping.
Make Ahead and Storage
If you’re planning a busy week, this recipe is perfect for making ahead! Here’s how to store it:
Wrap the cooled bread tightly in plastic wrap or aluminum foil and store it in the refrigerator for up to 3 days.
You can also freeze the bread for up to 2 months. Just make sure to wrap it well to prevent freezer burn.
To reheat, simply pop it in the oven at 350°F (175°C) for about 10-15 minutes until warmed through.
Now that you have this delightful recipe in your arsenal, you’re all set for your next family gathering or weeknight dinner! Whether you’re grilling up some steaks or whipping up a quick pasta dish, this Pão de Alho sem Glúten will surely impress. Enjoy every bite, and happy cooking!
Se você está procurando uma receita que traga sabor e alegria para suas refeições, você chegou ao lugar certo! A Farofa de Ovo é mais do que um simples acompanhamento; é uma explosão de sabores que vai encantar seu paladar e animar suas reuniões. Com ingredientes acessíveis e um preparo simples, essa receita é perfeita para qualquer ocasião. Vamos explorar como fazer essa delícia e tornar suas refeições ainda mais especiais!
Por Que Você Vai Amar Esta Receita
Antes de começarmos, aqui estão algumas razões para amar a Farofa de Ovo:
Sabor Incrível: A combinação de farinha de mandioca tostada e ovos cria uma mistura de sabores que agrada a todos.
Textura Perfeita: A farofa traz crocância, enquanto os ovos adicionam uma cremosidade irresistível.
Versatilidade: Pode ser servida como acompanhamento ou prato principal, combinando com diversas refeições.
Fácil de Fazer: Com poucos passos, você pode preparar essa delícia sem complicações.
Saudável e Nutritiva: Feita com ingredientes naturais, é uma opção saudável que pode ser adaptada para várias dietas.
Ingredientes que Você Vai Precisar
Vamos aos ingredientes que tornam essa receita tão especial!
2 colheres de sopa de manteiga: Para dar sabor e ajudar na tostagem da farinha.
1 xícara de farinha de mandioca tostada: A base da nossa farofa, que traz crocância.
2 colheres de sopa de azeite de oliva: Para refogar e adicionar um toque de sabor.
1 cebola amarela pequena (ralada): Para um sabor adocicado e caramelizado.
2 dentes de alho (ralados): Para um toque aromático.
3 ovos grandes: O protagonista da receita, que traz cremosidade.
Tempero Goya ou sal kosher (a gosto): Para realçar todos os sabores.
Pimenta-do-reino (a gosto): Para dar aquele toque picante.
Salsinha (a gosto): Para finalizar com frescor e cor.
Como Fazer a Farofa de Ovo
Agora que você tem todos os ingredientes, vamos ao passo a passo para fazer essa Farofa de Ovo deliciosa!
Aqueça uma frigideira grande e funda em fogo médio. Adicione a manteiga e a farinha de mandioca. Misture constantemente para que a farinha toste levemente sem queimar.
Continue mexendo por cerca de 6 minutos, até que a farofa esteja solta, levemente tostada e perfumada. Transfira a farinha para uma tigela e reserve. Não lave a frigideira!
Na mesma frigideira, adicione o azeite e a cebola ralada. Cozinhe por cerca de 2 minutos, até que a cebola amoleça. Adicione 1 colher de chá de água e, em seguida, acrescente o alho ralado, misturando rapidamente até que exale seu aroma.
Adicione os ovos à frigideira e mexa delicadamente. Dê uma mexida, pause brevemente e depois mexa novamente para que os ovos formem pequenos pedaços macios e não se desfaçam demais.
Tempere com o tempero Goya e a pimenta-do-reino a gosto. Mantenha o fogo alto no início, depois diminua a temperatura assim que os ovos estiverem cozidos.
Reduza o fogo para baixo e adicione a farinha de mandioca reservada de volta à frigideira. Misture delicadamente até que os ovos e a farinha estejam bem incorporados. Retire do fogo e finalize com salsinha picada. Sirva imediatamente.
Dicas de Cozinha para a Farofa de Ovo
Quer elevar sua Farofa de Ovo a outro nível? Confira estas dicas!
Escolha a farinha certa: Use sempre farinha de mandioca tostada para garantir o sabor autêntico.
Não queime a farinha: O segredo para uma farofa perfeita é mexer constantemente para evitar que a farinha queime e fique amarga.
Mexa os ovos com calma: A técnica de mexer suavemente ajuda a criar aquelas pequenas peças macias que são tão deliciosas.
Experimente diferentes temperos: Varie o tempero Goya por outros como páprica ou cominho para um sabor diferente.
Adicione legumes: Para uma versão mais nutritiva, acrescente legumes como cenoura ou ervilhas na mistura.
Sirva quente: A farofa é mais gostosa quando servida logo após o preparo.
Combine com proteína: Experimente servir com carne, frango ou até um prato vegetariano para um jantar completo.
Armazenamento adequado: Guarde a farofa em um recipiente hermético na geladeira; ela pode durar até 3 dias.
Erros Comuns e Como Evitá-los
Evite estes erros comuns ao preparar sua Farofa de Ovo:
Farinha queimada: Sempre mexa a farinha enquanto a tosta para evitar que queime.
Ovos muito secos: Não cozinhe os ovos por muito tempo; eles devem ser macios e cremosos.
Falta de tempero: Não esqueça de temperar bem; isso é essencial para o sabor da farofa.
Não usar ingredientes frescos: Sempre escolha ingredientes frescos para garantir o melhor sabor.
Variações da Farofa de Ovo
Você pode personalizar sua Farofa de Ovo da seguinte forma:
Farofa de Ovo com Bacon: Adicione bacon picado e frito para um toque crocante e saboroso.
Farofa Vegetariana: Substitua os ovos por tofu mexido e adicione vegetais variados.
Farofa de Ovo com Queijo: Misture queijo ralado para um sabor ainda mais rico.
Farofa de Ovo e Ervas: Adicione ervas frescas como tomilho ou orégano para uma explosão de frescor.
Armazenamento e Preparo Antecipado
A Farofa de Ovo pode ser feita com antecedência e armazenada da seguinte forma:
Na geladeira: Deixe esfriar completamente e armazene em um recipiente hermético. Dura até 3 dias.
Congelamento: Para conservar por mais tempo, congele em porções individuais. Quando for consumir, descongele e aqueça no fogão.
Perguntas Frequentes
Confira as respostas para algumas das perguntas mais comuns sobre a Farofa de Ovo:
Posso usar farinha de mandioca comum?: Não, a farinha de mandioca tostada é essencial para o sabor e a textura.
Os ovos podem ser substituídos?: Sim, você pode usar tofu ou ovos de linhaça como substitutos.
Posso adicionar carne?: Claro! Carnes como linguiça ou frango ficam ótimas na farofa.
É possível deixar a farofa mais crocante?: Sim, você pode adicionar mais farinha ou tostar por mais tempo.
Essa receita é adequada para vegetarianos?: Sim, desde que você use alternativas aos ovos.
Qual a melhor maneira de servir?: Experimente com carnes grelhadas ou como acompanhamento de feijão.
Posso fazer a farofa e aquecê-la depois?: Sim, a farofa pode ser reaquecida e ainda fica deliciosa.
Qual a melhor forma de temperar?: Experimente diferentes temperos e ajuste ao seu gosto!
Dicas Nutricionais e Adaptações Dietéticas
A Farofa de Ovo pode ser adaptada para diferentes necessidades nutricionais:
Sem glúten: A farinha de mandioca é naturalmente sem glúten, tornando a farofa uma ótima opção.
Baixa em carboidratos: Para uma versão cetogênica, reduza a quantidade de farinha e adicione mais ovos ou legumes.
Rica em fibras: Adicione legumes como cenouras ou abobrinhas para aumentar a quantidade de fibras.
Equipamentos Recomendados
Para preparar sua Farofa de Ovo, você vai precisar de:
Frigideira grande: Prefira uma com fundo grosso para melhor distribuição do calor.
Espátula de silicone: Ideal para mexer sem arranhar a frigideira.
Tigela para mistura: Para reservar a farinha e os ingredientes.
Sugestões de Acompanhamento
Para uma refeição completa, a Farofa de Ovo combina perfeitamente com:
Feijão: Uma combinação clássica que não tem como dar errado.
Saladas frescas: Para equilibrar a refeição com frescor.
Carne grelhada: O sabor da carne se complementa com a crocância da farofa.
Molhos: Experimente um molho de pimenta ou chimichurri para um toque especial.
Conclusão: A Farofa de Ovo em Sua Cozinha
A Farofa de Ovo é mais do que um simples acompanhamento; é uma forma de trazer sabor e alegria para sua mesa. Com suas inúmeras variações e possibilidades, você pode personalizar essa receita do seu jeito. Lembre-se de que cozinhar deve ser uma experiência divertida e criativa. Então, coloque a mão na massa e surpreenda sua família e amigos com essa delícia! Vamos juntos espalhar sorrisos à mesa!