Author

thomas

Browsing

Oh, my goodness! If you’re looking for a dessert that’s not only creamy and delicious but also incredibly easy to make, then you’ve stumbled upon the right recipe! Today, I’m excited to share with you my favorite no-bake treat: Pudim Prestígio Sem Forno. This delightful dessert combines the rich flavors of chocolate and coconut, making it a perfect ending to any meal. Plus, it’s a fantastic option for those busy weeknights when you want something sweet without spending hours in the kitchen. Trust me, this is a dessert that will impress your family and friends!

Why You’ll Love This Recipe

  • It’s a no-bake dessert, so you can whip it up in no time!
  • Rich chocolate and coconut flavors that everyone will adore.
  • Perfect for quick family dinners or as a sweet treat after your favorite easy pasta recipes.
  • Great for meal prep; make it ahead of time and store it in the fridge.
  • Impressive enough for gatherings but simple enough for a weeknight dinner idea.

Ingredients

To make this creamy, irresistible dessert, you’ll need the following ingredients:

  • 1 can of sweetened condensed milk
  • 1 can of coconut milk
  • 1 cup of grated coconut (unsweetened)
  • 1 cup of chocolate milk
  • 1 packet of unflavored gelatin
  • 1/2 cup of sugar (optional, depending on your sweetness preference)
  • Chocolate shavings or grated chocolate for garnish

Full ingredient list with measurements is provided in the printable recipe card below.

How to Make the Recipe

Now, let’s dive into the steps to create this delightful dessert:

  1. In a small bowl, dissolve the unflavored gelatin in 1/4 cup of cold water. Let it sit for about 5 minutes until it blooms.
  2. In a blender, combine the sweetened condensed milk, coconut milk, grated coconut, and sugar (if using). Blend until smooth.
  3. In a saucepan over low heat, gently warm the chocolate milk. Once warm, add the bloomed gelatin and stir until completely dissolved.
  4. Pour the chocolate mixture into the blender with the coconut mixture and blend until well combined.
  5. Pour the mixture into a mold or individual serving cups and refrigerate for at least 4 hours or until set.
  6. Once set, carefully unmold the pudim onto a serving plate or enjoy it directly from the cups. Garnish with chocolate shavings or grated chocolate for an extra touch!

Pro Tips for Making the Recipe

Here are some helpful suggestions to ensure your Pudim Prestígio Sem Forno turns out perfectly:

  • Make sure to blend the ingredients thoroughly for a smooth texture.
  • If you prefer a sweeter dessert, feel free to adjust the sugar to your liking.
  • For a fun twist, try adding a layer of crushed cookies or nuts at the bottom of the mold before pouring in the pudding mixture.
  • Don’t rush the chilling process; letting it set overnight will enhance the flavors.

How to Serve

This dessert is versatile and can be served in various ways:

  • Serve it chilled as a refreshing treat after a hearty meal.
  • Pair it with a cup of coffee or tea for a delightful afternoon snack.
  • Top it with fresh fruits like strawberries or raspberries for a pop of color and flavor.
  • It’s also a great addition to a dessert table at parties or family gatherings!

Make Ahead and Storage

One of the best things about this Pudim Prestígio Sem Forno is that it can be made ahead of time! Here are some storage tips:

  • Store any leftovers in an airtight container in the refrigerator for up to 5 days.
  • If you want to make it even further in advance, you can freeze it for up to a month. Just make sure to thaw it in the fridge before serving.
  • For a quick family dinner, prepare this dessert in the morning, and it will be ready to enjoy by dinner time!

So there you have it! A simple, creamy, and utterly delicious dessert that’s perfect for any occasion. Whether you’re looking for a sweet treat after your 30-minute meals or a delightful addition to your next gathering, this Pudim Prestígio Sem Forno is sure to be a hit. I can’t wait for you to try it and share your thoughts. Happy cooking!

Pudim Prestígio Sem Forno – Fácil, Cremoso e Irresistível

Prep Time 20 minutes
Total Time 20 minutes
Servings 8 pieces
Calories 450
Delicie-se com este pudim cremoso de chocolate e coco, fácil de fazer e perfeito para qualquer ocasião.

Ingredients

Dough

  • 2 cans leite condensado ((395g each))
  • 200 ml leite
  • 400 g creme de leite ((2 caixas))
  • 24 g gelatina incolor sem sabor ((2 envelopes))
  • 250 g chocolate meio amargo derretido
  • 200 ml leite de coco
  • 100 g coco ralado

Instructions 

  • Hidrate os gelatinas em 1/4 de xícara de água fria por 5 minutos.
  • Leve a gelatina hidratada ao micro-ondas por 15 segundos para dissolver.
  • Bata no liquidificador o leite condensado, leite, creme de leite, gelatina dissolvida, chocolate derretido, leite de coco e coco ralado até obter uma mistura homogênea.
  • Despeje a mistura em uma forma de aproximadamente 22 cm de diâmetro e leve à geladeira por pelo menos 4 horas ou até firmar.

Notes

Para um sabor mais intenso, substitua o leite por leite de amêndoas ou adicione uma camada de chocolate branco por cima.
Calories: 450kcal
Cost: $15
Course: Dessert
Cuisine: Brazilian
Keyword: chocolate, coconut

There’s something truly magical about a dessert that can brighten your day and refresh your spirit, and that’s exactly what Tortinha de Limão does! This delightful lemon treat is not only easy to make but also a perfect way to end a meal, especially after those quick family dinners or busy weeknights. If you’re looking for a dessert that will impress your family and friends without taking up too much of your time, then you’re in for a treat! Let’s dive into this easy pasta recipes companion that will surely become a staple in your dessert repertoire.

Why You’ll Love This Recipe

  • Refreshing and zesty flavor that brightens any meal.
  • Simple ingredients that you probably already have at home.
  • Quick to prepare, making it perfect for those 30-minute meals.
  • Impressive enough for gatherings yet easy enough for a weeknight dinner.
  • Can be made ahead of time, saving you stress on busy days.

Ingredients

To make this delicious Tortinha de Limão, you will need the following ingredients:

  • 1 cup of crushed graham crackers
  • 1/2 cup of unsalted butter, melted
  • 1 can (14 oz) of sweetened condensed milk
  • 1/2 cup of fresh lemon juice
  • 1 tablespoon of lemon zest
  • 1 cup of heavy whipping cream
  • 1/4 cup of powdered sugar
  • Fresh mint leaves for garnish (optional)

Full ingredient list with measurements is provided in the printable recipe card below.

How to Make the Recipe

Now, let’s get to the fun part! Here’s how to whip up this delightful dessert:

  1. Preheat your oven to 350°F (175°C).
  2. In a mixing bowl, combine the crushed graham crackers and melted butter. Mix until well combined.
  3. Press the mixture into the bottom of a 9-inch pie dish to form the crust. Bake for 10 minutes, then remove and let it cool.
  4. In another bowl, whisk together the sweetened condensed milk, fresh lemon juice, and lemon zest until smooth.
  5. In a separate bowl, whip the heavy cream and powdered sugar until soft peaks form.
  6. Gently fold the whipped cream into the lemon mixture until fully combined.
  7. Pour the lemon filling into the cooled crust and smooth the top with a spatula.
  8. Chill in the refrigerator for at least 2 hours before serving.

Pro Tips for Making the Recipe

Here are some of my favorite tips to ensure your Tortinha de Limão turns out perfectly every time:

  • Use fresh lemon juice for the best flavor. Bottled lemon juice can be a bit too tart.
  • Let the crust cool completely before adding the filling to prevent it from becoming soggy.
  • For an extra touch, you can add a layer of lemon curd on top of the filling before chilling.
  • If you want to make this dessert even more special, consider adding a dollop of whipped cream on top when serving.

How to Serve

When it comes to serving your Tortinha de Limão, presentation is key! Here are some delightful serving suggestions:

  • Slice into wedges and serve chilled, garnished with fresh mint leaves.
  • Pair with a scoop of vanilla ice cream for a creamy contrast.
  • Drizzle with a bit of lemon syrup or a sprinkle of lemon zest for added flair.
  • Serve alongside a cup of herbal tea for a refreshing afternoon treat.

Make Ahead and Storage

This Tortinha de Limão is perfect for making ahead of time! Here’s how to store it:

  • Cover the pie with plastic wrap or aluminum foil and store it in the refrigerator for up to 3 days.
  • If you want to make it even further in advance, you can freeze the pie (without the whipped cream topping) for up to a month. Just thaw it in the refrigerator overnight before serving.
  • For best results, add the whipped cream topping just before serving to keep it fresh and fluffy.

So there you have it! A delightful and refreshing Tortinha de Limão that’s perfect for any occasion. Whether you’re enjoying it after a busy weeknight dinner or serving it at a family gathering, this dessert is sure to impress. And if you’re looking for more delicious ideas, don’t forget to check out our weeknight dinner ideas and creamy garlic pasta recipes for a complete meal experience. Happy baking!

Tortinha de Limão – Sobremesa Fácil, Refrescante e Irresistível

Prep Time 20 minutes
Cook Time 30 minutes
Total Time 50 minutes
Servings 8 pieces
Calories 250
Uma deliciosa torta de limão fácil de fazer, perfeita para refrescar e encantar o paladar com seu sabor cítrico e massa crocante.

Ingredients

Dough

  • 1.5 cups farinha de trigo
  • 0.5 cup açúcar
  • 100 g manteiga gelada em cubos
  • 1 unit gema de ovo
  • 1 pinch sal

Lemon Filling

  • 1 can leite condensado (395 g)
  • 0.5 cup suco de limão (cerca de 3 limões)

Decorative Raspas de limão

  • 2 units claras de ovo (merengue opcional)
  • 0.5 cup açúcar (merengue opcional)

Instructions 

  • Pré-aqueça o forno a 155°C.
  • Modele a massa com farinha, manteiga, gema e sal, formando uma base.
  • Asse a massa por aproximadamente 15 minutos até ficar dourada.
  • Misture o leite condensado, suco de limão e raspas para o recheio.
  • Despeje o recheio sobre a massa assada e leve à geladeira por 3 horas.
  • Se desejar, prepare o merengue batendo as claras com açúcar até ficarem firmes e decore a torta.

Notes

Para um sabor mais intenso, deixe a torta na geladeira por pelo menos 3 horas antes de servir.
Calories: 250kcal
Cost: $15
Course: Dessert
Cuisine: Brazilian
Keyword: lemon

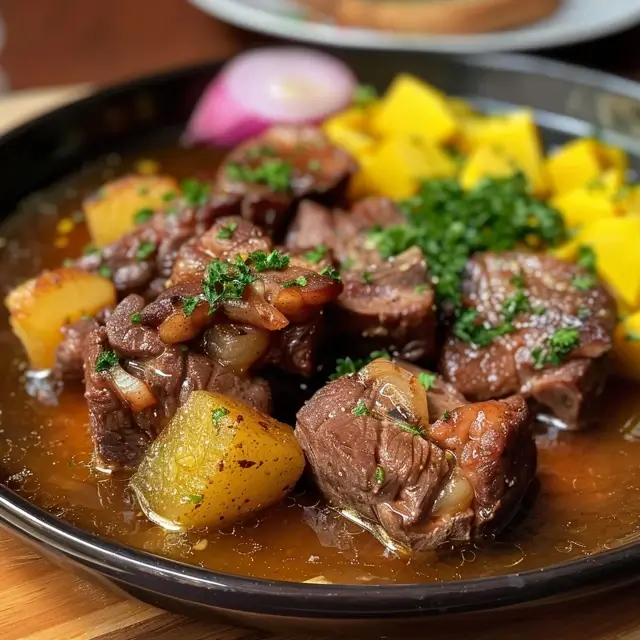
There’s something incredibly satisfying about preparing a delicious meal that brings everyone together, and today, I’m excited to share my recipe for Costela na Cerveja—a juicy and tender roast that will make your taste buds dance! This dish is perfect for a special lunch or a cozy weeknight dinner. Plus, if you’re looking for easy pasta recipes to pair with it, I’ve got you covered! Let’s dive into this delightful culinary adventure!

Why You’ll Love This Recipe

  • It’s incredibly easy to make, perfect for quick family dinners.
  • The beer marinade infuses the ribs with a rich flavor that’s simply irresistible.
  • It’s a crowd-pleaser, making it ideal for gatherings or special occasions.
  • Leftovers (if there are any!) are just as delicious the next day.
  • It pairs beautifully with a variety of sides, including creamy garlic pasta!

Ingredients

To make this mouthwatering Costela na Cerveja, you’ll need the following ingredients:

  • 4 pounds beef ribs
  • 1 can (12 oz) of your favorite beer
  • 1 large onion, sliced
  • 4 cloves garlic, minced
  • 2 tablespoons olive oil
  • 1 tablespoon brown sugar
  • 1 tablespoon soy sauce
  • Salt and pepper to taste
  • Fresh herbs for garnish (optional)

Full ingredient list with measurements is provided in the printable recipe card below.

How to Make the Recipe

Now, let’s get cooking! Follow these simple steps to create your own Costela na Cerveja:

  1. Preheat your oven to 300°F (150°C).
  2. In a large bowl, combine the beer, sliced onion, minced garlic, olive oil, brown sugar, soy sauce, salt, and pepper. Mix well.
  3. Add the beef ribs to the marinade, ensuring they are well coated. Let them marinate for at least 30 minutes, or overnight for the best flavor.
  4. Place the marinated ribs in a roasting pan, pouring the remaining marinade over them.
  5. Cover the pan with aluminum foil and roast in the preheated oven for 2.5 to 3 hours, or until the ribs are tender and falling off the bone.
  6. Remove the foil and increase the oven temperature to 400°F (200°C). Roast for an additional 15-20 minutes to achieve a nice caramelized crust.
  7. Once done, let the ribs rest for a few minutes before serving. Garnish with fresh herbs if desired.

Pro Tips for Making the Recipe

Here are some helpful suggestions to ensure your Costela na Cerveja turns out perfectly:

  • Choose a beer that you enjoy drinking; the flavor will enhance the dish.
  • For a bit of heat, add some red pepper flakes to the marinade.
  • If you’re short on time, you can use a pressure cooker to speed up the cooking process.
  • Pair this dish with 30-minute meals like a fresh salad or creamy garlic pasta for a complete meal.

How to Serve

Serving your Costela na Cerveja is just as fun as making it! Here are some ideas:

  • Serve the ribs with a side of roasted vegetables for a hearty meal.
  • Pair it with mashed potatoes or rice to soak up the delicious sauce.
  • For a lighter option, a crisp green salad is a perfect complement.
  • Don’t forget to offer some easy pasta recipes as a side dish; they make for a delightful addition!

Make Ahead and Storage

If you want to prepare this dish in advance, you can marinate the ribs the night before and store them in the refrigerator. This will enhance the flavor even more! Once cooked, any leftovers can be stored in an airtight container in the fridge for up to 3 days. Reheat gently in the oven or microwave before serving.

So there you have it! My Costela na Cerveja recipe is not only easy to make but also a fantastic way to impress your family and friends. Whether it’s for a special occasion or just a cozy weeknight dinner, this dish is sure to become a favorite. Enjoy your cooking adventure, and don’t forget to share your delicious results!

Costela na Cerveja – Receita Suculenta e Macia para Almoço Especial

Prep Time 30 minutes
Cook Time 2 hours
Total Time 2 hours 30 minutes
Servings 6 servings
Calories 650
Uma deliciosa costela bovina cozida lentamente na cerveja, resultando em uma carne macia e saborosa, perfeita para um almoço especial.

Ingredients

Meat

  • 2 kg costela bovina em pedaços

Beverages

  • 2 lata cerveja clara ((700 ml no total))

Vegetables

  • 1 large cebola picada
  • 5 dentes alho amassados

Seasonings

  • 2 sopa colheres de sal grosso
  • 1 sopa colher de molho de pimenta (opcional)
  • 1 chá colher de noz-moscada ralada

Herbs

  • 2 ramos de alecrim fresco
  • 3 folhas de louro

Vegetables

  • 4 tomates maduro em cubos

Root Vegetables

  • 500 g batata bolinha com casca
  • 500 g batata-doce em pedaços médios

Fats & Oils

  • 2 sopa manteiga de garrafa (ou óleo)

Herbs & Garnishes

  • salsa e cebolinha picadas a gosto

Instructions 

  • Modo de Preparar
  • Preparo da Costela
  • Coloque a costela em uma panela de pressão com a cerveja, cebola, alho, sal grosso, molho de pimenta, noz-moscada, alecrim, louro, tomates, batatas bolinha e batata-doce.
  • Cozinhe por aproximadamente 40 minutos após pegar pressão.
  • Após cozinhar, retire a costela e deixe reduzir o caldo por mais 20 minutos.
  • Em uma panela de pressão, aqueça a manteiga de garrafa ou óleo e refogue as verduras até ficarem macias.
  • Sirva a costela com o molho reduzido, decorada com salsa e cebolinha picadas.

Notes

Use cerveja escura para um sabor mais intenso e aproveite para ajustar o tempero ao seu gosto.
Calories: 650kcal
Cost: $15
Course: Main Course
Cuisine: Brazilian
Keyword: beef, beer, slow cooking

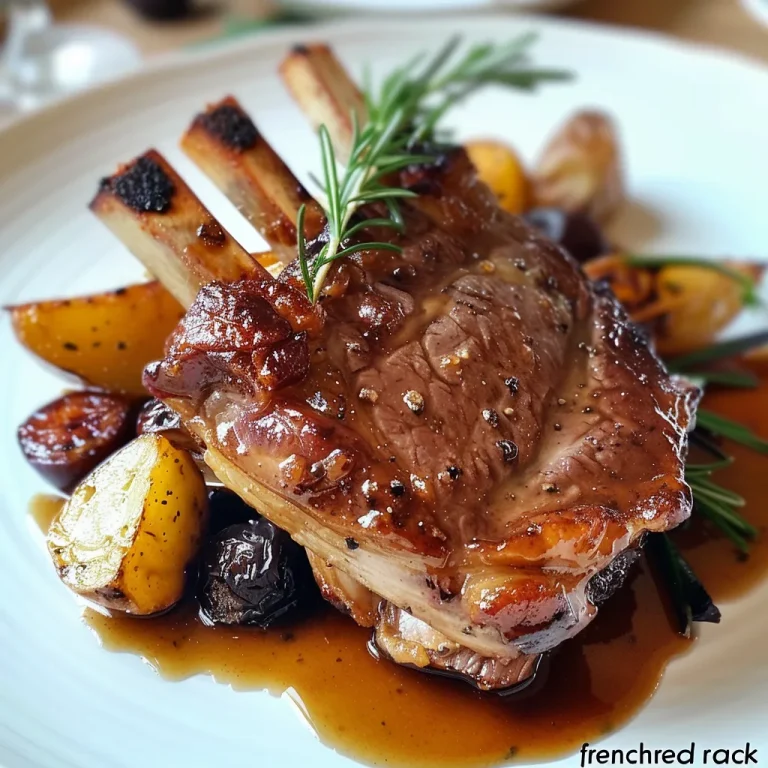
There’s something truly special about gathering around a beautifully roasted dish, and today, I’m excited to share my recipe for Coroa de Carré de Cordeiro – an elegant, succulent lamb roast that’s perfect for any occasion! Whether you’re planning a festive dinner party or simply want to impress your family with a delicious meal, this dish is sure to be a hit. Plus, it’s surprisingly easy to prepare, making it a fantastic option for those quick family dinners. So, let’s dive in and create something memorable!

Why You’ll Love This Recipe

  • Impressive presentation that will wow your guests.
  • Succulent lamb that melts in your mouth.
  • Easy to serve, making it perfect for gatherings.
  • Quick preparation time, leaving you more time to enjoy.
  • Versatile enough for both special occasions and weeknight dinner ideas.

Ingredients

To create this stunning Coroa de Carré de Cordeiro, you’ll need the following ingredients:

  • 1 rack of lamb (about 8 ribs)
  • 2 tablespoons olive oil
  • 4 cloves garlic, minced
  • 1 tablespoon fresh rosemary, chopped
  • 1 tablespoon fresh thyme, chopped
  • Salt and pepper to taste
  • 1 cup red wine (optional)
  • 1 tablespoon Dijon mustard
  • 1 tablespoon honey

Full ingredient list with measurements is provided in the printable recipe card below.

How to Make the Recipe

Now, let’s get cooking! Follow these simple steps to create your Coroa de Carré de Cordeiro:

  1. Preheat your oven to 400°F (200°C).
  2. In a small bowl, mix together the olive oil, minced garlic, rosemary, thyme, salt, and pepper.
  3. Rub this mixture all over the rack of lamb, ensuring it’s well coated.
  4. In a large oven-safe skillet, sear the lamb on medium-high heat for about 2-3 minutes on each side until browned.
  5. If using, pour in the red wine and bring to a simmer.
  6. Brush the lamb with Dijon mustard and drizzle with honey.
  7. Transfer the skillet to the preheated oven and roast for about 20-25 minutes for medium-rare, or until it reaches your desired doneness.
  8. Let the lamb rest for 10 minutes before slicing into chops.

Pro Tips for Making the Recipe

Here are some of my favorite tips to ensure your Coroa de Carré de Cordeiro turns out perfectly:

  • Use a meat thermometer to check for doneness: 130°F for medium-rare, 140°F for medium.
  • Let the lamb rest before slicing to keep it juicy.
  • Pair it with creamy garlic pasta for a delightful side dish that complements the flavors beautifully.
  • For a quick family dinner, serve with a simple salad or roasted vegetables.
  • Don’t forget to save the bones for a delicious homemade broth!

How to Serve

When it comes to serving your Coroa de Carré de Cordeiro, presentation is key! Here are some ideas:

  • Arrange the lamb chops on a large platter, garnished with fresh herbs.
  • Serve with a side of easy pasta recipes like creamy garlic pasta or roasted potatoes.
  • Pair with a nice red wine to elevate the dining experience.
  • For a festive touch, add seasonal vegetables or a colorful salad.

Make Ahead and Storage

If you’re planning ahead, you can prepare the lamb rub a day in advance and store it in the refrigerator. This allows the flavors to meld beautifully! After cooking, any leftovers can be stored in an airtight container in the fridge for up to 3 days. Reheat gently in the oven or microwave, and you’ll have a delicious meal ready in no time – perfect for those busy weeknight dinner ideas!

So there you have it! My Coroa de Carré de Cordeiro is not just a meal; it’s an experience that brings people together. I hope you enjoy making this dish as much as I do. Happy cooking!

Coroa de Carré de Cordeiro – Elegante, Suculenta e Fácil de Servir

Prep Time 30 minutes
Cook Time 45 minutes
Total Time 1 hour 15 minutes
Servings 4 porções
Calories 650
Uma deliciosa e sofisticada receita de carré de cordeiro, perfeita para impressionar na mesa com sabor e elegância.

Ingredients

Carne

  • 2 pieces carrés de cordeiro "frenched rack" ((8 ossos cada, ~1,6 kg no total))
  • 2 teaspoons sal
  • 1 teaspoon pimenta-do-reino moída na hora
  • 2 ramos de alecrim (folhas)
  • 2 ramos de tomilho (folhas)
  • 2 cloves de alho amassados
  • 2 tablespoons azeite

Cebolas

  • 800 g cebola pérola (ou mini-cebola)
  • 0.25 cup azeite
  • to taste sal e pimenta-do-reino

Alho e Vinho

  • 1 head de alho (dentes com casca)
  • 2 cups água
  • 0.25 cup vinho branco seco

Cuscuz Marroquino e Ervilhas

  • 2 cups cuscuz marroquino
  • 2 cups água quente
  • 1 cup ervilha congelada
  • cup uva-passa branca
  • ½ cup castanha-de-caju picada
  • 6 ramos de hortelã (folhas fatiadas)
  • 3 tablespoons azeite
  • 1 teaspoon sal

Instructions 

  • Tempere o carré de cordeiro com sal, pimenta, alecrim, tomilho e alho. Amarre com barbante e sele na frigideira com azeite até dourar.
  • Refogue as cebolas pérola no azeite até ficarem transparentes. Adicione alho, água, vinho e cozinhe até as cebolas ficarem macias.
  • Cozinhe o carré no forno a 200°C por aproximadamente 30 minutos ou até atingir o ponto desejado.
  • Prepare o cuscuz marroquino com água quente, ervilhas, uvas passas, castanhas e hortelã. Misture bem e deixe descansar por 10 minutos.
  • Sirva o carré fatiado ao lado do cuscuz e decore com hortelã.

Notes

Para um sabor mais intenso, deixe o cordeiro marinar com os temperos por algumas horas antes de cozinhar.
Calories: 650kcal
Cost: $15
Course: Prato principal
Cuisine: brasileira
Keyword: cordeiro

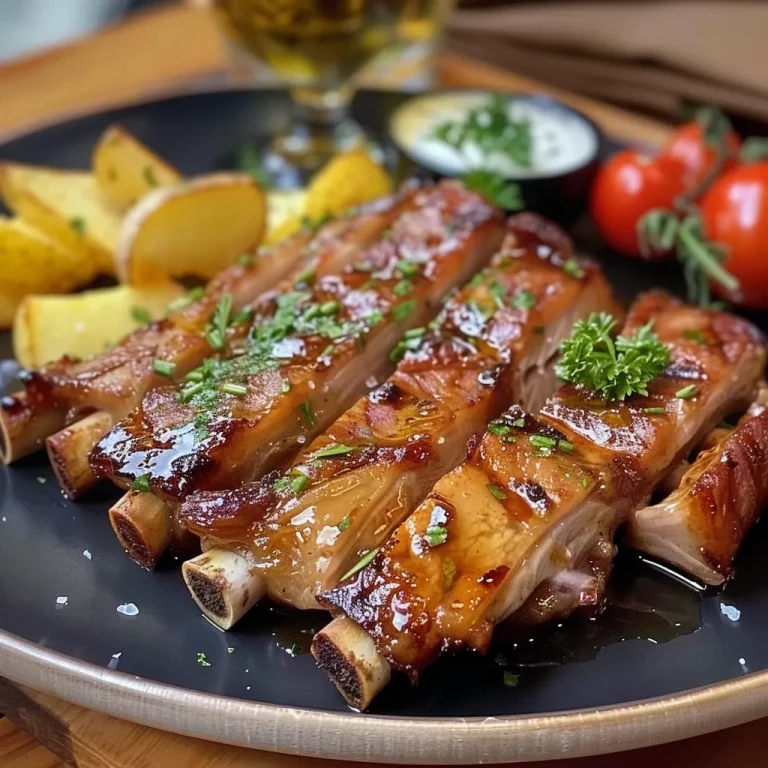
Are you ready to elevate your snacking game? I can hardly contain my excitement as I share with you my favorite recipe for Torresmo Crocante! This crispy delight, also known as sequinho de boteco, is the perfect treat for any occasion. Whether you’re hosting a game night or simply craving something crunchy, this recipe is a must-try. Plus, it’s a fantastic addition to your repertoire of easy pasta recipes for those quick family dinners!

Why You’ll Love This Recipe

  • Quick and easy to prepare, making it perfect for 30-minute meals.
  • Deliciously crispy, satisfying your cravings for something crunchy.
  • Versatile enough to serve as a snack or a side dish.
  • Great for entertaining guests or enjoying a cozy night in.
  • Pairs wonderfully with your favorite dips and drinks!

Ingredients

To make the perfect Torresmo Crocante, you’ll need the following ingredients:

  • 2 pounds of pork belly, cut into bite-sized pieces
  • Salt, to taste
  • Black pepper, to taste
  • 1 tablespoon of garlic powder
  • Vegetable oil, for frying

Full ingredient list with measurements is provided in the printable recipe card below.

How to Make the Recipe

Now, let’s dive into the fun part—making our Torresmo Crocante!

  1. Start by seasoning the pork belly pieces with salt, black pepper, and garlic powder. Make sure every piece is well-coated for maximum flavor.
  2. In a large pot, heat enough vegetable oil to cover the pork belly pieces. You want the oil to be hot but not smoking.
  3. Carefully add the seasoned pork belly to the hot oil in batches. Fry until golden brown and crispy, about 10-15 minutes. Keep an eye on them to avoid burning!
  4. Once crispy, remove the pork belly from the oil and place them on a paper towel-lined plate to drain excess oil.
  5. Let them cool slightly before serving. Trust me, the crunch is worth the wait!

Pro Tips for Making the Recipe

Here are some of my favorite tips to ensure your Torresmo Crocante turns out perfectly every time:

  • For extra crunch, let the pork belly pieces sit in the fridge uncovered for a few hours before frying. This helps to dry out the skin.
  • Don’t overcrowd the pot while frying; this can lower the oil temperature and result in soggy pork.
  • Experiment with different seasonings! Try adding paprika or cayenne pepper for a spicy kick.
  • Make sure to use a thermometer to check the oil temperature. Ideally, it should be around 350°F (175°C).

How to Serve

Serving your Torresmo Crocante is just as fun as making it! Here are some ideas:

  • Serve with a side of creamy garlic pasta for a delightful contrast of textures.
  • Pair with your favorite dipping sauces, like spicy mayo or chimichurri.
  • Use as a topping for salads or grain bowls for added crunch.
  • Enjoy as a snack while watching your favorite movie or sports game!

Make Ahead and Storage

If you want to prepare ahead of time, you can season the pork belly and store it in the fridge for up to 24 hours before frying. However, I recommend frying them fresh for the best crunch!

To store leftovers, place them in an airtight container in the fridge for up to 3 days. To reheat, pop them in the oven at 375°F (190°C) for about 10 minutes to regain their crispiness.

Now that you have this amazing recipe for Torresmo Crocante, you can impress your family and friends with your culinary skills! It’s perfect for those busy weeknights when you need quick family dinners or even as a fun appetizer for gatherings. And don’t forget, it pairs beautifully with easy pasta recipes like creamy garlic pasta for a complete meal!

So, what are you waiting for? Grab your ingredients and let’s get cooking! You’ll be amazed at how easy it is to make this crispy delight. Enjoy every crunchy bite!

Torresmo Crocante – Receita Fácil e Sequinho de Boteco

Prep Time 30 minutes
Cook Time 1 hour
Total Time 1 hour 30 minutes
Servings 4 servings
Calories 250
Descubra como fazer um torresmo crocante, sequinho e irresistível, perfeito para petiscar no boteco ou em casa.

Ingredients

Meat

  • 1.5 kg barriga de porco (toucinho ou panceta) (cortada em cubos médios)
  • 4 dentes alho amassado
  • 1 sopa colher de sal grosso
  • 1 chá colher de pimenta-do-reino
  • 100 ml cachaça (opcional) (para sabor extra)
  • 0.5 sopa vinagre ou fermento químico (truque para pururucar)
  • óleo para fritar óleo para fritar (ou banha de porco)

Instructions 

  • Marinar a carne com alho, sal, pimenta, cachaça, e vinagre por 30 minutos.
  • Fritar os cubos de carne em óleo quente até ficarem dourados e crocantes, cerca de 30 minutos, mexendo ocasionalmente.
  • Retirar, escorrer e servir quente.

Notes

Para obter o melhor crocante, deixe o torresmo descansar por 5 minutos após fritar.
Calories: 250kcal
Cost: $15
Course: Appetizer
Cuisine: Brazilian
Keyword: pork

Oh, my goodness! If you’re looking for a dish that will make your taste buds dance and your family ask for seconds, you’ve come to the right place! Today, I’m excited to share my recipe for Cupim com Mandioca, a succulent Brazilian roast that’s perfect for quick family dinners. This dish combines tender beef with creamy cassava, creating a meal that’s not only delicious but also incredibly satisfying. And let me tell you, it’s just as easy to whip up as those easy pasta recipes you love!

Why You’ll Love This Recipe

  • It’s a crowd-pleaser that will impress your family and friends.
  • Perfect for weeknight dinner ideas when you want something hearty.
  • Simple ingredients that you can find at your local grocery store.
  • Great for meal prep and leftovers!
  • It’s a unique dish that brings a taste of Brazil to your kitchen.

Ingredients

To make this delightful Cupim com Mandioca, you’ll need the following ingredients:

  • 2 pounds of cupim (hump meat)
  • 1 pound of cassava (mandioca), peeled and cut into chunks
  • 4 cloves of garlic, minced
  • 1 large onion, chopped
  • 2 cups of beef broth
  • 2 tablespoons of olive oil
  • Salt and pepper to taste
  • Fresh parsley for garnish

Full ingredient list with measurements is provided in the printable recipe card below.

How to Make the Recipe

Now, let’s dive into the cooking process! Making Cupim com Mandioca is easier than you might think:

  1. In a large pot, heat the olive oil over medium heat. Add the chopped onion and minced garlic, sautéing until fragrant and the onion is translucent.
  2. Season the cupim with salt and pepper, then add it to the pot. Brown the meat on all sides for about 5-7 minutes.
  3. Pour in the beef broth, ensuring the meat is mostly submerged. Bring to a boil, then reduce the heat to low, cover, and let it simmer for about 2 hours, or until the meat is tender.
  4. After 1 hour of cooking, add the cassava chunks to the pot. Continue to simmer until both the meat and cassava are fork-tender.
  5. Once done, remove from heat and let it rest for a few minutes. Garnish with fresh parsley before serving.

Pro Tips for Making the Recipe

Here are some of my favorite tips to ensure your Cupim com Mandioca turns out perfectly:

  • For extra flavor, marinate the cupim overnight with garlic, salt, and pepper.
  • If you’re short on time, you can use a pressure cooker to speed up the cooking process.
  • Feel free to add your favorite vegetables, like carrots or bell peppers, for added nutrition.
  • Pair this dish with a side of rice or a fresh salad for a complete meal.

How to Serve

When it comes to serving Cupim com Mandioca, I love to keep it simple. Serve it hot, straight from the pot, with a sprinkle of fresh parsley on top. This dish is perfect for family gatherings or cozy weeknight dinners. You can also serve it alongside some creamy garlic pasta for a delightful twist!

Make Ahead and Storage

This dish is fantastic for meal prep! You can make it ahead of time and store it in the refrigerator for up to 3 days. Just reheat it on the stove or in the microwave when you’re ready to enjoy. If you want to keep it longer, it freezes beautifully! Just make sure to store it in an airtight container, and it will last for up to 3 months.

So there you have it! A delicious and easy recipe for Cupim com Mandioca that’s sure to become a family favorite. Whether you’re looking for quick family dinners or just want to try something new, this dish is a winner. I can’t wait for you to give it a try and share it with your loved ones!

Cupim com Mandioca – Receita Fácil, Suculenta e Muito Saborosa

Prep Time 30 minutes
Cook Time 2 hours
Total Time 2 hours 30 minutes
Servings 6 servings
Calories 850
Descubra como preparar um prato brasileiro tradicional com carne suculenta e mandioca, perfeito para uma refeição reconfortante e cheia de sabor.

Ingredients

Meat

  • 1.5 kg de cupim bovino (peça ou em fatias grossas)
  • 2 tbsp sal grosso
  • 5 cloves alho amassado
  • 0.5 cup cebola picada
  • 2 ramos de alecrim fresco
  • 3 leaves de louro
  • 250 ml vinho branco seco
  • 200 ml manteiga de garrafa (ou manteiga comum)
  • a gosto pimenta-do-reino e cominho

Mandioca

  • 1 kg de mandioca descascada e cortada em pedaços médios
  • 2 cloves de alho inteiros
  • 1 fatia de pimenta dedo-de-moça (opcional)
  • 2 tbsp manteiga de garrafa
  • a gosto salsinha picada

Instructions 

  • Tempere o cupim com sal, alho, cebola, alecrim, louro e vinho branco. Doure na manteiga até ficar bem selado.
  • Cozinhe lentamente até a carne ficar macia, cerca de 2 horas.
  • Enquanto isso, cozinhe a mandioca em água salgada até ficar macia, aproximadamente 30 minutos.
  • Refogue a mandioca com alho, pimenta dedo-de-moça, manteiga e salsinha. Sirva o cupim fatiado acompanhado da mandioca.

Notes

Para um sabor mais intenso, deixe a carne marinar por algumas horas antes de cozinhar.
Calories: 850kcal
Cost: $15
Course: Main Course
Cuisine: Brazilian
Keyword: beef, comfort food, mandioca

Have you ever craved a dish that warms your soul and nourishes your body? Well, let me introduce you to Mocotó Tradicional, a rich and flavorful Brazilian stew that’s not only delicious but also packed with collagen! This dish is perfect for those quick family dinners when you want something hearty and satisfying. Plus, it’s a fantastic alternative to the usual easy pasta recipes we often rely on. So, roll up your sleeves, and let’s dive into this delightful recipe!

Why You’ll Love This Recipe

  • Rich in collagen, promoting healthy skin and joints.
  • Flavorful and comforting, perfect for chilly evenings.
  • Great for meal prep and can be made ahead of time.
  • Versatile – pairs well with rice or crusty bread.
  • A unique dish that will impress your family and friends!

Ingredients

To make this delicious Mocotó Tradicional, you’ll need the following ingredients:

  • 2 pounds of beef trotters (mocotó)
  • 1 large onion, chopped
  • 4 cloves of garlic, minced
  • 2 carrots, diced
  • 2 tomatoes, chopped
  • 1 bell pepper, chopped
  • 1 bunch of fresh parsley, chopped
  • Salt and pepper to taste
  • Water (enough to cover the ingredients)
  • Optional: chili flakes for a spicy kick!

Full ingredient list with measurements is provided in the printable recipe card below.

How to Make the Recipe

Now, let’s get cooking! Follow these simple steps to create your own Mocotó Tradicional:

  1. Start by cleaning the beef trotters thoroughly. Rinse them under cold water and place them in a large pot.
  2. Add enough water to cover the trotters and bring to a boil. Skim off any foam that forms on the surface.
  3. Once the foam is removed, add the chopped onion, minced garlic, diced carrots, chopped tomatoes, and bell pepper to the pot.
  4. Season with salt and pepper, and if you like a bit of heat, sprinkle in some chili flakes.
  5. Cover the pot and let it simmer on low heat for about 3-4 hours, or until the meat is tender and falling off the bone.
  6. Once cooked, remove the trotters from the pot and let them cool slightly. Then, carefully remove the meat from the bones and chop it into bite-sized pieces.
  7. Return the meat to the pot, add the chopped parsley, and stir well. Let it simmer for an additional 10 minutes to meld the flavors.
  8. Serve hot and enjoy your delicious Mocotó Tradicional!

Pro Tips for Making the Recipe

Here are some helpful suggestions to ensure your Mocotó Tradicional turns out perfectly:

  • For a richer flavor, consider adding a splash of white wine during the cooking process.
  • If you’re short on time, you can use a pressure cooker to speed up the cooking process.
  • Feel free to customize the vegetables based on what you have on hand – this stew is very forgiving!
  • Don’t skip the parsley; it adds a fresh touch that brightens the dish.

How to Serve

When it comes to serving your Mocotó Tradicional, there are plenty of delicious options:

  • Serve it over a bed of fluffy white rice for a complete meal.
  • Pair it with crusty bread to soak up all that rich broth.
  • Top with extra parsley or a squeeze of lime for a zesty finish.
  • For a fun twist, serve it with a side of creamy garlic pasta for a fusion experience!

Make Ahead and Storage

This stew is perfect for meal prep! You can make it ahead of time and store it in the refrigerator for up to 3 days. Just reheat on the stove before serving. If you want to keep it longer, consider freezing it in individual portions. It’s a fantastic option for those busy weeknight dinner ideas when you need something quick and satisfying!

So, there you have it! A delightful recipe for Mocotó Tradicional that’s not only easy to make but also packed with flavor and nutrition. I hope you enjoy making this dish as much as I do. Happy cooking!

Mocotó Tradicional – Receita Fácil, Saborosa e Rica em Colágeno

Prep Time 30 minutes
Cook Time 2 hours
Total Time 2 hours 30 minutes
Servings 6 servings
Calories 450
Experience the rich flavors of traditional Brazilian mocotó, a collagen-rich stew that is hearty and flavorful.

Ingredients

Meat

  • 1.5 kg de mocotó (pés de boi em pedaços)
  • 1 each suco de 1 limão
  • 2 tbsp vinagre
  • 2 tbsp óleo
  • 1 medium cebola picada
  • 4 cloves alho picado
  • 2 maduros tomates picados
  • 1 green pimentão picado
  • 1 tbsp colorau
  • 1 tsp cominho
  • 2 folhas de louro
  • 1 tsp pimenta-do-reino
  • 1 malagueta ou dedo-de-moça pimenta-malagueta (opcional)
  • 1 cup extrato de tomate
  • a gosto sal
  • a gosto coentro ou salsinha picada
  • water as needed água suficiente para cozinhar

Instructions 

  • Prepare o mocotó, limpando e temperando com limão, vinagre, alho e sal.
  • Cozinhe o mocotó com água, folhas de louro e água até ficar macio, cerca de 2 horas.
  • Refogue a cebola, alho, tomate, pimentão e temperos em óleo até dourar.
  • Adicione o extrato de tomate, vinagre, colorau, cominho e pimenta, cozinhe por mais 30 minutos.
  • Junte o mocotó cozido ao refogado, ajuste o sal e cozinhe por mais 30 minutos para incorporar os sabores.
  • Finalize com coentro ou salsinha, sirva quente.

Notes

Use ingredientes frescos para melhor sabor e aproveite essa receita tradicional brasileira.
Calories: 450kcal
Cost: $15
Course: Main Course
Cuisine: Brazilian
Keyword: Mocotó

Are you ready to impress your family with a dish that’s not only delicious but also incredibly easy to make? Let me introduce you to my favorite Canelone de Frango com Ricota! This recipe is a delightful blend of flavors that will have everyone asking for seconds. Perfect for those busy weeknights, this dish is one of my go-to easy pasta recipes that can be whipped up in no time. So, grab your apron, and let’s dive into this savory family favorite!

Why You’ll Love This Recipe

  • Quick and easy to prepare, making it perfect for 30-minute meals.
  • Rich and creamy filling that everyone will adore.
  • Great for meal prep and can be made ahead of time.
  • Versatile – you can customize the filling to suit your family’s tastes.
  • A fantastic way to sneak in some veggies if you like!

Ingredients

To make this scrumptious Canelone de Frango com Ricota, you’ll need the following ingredients:

  • 12 cannelloni tubes
  • 2 cups cooked chicken, shredded
  • 1 cup ricotta cheese
  • 1 cup mozzarella cheese, shredded
  • 1/2 cup grated Parmesan cheese
  • 2 cups marinara sauce
  • 2 cloves garlic, minced
  • 1 teaspoon Italian seasoning
  • Salt and pepper to taste
  • Fresh basil for garnish (optional)

Full ingredient list with measurements is provided in the printable recipe card below.

How to Make the Recipe

Now, let’s get cooking! Follow these simple steps to create your Canelone de Frango com Ricota:

  1. Preheat your oven to 375°F (190°C).
  2. In a large bowl, combine the shredded chicken, ricotta cheese, half of the mozzarella, garlic, Italian seasoning, salt, and pepper. Mix well until everything is combined.
  3. Stuff each cannelloni tube with the chicken and ricotta mixture. You can use a piping bag or a spoon to make this easier.
  4. Spread a thin layer of marinara sauce on the bottom of a baking dish.
  5. Place the stuffed cannelloni in the dish and cover with the remaining marinara sauce. Sprinkle the rest of the mozzarella and Parmesan cheese on top.
  6. Cover the dish with aluminum foil and bake for 25 minutes. Remove the foil and bake for an additional 10 minutes, or until the cheese is bubbly and golden.
  7. Let it cool for a few minutes before serving. Garnish with fresh basil if desired.

Pro Tips for Making the Recipe

Here are some of my favorite tips to ensure your Canelone de Frango com Ricota turns out perfectly:

  • For a little extra flavor, sauté some spinach or mushrooms and mix them into the filling.
  • If you’re short on time, you can use store-bought rotisserie chicken.
  • Feel free to experiment with different cheeses, like goat cheese or feta, for a unique twist.
  • Make sure to cover the dish with foil while baking to keep the cannelloni moist.
  • Pair this dish with a side salad for a complete meal!

How to Serve

This Canelone de Frango com Ricota is best served hot out of the oven. I love to pair it with a simple green salad and a glass of white wine for a delightful dinner experience. You can also sprinkle some extra Parmesan cheese on top before serving for that added touch of flavor. It’s a fantastic option for quick family dinners that everyone will enjoy!

Make Ahead and Storage

If you want to prepare this dish in advance, you can assemble the cannelloni and store it in the refrigerator for up to 24 hours before baking. Just cover it tightly with plastic wrap or aluminum foil. If you have leftovers, they can be stored in an airtight container in the fridge for up to 3 days. Reheat in the oven or microwave until warmed through. This makes it a great option for weeknight dinner ideas when you want something comforting and delicious without the fuss!

So there you have it! My Canelone de Frango com Ricota is not just a meal; it’s a way to bring the family together around the dinner table. I hope you enjoy making this dish as much as I do. Happy cooking!

Canelone de Frango com Ricota – Receita Fácil e Saborosa para Toda a Família

Prep Time 30 minutes
Cook Time 45 minutes
Total Time 1 hour 15 minutes
Servings 6 servings
Calories 450
Uma deliciosa receita de canelone recheado com frango e ricota, perfeita para toda a família aproveitar um jantar saboroso e reconfortante.

Ingredients

Main Ingredients

  • 2 pieces peitos de frango cozidos e desfiados (cerca de 500 g)
  • 500 g ricota fresca amassada
  • 2 tablespoons azeite de oliva
  • 1 medium cebola picada
  • 2 cloves dentes de alho picados
  • 2 pieces tomates maduros picados
  • 2 tablespoons salsinha picada
  • to taste sal e pimenta-do-reino
  • 2 tablespoons manteiga
  • 2 tablespoons farinha de trigo
  • 1 liter leite
  • 1 cup molho de tomate pronto
  • 1 pinch noz-moscada (opcional)
  • 12 pieces massas para canelone ou panquecas prontas
  • 200 g queijo mussarela ralado
  • 50 g queijo parmesão ralado

Instructions 

  • Modo de preparar – como fazer canelone de frango com ricota
  • Recheie os canelones com o creme de frango e ricota, enrole e coloque em um refratário untado.
  • Prepare o molho branco com tomate, finalize com mussarela e parmesão, e enfeite com salsinha.
  • Leve ao forno por 30 minutos, gratinar e dourar.

Notes

Dica: Enrole o queijo na massa é uma excelente opção para um sabor mais intenso.
Calories: 450kcal
Cost: $15
Course: Main Course
Cuisine: Brazilian
Keyword: chicken, pasta, ricotta

Are you looking for a delicious and nutritious meal that the whole family will love? Look no further! Today, I’m excited to share my recipe for Filé de Tilápia Assada com Legumes – a delightful dish that’s not only easy to prepare but also packed with flavor and nutrients. This recipe is perfect for those busy weeknights when you want to whip up something quick and satisfying. Plus, it pairs beautifully with easy pasta recipes for a complete meal!

Why You’ll Love This Recipe

  • Quick and easy to prepare, making it ideal for 30-minute meals.
  • Nutritious and packed with vibrant vegetables.
  • Perfect for quick family dinners that everyone will enjoy.
  • Versatile – you can easily swap in your favorite veggies!
  • Great for meal prep and leftovers.

Ingredients

To make this delightful Filé de Tilápia Assada com Legumes, you will need the following ingredients:

  • 4 tilapia fillets
  • 2 cups of mixed vegetables (like bell peppers, zucchini, and carrots)
  • 2 tablespoons olive oil
  • 1 teaspoon garlic powder
  • 1 teaspoon paprika
  • Salt and pepper to taste
  • Fresh lemon juice (from 1 lemon)
  • Fresh parsley for garnish

Full ingredient list with measurements is provided in the printable recipe card below.

How to Make the Recipe

Now, let’s dive into the steps to create this mouthwatering dish:

  1. Preheat your oven to 400°F (200°C).
  2. In a large bowl, combine the mixed vegetables with olive oil, garlic powder, paprika, salt, and pepper. Toss until the veggies are well coated.
  3. Spread the seasoned vegetables on a baking sheet lined with parchment paper.
  4. Place the tilapia fillets on top of the vegetables. Drizzle with fresh lemon juice and season with additional salt and pepper if desired.
  5. Bake in the preheated oven for about 20 minutes, or until the fish flakes easily with a fork and the vegetables are tender.
  6. Garnish with fresh parsley before serving.

Pro Tips for Making the Recipe

Here are some of my favorite tips to ensure your Filé de Tilápia Assada com Legumes turns out perfectly every time:

  • Feel free to use any vegetables you have on hand. Broccoli, asparagus, or even cherry tomatoes work wonderfully!
  • If you love a bit of heat, add a pinch of red pepper flakes to the vegetable mix.
  • For a creamier side, consider pairing this dish with creamy garlic pasta for a delightful contrast.
  • Make sure not to overcrowd the baking sheet; this helps the vegetables roast nicely.

How to Serve

This dish is incredibly versatile! You can serve it as is for a light meal, or pair it with a side of easy pasta recipes for a heartier option. Here are a few serving suggestions:

  • Serve with a side of quinoa or brown rice for added fiber.
  • Top with a dollop of Greek yogurt or a sprinkle of feta cheese for extra flavor.
  • Pair with a fresh garden salad for a complete and balanced meal.

Make Ahead and Storage

This Filé de Tilápia Assada com Legumes is perfect for meal prep! Here’s how to store it:

  • Store any leftovers in an airtight container in the refrigerator for up to 3 days.
  • Reheat in the oven or microwave until warmed through.
  • You can also prepare the vegetables ahead of time and store them in the fridge until you’re ready to bake.

With this recipe, you’ll have a delicious and nutritious meal ready in no time, making it one of my favorite weeknight dinner ideas. I hope you enjoy making and sharing this delightful dish with your loved ones. Happy cooking!

Filé de Tilápia Assada com Legumes – Fácil e Nutritivo

Prep Time 15 minutes
Cook Time 30 minutes
Total Time 45 minutes
Servings 4 people
Calories 350
Uma deliciosa e nutritiva receita de filé de tilápia assada com legumes variados, perfeita para uma refeição leve e saborosa.

Ingredients

Protein

  • 800 g filé de tilápia
  • 1 unit suco de limão
  • 2 dentes alho picados
  • 1 colher chá sal
  • 1 pitada pimenta-do-reino

Vegetables

  • 2 unidades tomates em rodelas
  • 1 unidade cebola grande em rodelas
  • 1 unidade cenoura em rodelas finas
  • 2 unidades batatas médias pré-cozidas em cubos
  • 1 pimentão vermelho em tiras
  • 1 pimentão amarelo em tiras
  • 1 abobrinha em rodelas
  • a gosto azeite de oliva

Final Touch

  • para finalizar cheiro-verde picado

Instructions 

  • Tempere o filé de tilápia com suco de limão, alho, sal e pimenta-do-reino. Deixe descansar por 15 minutos.
  • Preaqueça o forno a 200°C. Monte os legumes em uma assadeira, regue com azeite e tempere a gosto.
  • Asse os legumes por 30 minutos ou até ficarem macios.
  • Enquanto isso, asse o filé de tilápia por cerca de 20 minutos ou até ficar cozido.
  • Retire o papel alumínio e finalize com cheiro-verde picado antes de servir.

Notes

Para um sabor mais intenso, deixe marinar o peixe por mais tempo.
Calories: 350kcal
Cost: $15
Course: Main Course
Cuisine: Brazilian
Keyword: Tilápia

Are you ready to discover a delicious and healthy alternative to traditional rice? I’m so excited to share my recipe for Arroz de Couve-Flor Low Carb – a dish that’s not only low in carbs but also packed with flavor! This recipe is perfect for those busy weeknights when you need quick family dinners that everyone will love. Plus, it’s a fantastic way to sneak in some veggies without anyone noticing! Let’s dive into this easy pasta recipe that will surely become a staple in your home.

Why You’ll Love This Recipe

  • Low carb and healthy, making it perfect for any diet.
  • Quick to prepare, ideal for 30-minute meals.
  • Versatile and can be paired with various proteins.
  • Great for meal prep and leftovers.
  • A delicious way to enjoy cauliflower, a superfood!

Ingredients

To make this delightful Arroz de Couve-Flor Low Carb, you’ll need the following ingredients:

  • 1 medium head of cauliflower, riced
  • 2 tablespoons olive oil
  • 1 small onion, finely chopped
  • 2 cloves garlic, minced
  • 1 bell pepper, diced
  • Salt and pepper to taste
  • Fresh parsley for garnish

Full ingredient list with measurements is provided in the printable recipe card below.

How to Make the Recipe

Making Arroz de Couve-Flor Low Carb is a breeze! Follow these simple steps:

  1. Start by ricing the cauliflower. You can do this by grating it or using a food processor until it resembles rice grains.
  2. In a large skillet, heat the olive oil over medium heat. Add the chopped onion and sauté until translucent.
  3. Stir in the minced garlic and diced bell pepper, cooking for another 2-3 minutes until fragrant.
  4. Add the riced cauliflower to the skillet, mixing well. Season with salt and pepper to taste.
  5. Cook for about 5-7 minutes, stirring occasionally, until the cauliflower is tender but not mushy.
  6. Garnish with fresh parsley before serving.

Pro Tips for Making the Recipe

Here are some of my favorite tips to ensure your Arroz de Couve-Flor Low Carb turns out perfectly:

  • For a creamier texture, consider adding a splash of vegetable broth or a dollop of cream cheese.
  • Feel free to mix in your favorite vegetables or proteins to customize the dish.
  • If you’re short on time, pre-riced cauliflower is available in most grocery stores.
  • Make sure not to overcook the cauliflower; you want it to retain some texture.

How to Serve

This Arroz de Couve-Flor Low Carb is incredibly versatile! Here are some serving suggestions:

  • Pair it with grilled chicken or shrimp for a complete meal.
  • Use it as a base for stir-fries or curries.
  • Top it with a fried egg for a delicious breakfast option.
  • Mix it with your favorite sauces for a quick and easy side dish.

Make Ahead and Storage

If you’re like me and love to meal prep, you’ll be happy to know that this dish stores well! Here are some tips:

  • Store any leftovers in an airtight container in the refrigerator for up to 3 days.
  • You can also freeze the riced cauliflower before cooking for a quick meal later on.
  • Reheat in the microwave or on the stovetop, adding a splash of water to keep it moist.

Now that you have this fantastic recipe for Arroz de Couve-Flor Low Carb, I hope you’re inspired to try it out! It’s a wonderful addition to your collection of weeknight dinner ideas and can easily be adapted to fit your family’s tastes. Whether you’re looking for easy pasta recipes or just a healthy side dish, this recipe is sure to please. Enjoy your cooking adventure!

Arroz de Couve-Flor Low Carb – Fácil e Saudável

Prep Time 10 minutes
Cook Time 15 minutes
Total Time 25 minutes
Servings 4 servings
Calories 150
A healthy low-carb rice alternative made with cauliflower, perfect for a quick and nutritious meal.

Ingredients

Vegetables

  • 700 g couve-flor limpa, separada em buquês
  • 1 tbsp azeite de oliva extravirgem
  • 2 dentes alho picados
  • 1 small cebola picada
  • 0.5 cup salsinha fresca picada
  • 0.75 cup água quente
  • a gosto Sal e pimenta-do-reino

Instructions 

  • Modere o azeite, alho e cebola picados e doure levemente.
  • Coloque o couve-flor em um processador e pulse a textura desejada.
  • Refogue os temperos e o couve-flor processado, misture bem e adicione o caldo de legumes.
  • Deixe cozinhar até ficar macio, mexendo de vez em quando.
  • Acrescente a couve-flor processada, misture, tempere com sal e pimenta a gosto.
  • Finalize com sementes de gergelim ou outros toppings de sua preferência.

Notes

Para uma textura mais rústica, pulse o couve-flor em pequenos pedaços.
Calories: 150kcal
Cost: $15
Course: Main Course
Cuisine: Brazilian
Keyword: cauliflower