Author

thomas

Browsing

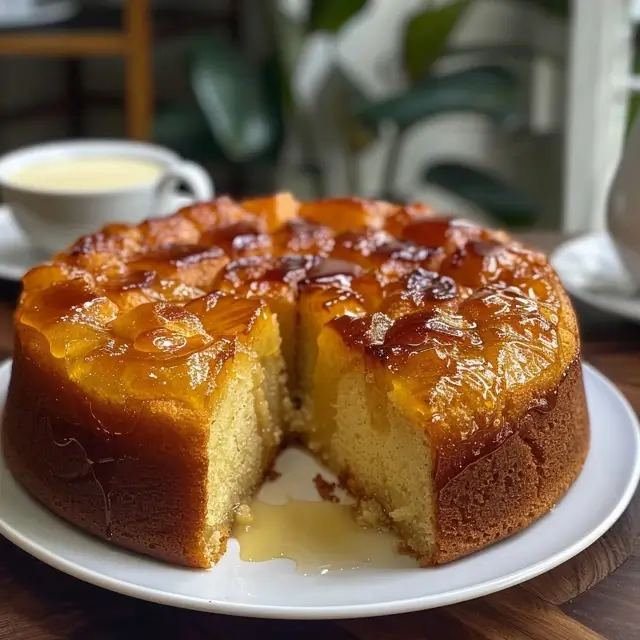
Have you ever craved something sweet and delightful that transports you to a cozy café in Brazil? Well, let me introduce you to Pão de Mel Recheado Fofinho! This irresistible treat is not only soft and flavorful but also comes with three delicious fillings that will make your taste buds dance with joy. Perfect for a quick family dinner dessert or a sweet snack, this recipe is a must-try! And if you’re looking for easy pasta recipes for your weeknight dinner ideas, you’re in for a treat as well!

Why You’ll Love This Recipe

  • Deliciously soft and fluffy texture that melts in your mouth.
  • Three different fillings to satisfy every sweet tooth.
  • Perfect for sharing with family and friends during gatherings.
  • Easy to make, making it a great addition to your collection of quick family dinners.
  • Can be enjoyed as a dessert or a delightful snack any time of the day!

Ingredients

To make this delightful Pão de Mel Recheado Fofinho, you’ll need the following ingredients:

  • 2 cups all-purpose flour
  • 1 cup honey
  • 1 cup sugar
  • 1/2 cup unsweetened cocoa powder
  • 1/2 cup milk
  • 1/2 cup vegetable oil
  • 2 large eggs
  • 1 tablespoon baking powder
  • 1 teaspoon ground cinnamon
  • 1/2 teaspoon ground ginger
  • 1/4 teaspoon salt
  • Filling options: dulce de leche, chocolate ganache, or fruit preserves

Full ingredient list with measurements is provided in the printable recipe card below.

How to Make the Recipe

Now, let’s dive into the fun part—making these delicious treats!

  1. Preheat your oven to 350°F (175°C) and grease a muffin tin or line it with paper liners.
  2. In a large mixing bowl, combine the flour, sugar, cocoa powder, baking powder, cinnamon, ginger, and salt. Mix well.
  3. In another bowl, whisk together the honey, milk, vegetable oil, and eggs until smooth.
  4. Gradually add the wet ingredients to the dry ingredients, stirring until just combined. Be careful not to overmix!
  5. Fill each muffin cup halfway with the batter. Add a spoonful of your chosen filling in the center, then cover with more batter until the cups are about 3/4 full.
  6. Bake for 20-25 minutes or until a toothpick inserted into the center comes out clean.
  7. Let them cool in the pan for a few minutes before transferring to a wire rack to cool completely.

Pro Tips for Making the Recipe

Here are some helpful suggestions to ensure your Pão de Mel Recheado Fofinho turns out perfectly:

  • Make sure your ingredients are at room temperature for better mixing.
  • Experiment with different fillings to find your favorite combination!
  • Don’t skip the cooling step; it helps the flavors meld beautifully.
  • If you want to make these ahead of time, they freeze well—just thaw before serving.

How to Serve

These delightful treats can be served in various ways:

  • Dust with powdered sugar for a simple yet elegant presentation.
  • Pair with a scoop of vanilla ice cream for a decadent dessert.
  • Serve with a cup of coffee or tea for a delightful afternoon snack.
  • Perfect for birthday parties, holiday gatherings, or just because!

Make Ahead and Storage

If you’re planning to make these sweet treats ahead of time, here are some storage tips:

  • Store in an airtight container at room temperature for up to 3 days.
  • For longer storage, freeze them in a single layer, then transfer to a freezer-safe bag for up to 3 months.
  • Thaw at room temperature before serving, or warm them slightly in the microwave for a few seconds.

So there you have it! A delightful recipe for Pão de Mel Recheado Fofinho that’s sure to impress your family and friends. Whether you’re looking for quick family dinners or just a sweet treat to brighten your day, this recipe is a winner. And if you’re also in need of some easy pasta recipes for your weeknight dinner ideas, don’t forget to check out my collection of creamy garlic pasta dishes that can be whipped up in just 30 minutes! Happy baking!

Pão de Mel Recheado Fofinho com 3 Opções de Recheio

Prep Time 30 minutes
Cook Time 20 minutes
Total Time 50 minutes
Servings 12 pieces
Calories 350
Delicie-se com este pão de mel fofinho, recheado com três opções irresistíveis, perfeito para festas e momentos especiais.

Ingredients

Baking Ingredients

  • 1 cup milk
  • 1/2 cup honey
  • 1 cup brown sugar
  • 1/4 cup refined sugar (to balance flavor)
  • 1/4 cup melted butter
  • 2 tbsp cocoa powder
  • 1/2 cup chocolate powder 50%
  • 2 tsp cinnamon powder
  • 1 tsp clove powder
  • 2 cups flour of wheat, sifted
  • 2 tsp baking powder
  • 1 tsp bicarbonate of soda
  • a pinch salt
  • 500 g creamy dulce de leche (with walnuts)
  • 1/2 cup chopped walnuts (for filling)
  • 1 can cooked condensed milk (pressure cooked for 20 min)
  • 1/2 cup moist shredded coconut (for filling)
  • 1 can condensed milk (for creamy brigadeiro)
  • 2 tbsp cocoa powder (for brigadeiro)
  • 1 tbsp butter (for brigadeiro)
  • 1/2 cup cream of milk (100g)

Chocolate for coating

  • 500 g semi-sweet or blend chocolate

Instructions 

  • Combine milk, honey, sugars, butter, cocoa, cinnamon, and clove. Mix well.
  • Add flour, baking powder, baking soda, and salt. Mix until smooth.
  • Bake in preheated oven at 180°C (356°F) for 20 minutes.
  • Prepare fillings: dulce de leche with walnuts, cooked condensed milk with coconut, and brigadeiro with cocoa and butter.
  • Assemble the filled cakes, then coat with melted chocolate.

Notes

Keep refrigerated for best results. Use high-quality chocolate for coating.
Calories: 350kcal
Cost: $15
Course: Dessert
Cuisine: Brazilian
Keyword: chocolate, sweet

Oh, my goodness! If you’re looking for a dessert that will transport you straight to a tropical paradise, then you’ve come to the right place! Today, I’m thrilled to share my recipe for Torta Gelada de Maracujá com Creme Cremoso. This delightful treat features a creamy filling and a fresh passion fruit topping that will make your taste buds dance with joy. Plus, it’s a fantastic way to impress your family and friends without spending hours in the kitchen. And let’s be honest, who doesn’t love a dessert that’s as easy as some of those easy pasta recipes we whip up for quick family dinners? Let’s dive in!

Why You’ll Love This Recipe

  • It’s incredibly easy to make, perfect for busy weeknights.
  • The tropical flavors of passion fruit will brighten your day.
  • It’s a no-bake dessert, so you won’t heat up your kitchen!
  • Great for gatherings, potlucks, or just a sweet treat at home.
  • Can be made ahead of time, making it a stress-free option.

Ingredients

To create this luscious Torta Gelada de Maracujá com Creme Cremoso, you’ll need the following ingredients:

  • 1 package of Maria cookies (or any plain cookies)
  • 1 cup of unsweetened passion fruit pulp
  • 1 can of sweetened condensed milk
  • 1 cup of heavy cream
  • 1 tablespoon of gelatin powder
  • 1/4 cup of water
  • 1/2 cup of sugar (optional, depending on your sweetness preference)

Full ingredient list with measurements is provided in the printable recipe card below.

How to Make the Recipe

Now, let’s get to the fun part—making this delicious dessert!

  1. Start by preparing the gelatin. In a small bowl, sprinkle the gelatin powder over the water and let it sit for about 5 minutes to bloom.
  2. In a mixing bowl, combine the sweetened condensed milk and passion fruit pulp. Mix well until fully combined.
  3. In another bowl, whip the heavy cream until soft peaks form. Gently fold the whipped cream into the passion fruit mixture.
  4. Next, heat the bloomed gelatin in the microwave for about 10-15 seconds until it’s fully dissolved. Stir it into the passion fruit mixture.
  5. Now, it’s time to assemble! In a rectangular dish, layer the Maria cookies at the bottom. Pour half of the creamy mixture over the cookies.
  6. Add another layer of cookies, followed by the remaining creamy mixture. Smooth the top with a spatula.
  7. Cover the dish with plastic wrap and refrigerate for at least 4 hours, or overnight for best results.

Pro Tips for Making the Recipe

Here are some of my favorite tips to ensure your Torta Gelada de Maracujá comes out perfectly:

  • Make sure to use fresh passion fruit pulp for the best flavor.
  • If you want a sweeter dessert, feel free to add more sugar to the cream mixture.
  • For a fun twist, try adding a layer of chocolate cookies for a chocolatey flavor.
  • Don’t skip the chilling time; it’s essential for the dessert to set properly.

How to Serve

When it’s time to serve your Torta Gelada de Maracujá, slice it into squares and garnish with fresh passion fruit seeds or a dollop of whipped cream. This dessert pairs beautifully with a cup of coffee or tea, making it a perfect end to any meal. It’s also a fantastic option for weeknight dinner ideas when you want to impress your family without spending hours in the kitchen!

Make Ahead and Storage

This dessert is perfect for making ahead of time! You can prepare it a day or two in advance and keep it in the refrigerator until you’re ready to serve. Just be sure to cover it well to prevent any odors from the fridge affecting its flavor. It can last up to 3 days in the fridge, but I doubt it will last that long because it’s just too delicious!

So there you have it! A delightful, creamy, and refreshing dessert that’s sure to become a family favorite. Whether you’re looking for a sweet treat after one of those 30-minute meals or just want to indulge in something special, this Torta Gelada de Maracujá com Creme Cremoso is the way to go. Enjoy every bite, and happy cooking!

Torta Gelada de Maracujá com Creme Cremoso

Prep Time 30 minutes
Cook Time 15 minutes
Total Time 45 minutes
Servings 8 pieces
Calories 350
A refreshing and creamy passion fruit tart perfect for hot days, combining a buttery base with a tangy filling and a sweet topping.

Ingredients

Base

  • 200 g biscoito maisena (for the base)
  • 100 g manteiga derretida (for the base)

Filling

  • 1 can leite condensado
  • 1 can creme de leite
  • 1 cup suco de maracujá concentrado
  • 1 sopa gelatina incolor sem sabor
  • 3 colheres de sopa água
  • 0.5 cup açúcar (optional, as desired)

Topping

  • 2 maracujás polpa de maracujá com sementes (for coverage)
  • 0.5 cup açúcar (for coverage)

Instructions 

  • Prepare a base: crush the biscoito maisena and mix with melted butter to form a fine mass. Press into a tart pan and set aside.
  • Make the gelatin: dissolve the gelatin in water, then add to the passion fruit mixture. Mix well and pour over the base.
  • Chill the tart for at least 4 hours or until set.
  • Prepare the topping: blend the polpa de maracujá with sugar and spread over the set tart.

Notes

Keep the tart refrigerated and consume within 3 days for best flavor and texture.
Calories: 350kcal
Cost: $15
Course: Dessert
Cuisine: Brazilian
Keyword: passion fruit

Have you ever found yourself craving something sweet but don’t want to spend hours in the kitchen? I know I have! That’s why I’m thrilled to share my favorite quick dessert: the Bolo de Caneca de Micro-ondas SUPER Fofinho. This delightful mug cake is not only fluffy and delicious, but it also takes just minutes to whip up. Perfect for those busy weeknights when you need a little treat after a long day! And if you’re looking for easy pasta recipes to pair with your dessert, I’ve got you covered there too!

Why You’ll Love This Recipe

  • Quick and easy to make in just a few minutes.
  • Perfectly fluffy texture that melts in your mouth.
  • Minimal ingredients required, making it budget-friendly.
  • Customizable with your favorite toppings or mix-ins.
  • Great for satisfying sweet cravings without the fuss!

Ingredients

To make this scrumptious mug cake, you’ll need the following ingredients:

  • 4 tablespoons all-purpose flour
  • 4 tablespoons sugar
  • 2 tablespoons cocoa powder
  • 1/8 teaspoon baking powder
  • 1/8 teaspoon salt
  • 3 tablespoons milk
  • 2 tablespoons vegetable oil
  • 1/4 teaspoon vanilla extract
  • Optional: chocolate chips or nuts for added flavor

Full ingredient list with measurements is provided in the printable recipe card below.

How to Make the Recipe

Making the Bolo de Caneca de Micro-ondas SUPER Fofinho is as easy as 1-2-3! Here’s how:

  1. In a microwave-safe mug, combine the flour, sugar, cocoa powder, baking powder, and salt. Mix well to ensure there are no lumps.
  2. Add the milk, vegetable oil, and vanilla extract to the dry ingredients. Stir until you have a smooth batter. If you’re feeling adventurous, toss in some chocolate chips or nuts!
  3. Microwave the mug on high for about 1 minute and 30 seconds. Keep an eye on it, as microwaves can vary in power. You want it to rise and look set but not overcooked.

Pro Tips for Making the Recipe

Here are some of my favorite tips to ensure your mug cake turns out perfectly every time:

  • Use a large mug to prevent overflow while cooking.
  • Don’t overmix the batter; a few lumps are okay!
  • Experiment with flavors by adding a pinch of cinnamon or a splash of almond extract.
  • If you want to make this a complete meal, consider pairing it with some 30-minute meals or creamy garlic pasta for a delightful dinner.

How to Serve

This mug cake is best enjoyed warm right out of the microwave. You can top it with:

  • A scoop of vanilla ice cream
  • Whipped cream and fresh berries
  • Chocolate sauce or caramel drizzle
  • Chopped nuts for a crunchy texture

Pair it with a cup of coffee or tea for a cozy dessert experience!

Make Ahead and Storage

While this mug cake is best enjoyed fresh, you can prepare the dry ingredients in advance and store them in an airtight container. When you’re ready for a treat, just add the wet ingredients and microwave! If you have leftovers (which is rare!), you can store them in the fridge for up to a day, but I recommend reheating them in the microwave for a few seconds before enjoying.

So there you have it! The Bolo de Caneca de Micro-ondas SUPER Fofinho is not just a quick dessert; it’s a delightful way to treat yourself after a busy day. And if you’re looking for more weeknight dinner ideas, don’t forget to check out my collection of easy pasta recipes that can be made in no time. Happy baking!

Bolo de Caneca de Micro-ondas SUPER Fofinho

Prep Time 5 minutes
Cook Time 2 minutes
Total Time 7 minutes
Servings 1 cup
Calories 250
A quick and delicious microwave mug cake perfect for satisfying sweet cravings in minutes.

Ingredients

Main ingredients

  • 1 medium egg ovo médio (at room temperature)
  • 3 tablespoons açúcar demerara ou cristal
  • 2 tablespoons óleo (canola ou girassol)
  • 4 tablespoons leite integral
  • 3 tablespoons cacau 100% (or 2 tbsp cacao + 1 tbsp chocolate 50%)
  • 4 tablespoons farinha de trigo peneirada
  • ½ teaspoon fermento químico
  • 1 pinch sal
  • 2 tablespoons chocolate meio-amargo picado (for optional topping)
  • 1 tablespoon creme de leite ou leite (for optional topping)

Instructions 

  • Misture o ovo: quebre o ovo direto na caneca e bata bem com garfo até ficar homogêneo.
  • Adicione o açúcar, óleo, leite, cacau, farinha, fermento e sal. Misture até obter uma massa lisa e homogênea.
  • Cubra com chocolate picado e, se desejar, adicione creme de leite por cima.
  • Leve ao micro-ondas por aproximadamente 1 minuto e 40 segundos em potência alta. O bolo deve ficar firme por fora e úmido por dentro.
  • Deixe descansar por alguns segundos antes de servir. Aproveite seu bolo de caneca super fofinho!

Notes

Para um sabor mais intenso, adicione uma pitada extra de cacau ou chocolate.
Calories: 250kcal
Cost: $3
Course: Dessert
Cuisine: Brazilian
Keyword: cake, microwave, quick

There’s nothing quite like the aroma of freshly baked banana cake wafting through the kitchen, is there? Today, I’m excited to share with you my favorite recipe for Bolo de Banana de Liquidificador Fofinho e Rápido. This delightful banana cake is not only fluffy and delicious, but it’s also incredibly quick to whip up—perfect for those busy weeknights when you need a sweet treat without spending hours in the kitchen. Plus, if you’re looking for easy pasta recipes to pair with your dessert, I’ve got you covered!

Why You’ll Love This Recipe

  • Quick and easy to make—perfect for busy weeknights!
  • Fluffy texture that melts in your mouth.
  • Uses simple ingredients you probably already have at home.
  • Great way to use up overripe bananas.
  • Perfect for family gatherings or a cozy night in.

Ingredients

To make this scrumptious banana cake, you’ll need the following ingredients:

  • 3 ripe bananas
  • 1 cup of sugar
  • 1/2 cup of vegetable oil
  • 3 eggs
  • 2 cups of all-purpose flour
  • 1 tablespoon of baking powder
  • 1/2 teaspoon of salt
  • 1 teaspoon of vanilla extract

Full ingredient list with measurements is provided in the printable recipe card below.

How to Make the Recipe

Now, let’s get to the fun part—making the cake! Follow these simple steps:

  1. Preheat your oven to 350°F (175°C) and grease a 9-inch round cake pan.
  2. In a blender, combine the ripe bananas, sugar, vegetable oil, and eggs. Blend until smooth.
  3. In a large mixing bowl, combine the flour, baking powder, and salt.
  4. Pour the banana mixture into the dry ingredients and mix until just combined. Be careful not to overmix!
  5. Add the vanilla extract and give it one last gentle stir.
  6. Pour the batter into the prepared cake pan and smooth the top.
  7. Bake for 30-35 minutes, or until a toothpick inserted in the center comes out clean.
  8. Let it cool for a few minutes before transferring it to a wire rack to cool completely.

Pro Tips for Making the Recipe

Here are some of my favorite tips to ensure your banana cake turns out perfectly every time:

  • Use very ripe bananas for the best flavor and sweetness.
  • Don’t skip the greasing step; it helps the cake come out of the pan easily.
  • Feel free to add nuts or chocolate chips for an extra special touch!
  • If you want to make this cake even more decadent, top it with a simple cream cheese frosting.
  • This recipe is also great for making mini cakes or muffins—just adjust the baking time accordingly!

How to Serve

This banana cake is delicious on its own, but here are some fun serving suggestions:

  • Serve it warm with a scoop of vanilla ice cream for a delightful dessert.
  • Pair it with a cup of coffee or tea for a cozy afternoon treat.
  • Top with fresh fruit or a drizzle of caramel sauce for an elegant touch.
  • It also makes a great addition to brunch alongside some 30-minute meals or weeknight dinner ideas.

Make Ahead and Storage

If you want to prepare this cake in advance, here are some tips:

  • Store the cooled cake in an airtight container at room temperature for up to 3 days.
  • You can also freeze the cake for up to 3 months. Just wrap it tightly in plastic wrap and then in aluminum foil.
  • To enjoy, simply thaw at room temperature and serve!

And there you have it! A quick and fluffy banana cake that’s sure to become a family favorite. Whether you’re looking for a sweet treat after one of your easy pasta recipes or just want to indulge in something delicious, this Bolo de Banana de Liquidificador Fofinho e Rápido is the perfect choice. Happy baking!

Bolo de Banana de Liquidificador Fofinho e Rápido

Prep Time 10 minutes
Cook Time 30 minutes
Total Time 40 minutes
Servings 8 slices
Calories 350
Delicie-se com este bolo de banana macio, rápido de fazer e perfeito para qualquer hora do dia.

Ingredients

group

  • 3 pieces bananas maduras (nanica ou prata)
  • 3 units ovos
  • 0.5 cup óleo
  • 1 cup açúcar (pode usar o mascavo)
  • 1.5 cup farinha de trigo
  • 1 tablespoon fermento em pó
  • 1 teaspoon canela em pó
  • 1 pinch sal
  • 0.75 cup açúcar (para calda)
  • 0.5 cup água (para calda)
  • 2 bananas bananas fatiadas em rodelas (para decorar o fundo)

Instructions 

  • Modo de Preparo Passo a Passo

Notes

Dica: Use bananas maduras para um sabor mais intenso e doce.
Calories: 350kcal
Cost: $15
Course: Dessert
Cuisine: Brazilian
Keyword: banana

Have you ever craved a warm, fluffy bread that’s not only delicious but also easy to make? Well, let me introduce you to my favorite recipe: Pão de Batata Doce Fofinho e Fácil de Fazer. This sweet potato bread is a delightful treat that can elevate any meal, making it perfect for quick family dinners or even as a snack. Plus, it’s a fantastic addition to your collection of easy pasta recipes, especially when paired with a creamy garlic pasta dish. Let’s dive into the world of sweet potato goodness!

Why You’ll Love This Recipe

  • Fluffy texture that melts in your mouth
  • Simple ingredients you probably already have at home
  • Perfect for 30-minute meals or as a side for weeknight dinner ideas
  • Great for the whole family, even picky eaters!
  • Versatile enough to enjoy with sweet or savory toppings

Ingredients

To make this delightful Pão de Batata Doce Fofinho, you’ll need the following ingredients:

  • 2 cups mashed sweet potatoes (about 2 medium sweet potatoes)
  • 3 cups all-purpose flour
  • 1/4 cup sugar
  • 1 packet (2 1/4 teaspoons) active dry yeast
  • 1 teaspoon salt
  • 1/2 cup warm milk (about 110°F)
  • 1/4 cup melted butter
  • 2 large eggs
  • 1 teaspoon vanilla extract

Full ingredient list with measurements is provided in the printable recipe card below.

How to Make the Recipe

Now, let’s get to the fun part—making this delicious bread!

  1. Start by boiling the sweet potatoes until they are tender. Drain and mash them until smooth.
  2. In a small bowl, combine the warm milk and yeast. Let it sit for about 5 minutes until it becomes frothy.
  3. In a large mixing bowl, combine the mashed sweet potatoes, sugar, melted butter, eggs, and vanilla extract. Mix well.
  4. Add the frothy yeast mixture to the sweet potato mixture and stir until combined.
  5. Gradually add the flour and salt, mixing until a soft dough forms.
  6. Knead the dough on a floured surface for about 5-7 minutes until it’s smooth and elastic.
  7. Place the dough in a greased bowl, cover it with a clean kitchen towel, and let it rise in a warm place for about 1 hour or until it doubles in size.
  8. Preheat your oven to 350°F (175°C).
  9. Once the dough has risen, punch it down and shape it into small rolls or a loaf.
  10. Place the shaped dough on a baking sheet lined with parchment paper. Let it rise again for about 30 minutes.
  11. Bake for 25-30 minutes or until golden brown. Let it cool slightly before serving.

Pro Tips for Making the Recipe

Here are some of my favorite tips to ensure your Pão de Batata Doce Fofinho turns out perfectly:

  • Make sure your sweet potatoes are well-mashed to avoid lumps in the dough.
  • For an extra touch of flavor, consider adding spices like cinnamon or nutmeg to the dough.
  • If you want to make this a quick family dinner, serve it alongside your favorite easy pasta recipes for a delightful meal.
  • Don’t rush the rising time; it’s essential for achieving that fluffy texture!

How to Serve

This sweet potato bread is incredibly versatile! Here are some serving suggestions:

  • Enjoy it warm with a pat of butter and a drizzle of honey.
  • Pair it with a hearty soup for a comforting meal.
  • Use it as a side for your favorite 30-minute meals or weeknight dinner ideas.
  • Slice it and make delicious sandwiches with your favorite fillings.

Make Ahead and Storage

If you want to prepare this bread in advance, here are some tips:

  • You can make the dough ahead of time and refrigerate it after the first rise. Just let it come to room temperature before shaping and baking.
  • Store any leftover bread in an airtight container at room temperature for up to 3 days.
  • For longer storage, freeze the bread in a freezer-safe bag. It can last up to 3 months! Just thaw and warm it up before serving.

Now that you have all the secrets to making this fluffy and delicious Pão de Batata Doce Fofinho, I can’t wait for you to try it! It’s perfect for those busy weeknights when you need quick family dinners or when you want to impress guests with minimal effort. Enjoy every bite, and happy baking!

Pão de Batata Doce Fofinho e Fácil de Fazer

Prep Time 20 minutes
Cook Time 30 minutes
Total Time 50 minutes
Servings 12 pieces
Calories 250
Delicious and fluffy sweet potato bread, easy to prepare and perfect for any occasion.

Ingredients

Main ingredients

  • 1 cup batata-doce cozida e amassada (cerca de 1 batata grande)
  • 3 cups farinha de trigo
  • 0.75 cup leite morno
  • 2 teaspoons fermento biológico seco
  • 2 teaspoons açúcar
  • 1 tablespoon manteiga (em temperatura ambiente)
  • 2 eggs ovos
  • 1 teaspoon sal

For polvilhar

  • to taste Farinha de trigo para polvilhar a bancada
  • 1 egg ovo para pincelar
  • 2 teaspoons água

Instructions 

  • Modo de preparo
  • Em uma tigela pequena, misture o fermento biológico seco com o leite morno e 1 colher de chá de açúcar. Deixe descansar por 5 minutos até formar uma espuma.
  • Em uma tigela grande, misture a batata-doce amassada, a farinha de trigo, o restante do açúcar, a manteiga, os ovos e o sal. Adicione a mistura de fermento e misture bem até obter uma massa homogênea.
  • Cubra a massa com um pano úmido e deixe crescer por cerca de 1 hora ou até dobrar de volume.
  • Preaqueça o forno a 180°C (356°F). Polvilhe a bancada com farinha de trigo e modele a massa em uma bola, cortando em pedaços ou formando pães pequenos.
  • Coloque os pães em uma assadeira untada ou forrada com papel manteiga. Pincele com o ovo batido misturado com a água.
  • Asse por cerca de 30 minutos ou até que fiquem dourados.

Notes

Para dar um toque especial, adicione ervas secas ou queijo ralado à massa antes de assar.
Calories: 250kcal
Cost: $15
Course: bread
Cuisine: Brazilian
Keyword: sweet potato

Have you ever tasted a cake that feels like a warm hug? That’s exactly what you’ll experience with my Bolo de Abacaxi Invertido Fofinho Molhadinho! This delightful pineapple upside-down cake is not only a feast for the eyes but also a treat for the taste buds. With its caramelized pineapple topping and moist, fluffy texture, it’s the perfect dessert to impress your family and friends. Plus, it’s a fantastic addition to your repertoire of easy pasta recipes and quick family dinners!

Why You’ll Love This Recipe

  • It’s incredibly moist and fluffy, thanks to the secret ingredient!
  • Caramelized pineapple adds a sweet, tangy flavor that’s irresistible.
  • Perfect for any occasion, from casual weeknight dinners to special celebrations.
  • Easy to make, so you can whip it up even on busy days.
  • It pairs beautifully with a scoop of vanilla ice cream or whipped cream.

Ingredients

To create this scrumptious Bolo de Abacaxi Invertido Fofinho Molhadinho, you’ll need the following ingredients:

  • 1 can of pineapple rings (in juice, not syrup)
  • 1 cup brown sugar
  • 1/2 cup unsalted butter
  • 1 cup all-purpose flour
  • 1 cup granulated sugar
  • 1/2 cup milk
  • 2 large eggs
  • 1 teaspoon baking powder
  • 1 teaspoon vanilla extract
  • 1/4 teaspoon salt

Full ingredient list with measurements is provided in the printable recipe card below.

How to Make the Recipe

Now, let’s dive into the fun part—making this delicious cake!

  1. Preheat your oven to 350°F (175°C).
  2. In a medium saucepan, melt the butter over low heat. Add the brown sugar and stir until dissolved. Pour this mixture into a 9-inch round cake pan, spreading it evenly.
  3. Arrange the pineapple rings on top of the caramel mixture, placing a cherry in the center of each ring if desired.
  4. In a large mixing bowl, beat the granulated sugar and eggs until light and fluffy. Add the milk and vanilla extract, mixing well.
  5. In another bowl, whisk together the flour, baking powder, and salt. Gradually add the dry ingredients to the wet mixture, stirring until just combined.
  6. Pour the batter over the pineapple layer in the cake pan, smoothing it out evenly.
  7. Bake for 30-35 minutes, or until a toothpick inserted into the center comes out clean.
  8. Let the cake cool for about 10 minutes, then carefully invert it onto a serving plate. Enjoy the beautiful presentation!

Pro Tips for Making the Recipe

Here are some of my favorite tips to ensure your Bolo de Abacaxi Invertido Fofinho Molhadinho turns out perfectly:

  • Make sure your butter is at room temperature for easier mixing.
  • Don’t skip the cooling step before inverting the cake; it helps maintain its shape.
  • For an extra touch, sprinkle some toasted coconut on top before serving.
  • If you want to make this cake ahead of time, it stores well in the fridge for up to 3 days.

How to Serve

This cake is delightful on its own, but you can elevate it even further! Here are some serving suggestions:

  • Serve warm with a scoop of vanilla ice cream for a comforting dessert.
  • Top with whipped cream and a sprinkle of cinnamon for a festive touch.
  • Pair it with a cup of coffee or tea for a lovely afternoon treat.
  • It also makes a great addition to brunch or a potluck!

Make Ahead and Storage

If you’re planning for a busy week, this cake is perfect for making ahead! Here’s how to store it:

  • Wrap the cooled cake tightly in plastic wrap and store it in the refrigerator for up to 3 days.
  • You can also freeze the cake for up to 2 months. Just make sure to wrap it well to prevent freezer burn.
  • To serve after freezing, let it thaw in the refrigerator overnight before enjoying.

Now that you have the secrets to making this delightful Bolo de Abacaxi Invertido Fofinho Molhadinho, I hope you’re inspired to try it out! It’s a fantastic addition to your collection of weeknight dinner ideas and 30-minute meals. And if you’re looking for more delicious recipes, don’t forget to check out my creamy garlic pasta and other easy pasta recipes for quick family dinners. Happy baking!

Bolo de Abacaxi Invertido Fofinho e Molhadinho

Prep Time 30 minutes
Cook Time 50 minutes
Total Time 1 hour 20 minutes
Servings 8 pieces
Calories 350
A delicious upside-down pineapple cake with a moist and fluffy texture, perfect for any occasion.

Ingredients

Caramel

  • 2 1/2 cups sugar (for the caramel)
  • 1 1/2 cups water (for the caramel)
  • 400 g pineapple slices (natural or preserved)

Flour mixture

  • 3 1/2 cups flour of wheat
  • 1/2 cup cornstarch
  • 2 cups sugar (for the batter)
  • 4 units eggs (separated)
  • 3 tablespoons margarine or butter
  • 1 cup hot milk
  • 1 tablespoon baking powder

Instructions 

  • Prepare the caramel by melting sugar with water until golden, then pour into a round 26 cm (10 inch) mold.
  • Arrange pineapple slices over the caramel in the mold.
  • In a bowl, beat egg whites until stiff; set aside.
  • In another bowl, beat egg yolks with sugar and margarine until creamy.
  • Add hot milk gradually, then sift in flour, cornstarch, and baking powder, mixing gently.
  • Fold in egg whites gently into the batter.
  • Pour batter over pineapple slices in the mold.
  • Bake at 180°C (356°F) for about 40-45 minutes until golden and a toothpick inserted comes out clean.
  • Allow to cool slightly, then invert onto a serving plate to serve.

Notes

Use fresh or preserved pineapple for best flavor. Invert the cake while still warm for a perfect presentation.
Calories: 350kcal
Cost: $15
Course: Dessert
Cuisine: Brazilian
Keyword: pineapple

There’s something truly magical about a homemade cake, especially when it’s a Bolo de Chocolate Simples com Cobertura Cremosa. This delightful chocolate cake is not only simple to make but also incredibly satisfying to eat. Whether you’re looking for a sweet treat to enjoy with your afternoon coffee or a dessert to impress your family, this cake is the answer! Plus, it’s a fantastic way to bring everyone together, just like those easy pasta recipes that make weeknight dinners a breeze. Let’s dive into this delicious recipe!

Why You’ll Love This Recipe

  • Quick and easy to prepare, perfect for busy weeknights.
  • Rich chocolate flavor that satisfies any sweet tooth.
  • Creamy frosting that takes the cake to the next level.
  • Great for family gatherings or a cozy night in.
  • Can be made ahead and stored for later enjoyment.

Ingredients

To make this scrumptious Bolo de Chocolate Simples com Cobertura Cremosa, you’ll need the following ingredients:

  • 1 ¾ cups all-purpose flour
  • 1 ½ cups granulated sugar
  • ¾ cup unsweetened cocoa powder
  • 1 ½ teaspoons baking powder
  • 1 ½ teaspoons baking soda
  • 1 teaspoon salt
  • 2 large eggs
  • 1 cup whole milk
  • ½ cup vegetable oil
  • 2 teaspoons vanilla extract
  • 1 cup boiling water
  • For the creamy frosting:
  • 1 cup unsalted butter, softened
  • 3 ½ cups powdered sugar
  • ½ cup unsweetened cocoa powder
  • 1/3 cup heavy cream
  • 1 teaspoon vanilla extract

Full ingredient list with measurements is provided in the printable recipe card below.

How to Make the Recipe

Now, let’s get to the fun part—making this delicious cake!

  1. Preheat your oven to 350°F (175°C). Grease and flour two 9-inch round cake pans.
  2. In a large mixing bowl, combine the flour, sugar, cocoa powder, baking powder, baking soda, and salt. Mix well.
  3. Add the eggs, milk, vegetable oil, and vanilla extract to the dry ingredients. Beat on medium speed for about 2 minutes until well combined.
  4. Stir in the boiling water (the batter will be thin, but that’s okay!).
  5. Pour the batter evenly into the prepared cake pans.
  6. Bake for 30-35 minutes or until a toothpick inserted in the center comes out clean.
  7. Let the cakes cool in the pans for 10 minutes, then remove them from the pans and transfer to a wire rack to cool completely.
  8. While the cakes are cooling, prepare the creamy frosting. In a mixing bowl, beat the softened butter until creamy. Gradually add the powdered sugar and cocoa powder, alternating with the heavy cream and vanilla extract. Beat until smooth and fluffy.
  9. Once the cakes are completely cool, spread a layer of frosting on top of one cake layer, place the second layer on top, and frost the top and sides of the cake.
  10. Slice, serve, and enjoy your delicious creation!

Pro Tips for Making the Recipe

Here are some tips to ensure your cake turns out perfectly:

  • Make sure your ingredients are at room temperature for better mixing.
  • Don’t skip the boiling water; it helps to create a moist cake.
  • For a richer flavor, consider adding a splash of coffee to the batter.
  • Feel free to add chocolate chips to the batter for extra chocolatey goodness!
  • Use a cake leveler to ensure even layers for a professional look.

How to Serve

This cake is perfect for any occasion! Here are some serving suggestions:

  • Pair it with a scoop of vanilla ice cream for a delightful dessert.
  • Serve it with fresh berries for a pop of color and flavor.
  • Enjoy it with a cup of coffee or tea for a cozy afternoon treat.
  • Consider adding a drizzle of chocolate sauce on top for an extra indulgent touch.

Make Ahead and Storage

If you want to prepare this cake ahead of time, here are some tips:

  • The cake layers can be baked a day in advance. Just wrap them tightly in plastic wrap and store them at room temperature.
  • Frost the cake on the day you plan to serve it for the best texture.
  • Store any leftovers in an airtight container at room temperature for up to 3 days, or in the refrigerator for up to a week.
  • You can also freeze the unfrosted cake layers for up to 3 months. Just make sure to wrap them well!

Now that you have this delightful recipe in your arsenal, you can whip up a Bolo de Chocolate Simples com Cobertura Cremosa anytime you need a sweet treat. It’s perfect for those busy weeknights when you want to impress your family without spending hours in the kitchen. And remember, just like those 30-minute meals or quick family dinners, this cake is all about bringing joy and deliciousness to your table. Happy baking!

Bolo de Chocolate Simples com Cobertura Cremosa

Prep Time 20 minutes
Cook Time 40 minutes
Total Time 1 hour
Servings 8 slices
Calories 350
A delicious and easy chocolate cake with a creamy frosting, perfect for any celebration or sweet craving.

Ingredients

massa

  • 4 eggs ovos (para a massa)
  • 2 cups açúcar (para a massa)
  • 2 cups farinha de trigo peneirada (para a massa)
  • 1 cup chocolate em pó 50% cacau (para a massa)
  • 0.5 cup óleo (para a massa)
  • 1 cup água quente (para a massa)
  • 1 tbsp fermento em pó (para a massa)

cobertura

  • 2 sopa manteiga (para a cobertura)
  • 7 sopa chocolate em pó (para a cobertura)
  • 2 latas creme de leite com soro (para a cobertura)
  • 3 sopa açúcar (para a cobertura)

Instructions 

  • Pré-aqueça o forno a 180°C e unte uma forma.
  • Bata os ovos, açúcar, farinha, cacau, óleo, água e fermento até obter uma massa homogênea.
  • Despeje na forma e asse por aproximadamente 40 minutos.
  • Para a cobertura, derreta a manteiga, misture o chocolate em pó e cozinhe por 2 minutos.
  • Adicione o creme de leite e o açúcar, misture bem e deixe esfriar.
  • Desenforme o bolo, cubra com a ganache e sirva.

Notes

Use quality chocolate para um sabor mais intenso.
Calories: 350kcal
Cost: $15
Course: Dessert
Cuisine: Brazilian
Keyword: chocolate

Are you ready to indulge in a dessert that’s not only quick to whip up but also incredibly creamy and delicious? I’m excited to share my favorite recipe for Bombocado de Liquidificador Fácil e Cremoso! This delightful cake is perfect for those busy weeknights when you want something sweet but don’t have hours to spend in the kitchen. Plus, it’s made with simple ingredients that you probably already have at home. Let’s dive into this easy pasta recipes-inspired dessert that will surely impress your family!

Why You’ll Love This Recipe

  • Quick and easy to prepare, perfect for busy weeknights.
  • Rich, creamy texture that melts in your mouth.
  • Uses simple ingredients you likely have on hand.
  • Great for family gatherings or a cozy night in.
  • Can be made ahead of time for effortless entertaining.

Ingredients

To make this delightful Bombocado de Liquidificador Fácil e Cremoso, you’ll need the following ingredients:

  • 1 cup of milk
  • 1 cup of sugar
  • 1 cup of cornmeal
  • 1 cup of grated coconut (fresh or dried)
  • 1/2 cup of melted butter
  • 3 eggs
  • 1 tablespoon of baking powder
  • 1 teaspoon of vanilla extract

Full ingredient list with measurements is provided in the printable recipe card below.

How to Make the Recipe

Now, let’s get to the fun part—making this delicious cake!

  1. Preheat your oven to 350°F (175°C) and grease a cake pan.
  2. In a blender, combine the milk, sugar, cornmeal, grated coconut, melted butter, eggs, baking powder, and vanilla extract.
  3. Blend until the mixture is smooth and creamy.
  4. Pour the batter into the prepared cake pan.
  5. Bake for about 30-35 minutes or until a toothpick inserted in the center comes out clean.
  6. Let it cool for a few minutes before serving. Enjoy your creamy delight!

Pro Tips for Making the Recipe

Here are some of my favorite tips to ensure your Bombocado de Liquidificador Fácil e Cremoso turns out perfectly every time:

  • Make sure your ingredients are at room temperature for a smoother batter.
  • Don’t skip the blending step; it’s key to achieving that creamy texture!
  • Feel free to add chocolate chips or nuts for an extra twist.
  • Serve it warm with a scoop of vanilla ice cream for a decadent treat.

How to Serve

This cake is incredibly versatile! You can serve it as a delightful dessert after a hearty meal or as a sweet treat during your afternoon coffee break. Pair it with a dollop of whipped cream or a sprinkle of powdered sugar for an elegant touch. It’s also a fantastic addition to any family gathering or potluck, making it a great option for quick family dinners or special occasions.

Make Ahead and Storage

If you’re planning ahead, this cake can be made a day in advance. Just store it in an airtight container at room temperature. If you have leftovers (which is rare!), you can keep them in the fridge for up to three days. Just reheat a slice in the microwave for a few seconds before enjoying it again!

So, what are you waiting for? Grab those ingredients and let’s make this Bombocado de Liquidificador Fácil e Cremoso today! It’s the perfect way to satisfy your sweet tooth without spending hours in the kitchen. And if you’re looking for more 30-minute meals or weeknight dinner ideas, don’t forget to check out my collection of easy pasta recipes that are sure to please the whole family!

Bombocado de Liquidificador Fácil e Cremoso

Prep Time 10 minutes
Cook Time 30 minutes
Total Time 40 minutes
Servings 8 pieces
Calories 250
A creamy and delicious Brazilian dessert made with coconut, cheese, and a moist texture, perfect for any occasion.

Ingredients

group

  • 3 units ovos inteiros
  • 1 lata leite condensado ((395 g))
  • 2 cups leite
  • 3 tablespoons manteiga derretida
  • 1 package coco ralado ((100 g))
  • 0.5 package queijo parmesão ralado fino ((50 g))
  • 5 tablespoons farinha de trigo
  • 1 tablespoon fermento em pó
  • 1 pinch sal

group

  • as needed Manteiga ou margarina (para untar)
  • as needed Farinha de trigo (para untar)

Instructions 

  • Preheat the oven to 180°C (356°F).
  • In a blender, combine eggs, condensed milk, milk, melted butter, coconut, Parmesan cheese, flour, baking powder, and salt. Blend until smooth.
  • Grease a baking dish with butter and dust with flour.
  • Pour the mixture into the prepared dish.
  • Bake for approximately 30 minutes or until golden and firm.
  • Remove from oven, let cool slightly, then serve.

Notes

For best results, use fresh ingredients and preheat the oven properly.
Calories: 250kcal
Cost: $15
Course: Dessert
Cuisine: Brazilian
Keyword: cheese, coconut, dessert

Are you ready to elevate your weeknight dinner game? I’m thrilled to share with you my favorite recipe for Bacalhau com Legumes Gratinado – a creamy and flavorful dish that’s perfect for quick family dinners! This delightful meal combines the rich taste of cod with fresh vegetables and a cheesy topping that will have everyone asking for seconds. Plus, it’s one of those easy pasta recipes that you can whip up in no time, making it a fantastic choice for busy evenings.

Why You’ll Love This Recipe

  • It’s a creamy, comforting dish that warms the soul.
  • Perfect for quick family dinners that everyone will enjoy.
  • Can be made in under 30 minutes, making it ideal for 30-minute meals.
  • Incorporates fresh vegetables, making it a nutritious option.
  • Great for meal prep and leftovers!

Ingredients

To make this delicious Bacalhau com Legumes Gratinado, you’ll need the following ingredients:

  • 1 pound of salted cod (bacalhau), soaked and shredded
  • 2 cups of mixed vegetables (like bell peppers, zucchini, and carrots)
  • 1 cup of heavy cream
  • 1 cup of grated cheese (like mozzarella or parmesan)
  • 3 cloves of garlic, minced
  • 1 onion, chopped
  • 2 tablespoons of olive oil
  • Salt and pepper to taste
  • Fresh parsley for garnish

Full ingredient list with measurements is provided in the printable recipe card below.

How to Make the Recipe

Now, let’s dive into the steps to create this creamy masterpiece:

  1. Preheat your oven to 375°F (190°C).
  2. In a large skillet, heat the olive oil over medium heat. Add the chopped onion and minced garlic, sautéing until fragrant and translucent.
  3. Add the mixed vegetables to the skillet and cook for about 5 minutes, until they start to soften.
  4. Stir in the shredded cod and cook for another 5 minutes, allowing the flavors to meld.
  5. Pour in the heavy cream, stirring to combine. Season with salt and pepper to taste.
  6. Transfer the mixture to a baking dish and sprinkle the grated cheese evenly on top.
  7. Bake in the preheated oven for 20-25 minutes, or until the cheese is bubbly and golden brown.
  8. Garnish with fresh parsley before serving.

Pro Tips for Making the Recipe

Here are some of my favorite tips to ensure your Bacalhau com Legumes Gratinado turns out perfectly:

  • Make sure to soak the salted cod for at least 24 hours to remove excess salt.
  • Feel free to customize the vegetables based on what you have on hand or your family’s preferences.
  • If you want to add a little kick, sprinkle some red pepper flakes into the mixture.
  • This dish pairs wonderfully with a side salad or crusty bread for a complete meal.

How to Serve

When it comes to serving this dish, I love to present it straight from the oven, bubbling and golden. It’s perfect for a cozy family dinner or even a gathering with friends. You can serve it alongside a light salad or some roasted potatoes for a heartier meal. This dish is not only delicious but also visually appealing, making it a great centerpiece for your table.

Make Ahead and Storage

If you’re looking for weeknight dinner ideas that can be prepped in advance, this recipe is a winner! You can prepare the cod and vegetable mixture a day ahead and store it in the refrigerator. Just add the cheese and bake when you’re ready to serve. Leftovers can be stored in an airtight container in the fridge for up to 3 days. Reheat in the oven or microwave until warmed through.

So, what are you waiting for? Try this Bacalhau com Legumes Gratinado recipe today and enjoy a creamy, flavorful dish that’s sure to become a family favorite. It’s perfect for those busy nights when you need something quick yet satisfying. And remember, cooking should be fun, so don’t hesitate to get creative with your ingredients!

Bacalhau com Legumes Gratinado – Cremoso e Saboroso

Prep Time 30 minutes
Cook Time 45 minutes
Total Time 1 hour 15 minutes
Servings 4 servings
Calories 450
A delicious Portuguese-inspired baked cod with colorful vegetables, topped with creamy cheese and herbs, perfect for a hearty meal.

Ingredients

Main Ingredients

  • 0.5 kg de bacalhau dessalgado
  • 2 large batatas grandes
  • 2 large cenouras
  • 1 red pimentão vermelho
  • 1 yellow pimentão amarelo
  • 1 abobrinha abobrinha
  • 1 large cebola grande
  • 2 dentes alho
  • 200 ml creme de leite
  • 150 g queijo parmesão ralado
  • 50 g manteiga
  • Azeite de oliva a gosto
  • Sal e pimenta-do-reino a gosto
  • Salsinha picada para decorar

Instructions 

  • Preheat oven to 350°F (180°C). Desalt the bacalhau if needed, then cook and flake it. Slice potatoes, carrots, and zucchini thinly. Sauté chopped onion and garlic in olive oil until translucent. Layer vegetables and bacalhau in a baking dish, alternating layers. Mix cream, grated cheese, butter, salt, and pepper, then pour over the layered ingredients. Bake for 45 minutes until golden. Garnish with chopped parsley before serving.

Notes

For best flavor, use high-quality ingredients and serve hot garnished with fresh parsley.
Calories: 450kcal
Cost: $15
Course: Main Course
Cuisine: Portuguese
Keyword: bacalhau, gratin, vegetables

Oh, my goodness! If you’re anything like me, you know that sometimes nothing hits the spot quite like a creamy chocolate frozen treat. Today, I’m thrilled to share my recipe for Sorvetão de Chocolate Cremoso – a delightful dessert that’s not only easy to make but also incredibly satisfying. With just a few simple ingredients, you can whip up this irresistible frozen delight that will have your family begging for seconds. And let’s be honest, who doesn’t love a sweet treat after a long day? Plus, it’s a fantastic way to cool down during those warm summer evenings!

Why You’ll Love This Recipe

  • It’s a quick and easy dessert that can be made in no time.
  • Perfect for family gatherings or a cozy night in.
  • Rich, creamy chocolate flavor that satisfies any sweet tooth.
  • Great for meal prep – make it ahead of time!
  • Pairs wonderfully with your favorite easy pasta recipes for a complete meal.

Ingredients

To make this delicious Sorvetão de Chocolate Cremoso, you’ll need the following ingredients:

  • 2 cups heavy cream
  • 1 cup sweetened condensed milk
  • 1 cup cocoa powder
  • 1 teaspoon vanilla extract
  • 1/2 cup chocolate chips (optional)

Full ingredient list with measurements is provided in the printable recipe card below.

How to Make the Recipe

Now, let’s dive into the fun part – making this creamy chocolate frozen delight!

  1. In a large mixing bowl, whip the heavy cream until soft peaks form. This will give your sorvetão that luscious, creamy texture.
  2. In another bowl, combine the sweetened condensed milk, cocoa powder, and vanilla extract. Mix until smooth and well combined.
  3. Gently fold the whipped cream into the chocolate mixture. Be careful not to deflate the cream; we want to keep it light and airy!
  4. If you’re feeling indulgent, fold in the chocolate chips for an extra chocolatey bite.
  5. Transfer the mixture into a suitable container and smooth the top. Cover it tightly with plastic wrap.
  6. Freeze for at least 4 hours, or until firm. I usually make it the night before for the best results!

Pro Tips for Making the Recipe

Here are some of my favorite tips to ensure your Sorvetão de Chocolate Cremoso turns out perfectly:

  • Make sure your heavy cream is cold before whipping; this helps it whip up nicely.
  • For a fun twist, try adding a splash of espresso to enhance the chocolate flavor.
  • Experiment with different mix-ins like nuts or fruit for a unique touch.
  • If you’re short on time, you can use store-bought whipped cream instead of whipping your own.

How to Serve

When it’s time to serve your Sorvetão de Chocolate Cremoso, here are a few ideas:

  • Serve it in bowls topped with whipped cream and chocolate shavings.
  • Pair it with a slice of your favorite cake for a decadent dessert.
  • For a fun family night, scoop it into cones and enjoy it like ice cream!
  • It also makes a delightful addition to your quick family dinners as a sweet finish.

Make Ahead and Storage

This dessert is perfect for making ahead of time! You can store your Sorvetão de Chocolate Cremoso in the freezer for up to two weeks. Just make sure it’s well covered to prevent freezer burn. When you’re ready to enjoy it, let it sit at room temperature for a few minutes before scooping to make serving easier.

So, there you have it! A simple yet indulgent recipe that’s sure to impress your family and friends. Whether you’re looking for a sweet treat after a busy day or a delightful dessert to accompany your 30-minute meals, this creamy chocolate frozen delight is the answer. Don’t forget to check out my other weeknight dinner ideas and creamy garlic pasta recipes for a complete meal experience. Happy cooking!

Sorvetão de Chocolate Cremoso – Fácil e Irresistível

Prep Time 30 minutes
Total Time 30 minutes
Servings 10 pieces
Calories 350
Delicie-se com este sorvete de chocolate cremoso, fácil de fazer e perfeito para dias quentes ou ocasiões especiais.

Ingredients

Dough

  • 500 ml creme de leite fresco (bem gelado)
  • 1 lata leite condensado
  • 200 g chocolate meio amargo
  • 100 g chocolate ao leite
  • 1 colher de sopa essência de baunilha

Cobertura e confeitos

Instructions 

  • Derreta os chocolates meio amargo e ao leite em banho-maria ou no micro-ondas, misture até obter um creme homogêneo.
  • Bata o creme de leite fresco até ficar firme, adicione o leite condensado, a essência de baunilha e misture delicadamente.
  • Incorpore o chocolate derretido à mistura de creme, misture bem até ficar uniforme.
  • Despeje a mistura em uma forma de vidro ou silicone, cubra e leve ao freezer por cerca de 6 horas ou até firmar completamente.
  • Antes de servir, decore com cobertura de chocolate e confeitos a gosto.

Notes

Use chocolate de boa qualidade para um sabor mais intenso e cremoso.
Calories: 350kcal
Cost: $15
Course: Dessert
Cuisine: Brazilian
Keyword: chocolate