Author

thomas

Browsing

As I stand in my kitchen, the aroma of Bacalhoada Tradicional Portuguesa fills the air, and I can’t help but smile. This traditional Portuguese dish, featuring salted cod, is not just a meal; it’s a celebration of flavors and memories. If you’re looking for a delightful recipe that can easily become a staple in your home, you’ve come to the right place! Plus, it’s a fantastic option for quick family dinners, especially when you want something hearty yet simple. And if you’re a fan of easy pasta recipes, you’ll find that this dish can be just as comforting!

Why You’ll Love This Recipe

  • It’s a classic dish that brings a taste of Portugal to your table.
  • Perfect for weeknight dinner ideas that impress without the stress.
  • Can be made ahead, making it ideal for busy families.
  • Rich in flavor and nutrients, thanks to the combination of vegetables and cod.
  • Great for serving a crowd or enjoying as leftovers!

Ingredients

To make the perfect Bacalhoada Tradicional Portuguesa, you’ll need the following ingredients:

  • 1 lb salted cod (bacalhau), soaked for 24 hours
  • 4 medium potatoes, sliced
  • 2 large onions, sliced
  • 2 cloves garlic, minced
  • 1 bell pepper, sliced
  • 1 can of diced tomatoes (14 oz)
  • 1/2 cup black olives
  • 1/4 cup olive oil
  • Salt and pepper to taste
  • Fresh parsley for garnish

Full ingredient list with measurements is provided in the printable recipe card below.

How to Make the Recipe

Now, let’s dive into the steps to create this delicious Bacalhoada:

  1. Start by preheating your oven to 375°F (190°C).
  2. In a large pot, boil the soaked cod for about 10 minutes. Drain and let it cool, then flake the fish into bite-sized pieces.
  3. In a large baking dish, layer the sliced potatoes, onions, and bell peppers. Sprinkle with salt and pepper.
  4. Add the flaked cod on top of the vegetables.
  5. In a separate bowl, mix the diced tomatoes, minced garlic, and olive oil. Pour this mixture over the cod and vegetables.
  6. Top with black olives and cover the dish with aluminum foil.
  7. Bake in the preheated oven for 30 minutes. Remove the foil and bake for an additional 15 minutes until the top is golden brown.
  8. Garnish with fresh parsley before serving.

Pro Tips for Making the Recipe

Here are some of my favorite tips to ensure your Bacalhoada turns out perfectly:

  • Make sure to soak the salted cod for at least 24 hours to remove excess salt.
  • Feel free to add other vegetables like carrots or zucchini for extra flavor and nutrition.
  • If you’re short on time, consider using pre-cooked potatoes to speed up the process.
  • This dish can be made in advance and reheated, making it a great option for busy weeknights.
  • Pair it with a side salad or some crusty bread for a complete meal.

How to Serve

When it comes to serving Bacalhoada, I love to keep it simple. Serve it hot from the oven, garnished with fresh parsley. It pairs beautifully with a light salad or some roasted vegetables. If you’re looking for a comforting side, consider making a creamy garlic pasta to complement the flavors of the dish. This can easily become one of your go-to weeknight dinner ideas!

Make Ahead and Storage

This Bacalhoada is perfect for meal prep! You can prepare it a day in advance and store it in the refrigerator. Just cover it tightly with plastic wrap or aluminum foil. When you’re ready to enjoy, simply reheat it in the oven at 350°F (175°C) until warmed through. Leftovers can be stored in an airtight container in the fridge for up to three days, making it a fantastic option for quick family dinners throughout the week.

So, what are you waiting for? Dive into this delightful Bacalhoada Tradicional Portuguesa and bring a taste of Portugal to your home. I promise it will become a cherished recipe in your collection, just like my favorite easy pasta recipes. Happy cooking!

Bacalhado Tradicional Portuguesa

Prep Time 30 minutes
Cook Time 45 minutes
Total Time 1 hour 15 minutes
Servings 6 servings
Calories 350
A classic Portuguese dish featuring salted cod, baked with vegetables and herbs, offering a hearty and flavorful experience.

Ingredients

Main ingredients

  • 1.5 kg de bacalhau dessalgado (em postas ou desfiado)
  • 4 medium batatas cortadas em rodelas grossas
  • 2 large cebolas em fatias
  • 2 dentes de alho picados
  • 1 red pimentão vermelho em tiras
  • 1 yellow or green pimentão amarelo ou verde em tiras
  • 2 large tomates maduros sem pele, cortados em cubos grandes
  • 100 g de azeitonas pretas sem caroço
  • 3 ovos cozidos cortados em rodelas
  • 0.5 cup de cheiro-verde picado
  • a gosto Sal e pimenta-do-reino
  • generously Azeite de oliva extravirgem para regar

Instructions 

  • Dessalgue o bacalhau em água fria por 24 a 36 horas, trocando a água várias vezes.
  • Preaqueça o forno a 180°C e prepare uma assadeira untada.
  • Coloque o bacalhau, as batatas, cebolas, alho, pimentões, tomates, azeitonas e ovos na assadeira, intercalando os ingredientes.
  • Regue generosamente com azeite de oliva e tempere com sal e pimenta a gosto.
  • Cubra com papel alumínio e asse por 30 minutos, depois retire o papel e asse por mais 15 minutos até dourar.

Notes

Para melhor sabor, deixe o bacalhau dessalgar lentamente na geladeira.
Calories: 350kcal
Cost: $15
Course: Main Course
Cuisine: Portuguese
Keyword: bacalhau

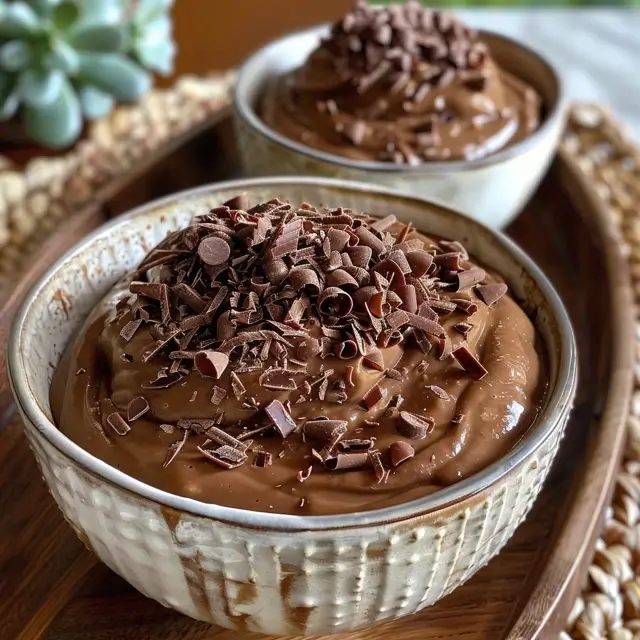
Have you ever craved a dessert that’s not only delicious but also incredibly easy to make? Well, let me introduce you to my favorite treat: Brigadeirão Gelado Cremoso de Chocolate Meio Amargo! This creamy chocolate dessert is a delightful way to satisfy your sweet tooth, and it’s perfect for any occasion. Plus, it’s a fantastic addition to your repertoire of easy pasta recipes and 30-minute meals for those busy weeknights. Let’s dive into this scrumptious recipe!

Why You’ll Love This Recipe

  • It’s a no-bake dessert, making it perfect for warm days.
  • Rich, creamy chocolate flavor that will impress your family and friends.
  • Quick and easy to prepare, so you can whip it up in no time.
  • Perfect for gatherings or as a sweet treat after a quick family dinner.
  • Can be made ahead of time, allowing you to enjoy your evening without stress.

Ingredients

To make Brigadeirão Gelado Cremoso de Chocolate Meio Amargo, you’ll need the following ingredients:

  • 1 can of sweetened condensed milk
  • 1 can of evaporated milk
  • 1 cup of semi-sweet chocolate chips
  • 1 tablespoon of unsweetened cocoa powder
  • 1 tablespoon of butter
  • 1 teaspoon of vanilla extract
  • 1 cup of whipped cream
  • Chocolate shavings for garnish (optional)

Full ingredient list with measurements is provided in the printable recipe card below.

How to Make the Recipe

Now, let’s get to the fun part—making this delightful dessert! Follow these simple steps:

  1. In a saucepan over low heat, combine the sweetened condensed milk, evaporated milk, chocolate chips, cocoa powder, and butter. Stir continuously until the chocolate is melted and the mixture is smooth.
  2. Remove the saucepan from heat and stir in the vanilla extract. Allow the mixture to cool slightly.
  3. Once cooled, gently fold in the whipped cream until well combined. This will give your Brigadeirão that creamy texture we all love!
  4. Pour the mixture into a mold or a serving dish of your choice. Cover it with plastic wrap and refrigerate for at least 4 hours, or until set.
  5. When ready to serve, carefully unmold the Brigadeirão onto a serving plate. Garnish with chocolate shavings if desired, and enjoy!

Pro Tips for Making the Recipe

Here are some helpful suggestions to ensure your Brigadeirão turns out perfectly:

  • Make sure to stir the chocolate mixture continuously to prevent it from burning.
  • For a richer flavor, you can use dark chocolate chips instead of semi-sweet.
  • If you want to add a twist, consider incorporating a splash of coffee or a hint of orange zest for a unique flavor profile.
  • Don’t rush the chilling process; letting it set properly is key to achieving that perfect creamy texture.

How to Serve

Brigadeirão is best served chilled. You can slice it like a cake or scoop it out into bowls. Pair it with fresh berries or a dollop of whipped cream for an extra touch of elegance. It’s a fantastic dessert to serve after a hearty meal or as a sweet treat during a cozy family gathering. It’s also a great way to impress guests at your next dinner party!

Make Ahead and Storage

This dessert is perfect for making ahead of time! You can prepare Brigadeirão up to two days in advance and store it in the refrigerator. Just make sure it’s well covered to keep it fresh. If you have leftovers (which is rare, trust me!), you can keep them in an airtight container in the fridge for up to three days. Just remember to enjoy it chilled for the best experience!

So there you have it! Brigadeirão Gelado Cremoso de Chocolate Meio Amargo is not just a dessert; it’s a celebration of chocolatey goodness that’s easy to make and even easier to enjoy. Whether you’re looking for a sweet treat after a busy day or a show-stopping dessert for a special occasion, this recipe is sure to become a favorite in your home. Happy cooking!

Brigadeirão Gelado Cremoso de Chocolate Meio Amargo

Prep Time 30 minutes
Total Time 30 minutes
Servings 8 pieces
Calories 350
A delicious and creamy frozen chocolate dessert made with dark chocolate and a smooth texture, perfect for special occasions or a sweet treat.

Ingredients

Main Ingredients

  • 500 grams chocolate meio amargo
  • 400 grams creme de leite
  • 1 lata leite condensado
  • 1 sachê gelatina incolor (12 grams, diluted as per manufacturer instructions)
  • to taste granulado de chocolate para decorar (optional: strawberries or cherries for decoration)

Instructions 

  • Prepare the gelatin according to the manufacturer's instructions.
  • Melt the dark chocolate and mix with the cream, condensed milk, and dissolved gelatin until smooth.
  • Pour the mixture into a mold and refrigerate for approximately 8 hours or until firm.
  • Decorate with chocolate sprinkles, strawberries, or cherries as desired before serving.

Notes

Ensure the mixture is well blended for a smooth texture and refrigerate until fully set for best results.
Calories: 350kcal
Cost: $15
Course: Dessert
Cuisine: Brazilian
Keyword: chocolate

Have you ever craved a warm, comforting bread that brings a taste of tradition right into your kitchen? Well, let me introduce you to Broa de Milho Caseira, a delightful Brazilian cornbread that is not only easy to make but also perfect for quick family dinners! This recipe is a wonderful addition to your collection of easy pasta recipes and will surely impress your loved ones. So, roll up your sleeves, and let’s dive into this delicious journey!

Why You’ll Love This Recipe

  • Simple ingredients that you probably already have at home.
  • Perfect for any meal – breakfast, lunch, or dinner!
  • Great for pairing with soups, stews, or even as a snack.
  • It’s a fantastic way to introduce your family to Brazilian cuisine.
  • Quick to prepare, making it ideal for 30-minute meals.

Ingredients

To make this scrumptious Broa de Milho Caseira, you will need the following ingredients:

  • 2 cups cornmeal
  • 1 cup all-purpose flour
  • 1 cup milk
  • 1/2 cup sugar
  • 1/4 cup vegetable oil
  • 1 tablespoon baking powder
  • 1 teaspoon salt
  • 2 large eggs
  • Optional: 1/2 cup cheese for a cheesy twist!

Full ingredient list with measurements is provided in the printable recipe card below.

How to Make the Recipe

Now, let’s get to the fun part – making the Broa de Milho Caseira!

  1. Preheat your oven to 375°F (190°C) and grease a baking dish or line it with parchment paper.
  2. In a large mixing bowl, combine the cornmeal, all-purpose flour, sugar, baking powder, and salt. Mix well.
  3. In another bowl, whisk together the milk, vegetable oil, and eggs until well combined.
  4. Pour the wet ingredients into the dry ingredients and stir until just combined. If you’re adding cheese, fold it in gently.
  5. Pour the batter into the prepared baking dish and smooth the top with a spatula.
  6. Bake for 30-35 minutes or until the top is golden brown and a toothpick inserted in the center comes out clean.
  7. Let it cool for a few minutes before slicing and serving. Enjoy your delicious Broa de Milho Caseira!

Pro Tips for Making the Recipe

Here are some helpful suggestions to ensure your Broa de Milho Caseira turns out perfectly:

  • For a richer flavor, consider using buttermilk instead of regular milk.
  • Don’t overmix the batter; it’s okay if there are a few lumps.
  • Feel free to experiment with different cheeses or add herbs for extra flavor.
  • This bread is best enjoyed fresh, but it can also be toasted for a delightful crunch!

How to Serve

Broa de Milho Caseira is incredibly versatile! Here are some serving suggestions:

  • Pair it with a hearty soup or stew for a comforting meal.
  • Serve it alongside a fresh salad for a light lunch.
  • Enjoy it as a snack with butter or your favorite jam.
  • It also makes a great side for weeknight dinner ideas like grilled chicken or roasted vegetables.

Make Ahead and Storage

If you want to prepare this bread in advance, you can make the batter and store it in the refrigerator for up to 24 hours before baking. Just give it a good stir before pouring it into the baking dish. For storage, keep any leftovers in an airtight container at room temperature for up to 3 days. You can also freeze the bread for up to 3 months. Just thaw it overnight in the fridge and reheat it in the oven for a few minutes before serving.

Now that you know how to make this delightful Broa de Milho Caseira, I hope you’re as excited as I am to try it! It’s a wonderful addition to your repertoire of easy pasta recipes and will surely become a family favorite. So, gather your ingredients, and let’s make some delicious memories together!

Broa de Milho Caseira – Receita Saborosa e Tradicional

Prep Time 20 minutes
Cook Time 30 minutes
Total Time 50 minutes
Servings 8 pieces
Calories 250
A traditional Brazilian cornbread with a rich, moist texture and a hint of sweetness, perfect for sharing with family and friends.

Ingredients

Dough

  • 3 eggs eggs
  • 1.5 cups sugar
  • 1 cup butter ((or margarine))
  • 2 tablespoons erva-doce ((optional))
  • 2 cups finely ground corn flour
  • 3 cups wheat flour
  • 1 tablespoon chemical leavening agent (fermento em pó químico)
  • a pinch salt salt
  • 3 tablespoons milk

For topping

  • crystal sugar crystal sugar for sprinkling

Instructions 

  • Preheat oven to 180°C (356°F). Grease a baking dish with butter.
  • In a bowl, beat eggs and sugar until well combined. Add melted butter and mix.
  • In a separate bowl, mix corn flour, wheat flour, salt, and leavening. Gradually add dry ingredients to wet mixture, stirring gently.
  • Add milk and mix until smooth. Pour batter into prepared baking dish.
  • Sprinkle crystal sugar on top. Bake for 25-30 minutes until golden and a toothpick inserted comes out clean.

Notes

For a richer flavor, let the bread rest for a few minutes before serving.
Calories: 250kcal
Cost: $15
Course: Dessert
Cuisine: Brazilian
Keyword: cornbread

There’s something truly magical about the aroma of freshly baked cake wafting through the kitchen, isn’t there? Today, I’m excited to share with you my favorite recipe for Bolo de Cenoura Fofinho com Cobertura de Brigadeiro, a fluffy carrot cake topped with a rich chocolate glaze that will make your taste buds dance! This delightful treat is perfect for any occasion, whether you’re hosting a family gathering or simply indulging in a sweet moment at home. Plus, it’s a fantastic way to sneak in some veggies! And if you’re looking for easy pasta recipes to pair with this dessert for a complete meal, I’ve got you covered!

Why You’ll Love This Recipe

  • It’s incredibly fluffy and moist, making it a crowd-pleaser.
  • The brigadeiro topping adds a rich, chocolatey flavor that complements the carrot perfectly.
  • It’s a simple recipe that doesn’t require fancy ingredients or equipment.
  • Perfect for quick family dinners or as a sweet treat for your next gathering.
  • It can be made ahead of time, making it a great option for busy weeknight dinner ideas.

Ingredients

To make this delicious Bolo de Cenoura, you’ll need the following ingredients:

  • 2 cups of grated carrots (about 3 medium carrots)
  • 1 cup of sugar
  • 1 cup of vegetable oil
  • 4 large eggs
  • 2 cups of all-purpose flour
  • 1 tablespoon of baking powder
  • 1/2 teaspoon of salt
  • For the brigadeiro topping:
  • 1 can of sweetened condensed milk
  • 2 tablespoons of cocoa powder
  • 2 tablespoons of unsalted butter
  • Chocolate sprinkles for decoration

Full ingredient list with measurements is provided in the printable recipe card below.

How to Make the Recipe

Now, let’s dive into the steps to create this delightful cake:

  1. Preheat your oven to 350°F (175°C) and grease a 9-inch round cake pan.
  2. In a blender, combine the grated carrots, sugar, vegetable oil, and eggs. Blend until smooth.
  3. In a large mixing bowl, whisk together the flour, baking powder, and salt.
  4. Pour the carrot mixture into the dry ingredients and mix until just combined.
  5. Pour the batter into the prepared cake pan and bake for 30-35 minutes, or until a toothpick inserted in the center comes out clean.
  6. While the cake is baking, prepare the brigadeiro topping. In a saucepan, combine the sweetened condensed milk, cocoa powder, and butter. Cook over medium heat, stirring constantly until it thickens and starts to pull away from the sides of the pan.
  7. Once the cake is done, let it cool for a few minutes before transferring it to a wire rack. Once cooled, spread the brigadeiro topping over the cake and sprinkle with chocolate sprinkles.

Pro Tips for Making the Recipe

Here are some of my favorite tips to ensure your Bolo de Cenoura turns out perfectly:

  • Make sure to grate the carrots finely for a smoother texture.
  • Don’t overmix the batter; mix just until combined to keep the cake fluffy.
  • For an extra touch, you can add chopped nuts or chocolate chips to the batter.
  • Let the brigadeiro topping cool slightly before spreading it on the cake for a smoother finish.

How to Serve

This cake is delightful on its own, but here are some serving suggestions to elevate your dessert experience:

  • Serve with a scoop of vanilla ice cream for a delicious contrast.
  • Pair it with a cup of coffee or tea for a cozy afternoon treat.
  • For a festive touch, add fresh berries on the side.

Make Ahead and Storage

If you’re planning ahead, this cake can be made a day in advance. Just store it in an airtight container at room temperature. If you have leftovers (which is rare!), you can keep them in the fridge for up to 3 days. Just make sure to let it come to room temperature before serving again. This cake is perfect for those busy weeknight dinner ideas when you want something sweet without the fuss!

So there you have it! A delightful recipe for Bolo de Cenoura Fofinho com Cobertura de Brigadeiro that’s sure to impress your family and friends. And if you’re looking for more quick family dinners or 30-minute meals, don’t forget to check out my collection of creamy garlic pasta recipes that are perfect for busy nights. Happy baking!

Bolo de Cenoura Fofinho com Cobertura de Brigadeiro

Prep Time 30 minutes
Cook Time 45 minutes
Total Time 1 hour 15 minutes
Servings 12 pieces
Calories 350
A delicious and fluffy carrot cake topped with rich brigadeiro chocolate frosting, perfect for celebrations or a sweet treat.

Ingredients

PARA A MASSA DO BOLO

  • 4 units cenouras, descascadas e cortadas em rodelas
  • 3 units ovos
  • 1 cup óleo vegetal
  • 2 cups açúcar
  • 2 cups farinha de trigo
  • 1 tbsp fermento em pó

PARA O BRIGADEIRO

  • 3 cans leite condensado
  • 3 caixinhas creme de leite
  • 2 tbsp manteiga
  • 1 cup cacau em pó
  • 300 grams chocolate meio amargo

Granulado para decorar

Instructions 

  • Pré-aqueça o forno a 180°C. Misture as cenouras, ovos, óleo e açúcar no liquidificador até obter uma massa homogênea.
  • Adicione a farinha de trigo e o fermento à mistura e mexa delicadamente.
  • Despeje a massa em uma forma untada e asse por aproximadamente 45 minutos ou até que um palito saia limpo.
  • Para o brigadeiro, cozinhe o leite condensado, creme de leite, manteiga e cacau em pó em fogo médio, mexendo até obter um brigadeiro consistente.
  • Deixe o brigadeiro esfriar antes de espalhar sobre o bolo já frio.
  • Decore com granulado e sirva.

Notes

Para um sabor mais intenso, adicione uma pitada de sal ao brigadeiro.
Calories: 350kcal
Cost: $15
Course: Dessert
Cuisine: Brazilian
Keyword: cake, carrot, chocolate

Have you ever found yourself in a cooking rut, staring at the same old spices and wondering how to add a little pizzazz to your meals? Well, let me introduce you to my secret weapon: Tempero Caseiro Completo! This homemade seasoning blend is not only versatile but also incredibly easy to whip up. It’s perfect for those quick family dinners and can elevate even the simplest of dishes, like my favorite creamy garlic pasta. So, let’s dive into how to make the perfect blend that will transform your cooking!

Why You’ll Love This Recipe

  • It’s a time-saver for 30-minute meals!
  • Enhances the flavor of all your favorite dishes.
  • Perfect for easy pasta recipes and more.
  • Made with fresh herbs and oils, it’s healthier than store-bought options.
  • Customizable to suit your taste preferences.

Ingredients

To create your own Tempero Caseiro Completo, you’ll need a few simple ingredients that you might already have in your pantry. Here’s what you’ll need:

  • 1 cup of fresh parsley, chopped
  • 1/2 cup of fresh cilantro, chopped
  • 1/4 cup of fresh oregano, chopped
  • 1/4 cup of garlic powder
  • 1/4 cup of onion powder
  • 1/2 cup of olive oil
  • Salt and pepper to taste

Full ingredient list with measurements is provided in the printable recipe card below.

How to Make the Recipe

Making Tempero Caseiro Completo is as easy as pie! Here’s how you can do it:

  1. In a large mixing bowl, combine the chopped parsley, cilantro, and oregano.
  2. Add the garlic powder and onion powder to the herbs.
  3. Slowly drizzle in the olive oil while stirring to combine all the ingredients.
  4. Season with salt and pepper to taste.
  5. Transfer the mixture to an airtight container and store it in the refrigerator.

And just like that, you have a delicious seasoning blend ready to enhance your meals!

Pro Tips for Making the Recipe

Here are some of my favorite tips to ensure your Tempero Caseiro Completo turns out perfectly:

  • Use fresh herbs for the best flavor. Dried herbs can work in a pinch, but fresh is always better!
  • Feel free to adjust the quantities of herbs based on your personal preference.
  • If you want a spicier kick, add a pinch of red pepper flakes.
  • This blend can also be used as a marinade for meats or vegetables.
  • Try it in your weeknight dinner ideas for a quick flavor boost!

How to Serve

Now that you have your Tempero Caseiro Completo, let’s talk about how to use it! This seasoning is incredibly versatile:

  • Sprinkle it over roasted vegetables for a burst of flavor.
  • Mix it into your favorite easy pasta recipes for a delicious twist.
  • Use it as a seasoning for grilled chicken or fish.
  • Stir it into soups or stews for added depth.
  • It’s also fantastic in salad dressings!

With this blend, your meals will never be boring again!

Make Ahead and Storage

One of the best things about Tempero Caseiro Completo is that it can be made ahead of time. Here are some storage tips:

  • Store your seasoning in an airtight container in the refrigerator for up to two weeks.
  • If you want to keep it longer, consider freezing it in ice cube trays. Just pop out a cube whenever you need a flavor boost!
  • Label your container with the date so you know when to use it by.

Now you’re all set to enjoy this delightful seasoning in your cooking! Whether you’re preparing 30-minute meals or planning a cozy family dinner, Tempero Caseiro Completo will be your go-to for flavor. Happy cooking!

Tempero Caseiro Completo

Prep Time 15 minutes
Cook Time 30 minutes
Total Time 45 minutes
Servings 4 servings
Calories 150
A flavorful homemade seasoning blend made with fresh herbs, garlic, and spices to elevate your dishes.

Ingredients

Vegetables and Herbs

  • 2 large onions
  • 300 g garlic, peeled
  • 1/2 bunch salsinha
  • 1/2 bunch cebolinha
  • 1 piece pimenta dedo-de-moça (optional) (seeds removed)
  • 100 ml azeite de oliva
  • 100 ml óleo vegetal
  • 1 tbsp sal
  • 1 tsp louro em pó (optional)

Instructions 

  • Descase as cebolas e o alho. Higienize a salsinha, a cebolinha e a pimenta, se usar.
  • Pique as cebolas, alho, salsinha, cebolinha e pimenta. Misture tudo com sal e louro em pó.
  • Adicione azeite e óleo, misture bem. Armazene em potes de vidro esterilizados.
  • Para descartar alho com mais facilidade, transfira o tempero para potes de vidro pequenos e conserve na geladeira.

Notes

Use sempre um colher limpo e seca para retirar o tempero.
Calories: 150kcal
Cost: $15
Course: Seasoning
Cuisine: Brazilian
Keyword: garlic, herbs, spices

There’s something incredibly satisfying about the smell of freshly baked bread wafting through your home, isn’t there? Today, I’m excited to share my favorite recipe for Pão Integral Macio e Nutritivo, or soft and nutritious whole wheat bread. This delightful bread is not only easy to make but also packed with nutrients, making it a perfect addition to your family meals. Plus, it pairs wonderfully with quick family dinners and can even elevate your easy pasta recipes to a whole new level!

Why You’ll Love This Recipe

  • Simple ingredients that you probably already have at home.
  • Perfectly soft texture that everyone will love.
  • Nutritious and wholesome, ideal for health-conscious families.
  • Versatile enough to use for sandwiches, toast, or as a side for 30-minute meals.
  • Great for meal prep and can be frozen for later use.

Ingredients

To make this delicious whole wheat bread, you will need the following ingredients:

  • 3 cups whole wheat flour
  • 1 cup warm water (about 110°F)
  • 2 tablespoons honey or maple syrup
  • 2 tablespoons olive oil
  • 1 packet (2 1/4 teaspoons) active dry yeast
  • 1 teaspoon salt
  • Optional: seeds or nuts for added texture

Full ingredient list with measurements is provided in the printable recipe card below.

How to Make the Recipe

Now, let’s get our hands a little floury and dive into the steps to create this amazing bread:

  1. In a small bowl, combine the warm water, honey, and yeast. Let it sit for about 5-10 minutes until it becomes frothy.
  2. In a large mixing bowl, combine the whole wheat flour and salt. Make a well in the center and pour in the yeast mixture along with the olive oil.
  3. Mix until a dough forms. If the dough is too sticky, add a little more flour, one tablespoon at a time.
  4. Knead the dough on a floured surface for about 8-10 minutes until it’s smooth and elastic.
  5. Place the dough in a greased bowl, cover it with a damp cloth, and let it rise in a warm place for about 1 hour or until it doubles in size.
  6. Once risen, punch down the dough and shape it into a loaf. Place it in a greased loaf pan.
  7. Cover and let it rise again for about 30 minutes.
  8. Bake in a preheated oven at 350°F (175°C) for 30-35 minutes or until the top is golden brown and sounds hollow when tapped.
  9. Let it cool on a wire rack before slicing.

Pro Tips for Making the Recipe

Here are some of my favorite tips to ensure your whole wheat bread turns out perfectly every time:

  • Make sure your water is warm, not hot, to activate the yeast without killing it.
  • For a richer flavor, consider adding a tablespoon of vital wheat gluten to your flour.
  • Experiment with different add-ins like sunflower seeds or walnuts for a delightful crunch.
  • If you’re short on time, you can use a bread machine to knead and bake your bread!

How to Serve

This soft and nutritious whole wheat bread is incredibly versatile! Here are some serving suggestions:

  • Enjoy it fresh with a pat of butter or a drizzle of honey.
  • Use it for sandwiches filled with your favorite ingredients for a quick lunch.
  • Pair it with a hearty soup or salad for a wholesome dinner.
  • Toast slices and serve them alongside creamy garlic pasta for a comforting weeknight dinner idea.

Make Ahead and Storage

If you want to prepare ahead, this bread freezes beautifully! Here’s how to store it:

  • Once cooled, wrap the loaf tightly in plastic wrap and then in aluminum foil.
  • Label and freeze for up to 3 months. When ready to use, simply thaw at room temperature.
  • For shorter storage, keep the bread in an airtight container at room temperature for up to 3 days.

Now that you have this delightful recipe for Pão Integral Macio e Nutritivo, I hope you feel inspired to bake your own bread at home! It’s a wonderful way to bring your family together and create delicious meals, whether it’s for quick family dinners or a cozy weekend brunch. Happy baking!

Pão Integral Macio e Nutritivo

Prep Time 15 minutes
Cook Time 30 minutes
Total Time 45 minutes
Servings 10 slices
Calories 180
A wholesome and soft whole wheat bread packed with nutrients and flavor, perfect for a healthy snack or meal.

Ingredients

Flours

  • 3 cups farinha de trigo integral
  • 1 cup farinha de trigo branca

Sweeteners

  • 2 tablespoons mel ou açúcar mascavo

Salt

  • 1 teaspoon sal

Yeast

  • 1 soup fermento biológico seco

Water

  • 1.5 cups água morna

Oils

  • 2 tablespoons óleo de coco ou azeite

Optional Seeds and Flakes

  • 1 tablespoon semente de linhaça (opcional)
  • 1 tablespoon aveia em flocos (opcional)

Egg Wash

  • 1 egg ovo batido (opcional)

Instructions 

  • Ative o fermento: misture o fermento com água morna e uma colher de sopa de mel ou açúcar mascavo, deixe descansar por 10 minutos até formar uma esponja.
  • Prepare a massa: em uma tigela grande, misture as farinhas, sal, sementes e aveia. Adicione a mistura de fermento, óleo e o ovo batido, sove até obter uma massa homogênea.
  • Deixe a massa descansar por 30 a 35 minutos até dobrar de tamanho.
  • Modele a massa em forma de pão ou pequenos pães, coloque em uma assadeira untada.
  • Asse em forno pré-aquecido a 180°C por 30 minutos até dourar.
  • Opcional: pincele com ovo batido antes de assar para obter uma crosta dourada.

Notes

Para um pão mais nutritivo, adicione sementes ou aveia na massa.
Calories: 180kcal
Cost: $15
Course: bread
Cuisine: Brazilian
Keyword: whole wheat

Have you ever found yourself in a dinner rut, staring blankly at the fridge, wondering what to whip up for your family? Well, let me introduce you to a dish that will not only save your weeknight dinners but also become a family favorite: Fricassê de Frango Cremoso e Fácil. This creamy chicken fricassée is a delightful blend of flavors and textures, making it one of the best easy pasta recipes you’ll ever try! With simple ingredients and a quick cooking time, it’s perfect for those busy evenings when you need 30-minute meals that don’t skimp on taste.

Why You’ll Love This Recipe

  • Quick and easy to prepare, making it ideal for quick family dinners.
  • Rich, creamy flavor that everyone will adore.
  • Perfect for using up leftover chicken or pasta.
  • Versatile enough to pair with your favorite sides.
  • Great for meal prep and can be stored for later!

Ingredients

To make this delicious Fricassê de Frango Cremoso, you’ll need the following ingredients:

  • 2 cups cooked chicken, shredded
  • 1 cup pasta (your choice, but I love using penne or fusilli)
  • 1 can (10.5 oz) cream of mushroom soup
  • 1 cup sour cream
  • 1 cup chicken broth
  • 1 cup grated cheese (mozzarella or cheddar work well)
  • 2 cloves garlic, minced
  • 1 small onion, chopped
  • Salt and pepper to taste
  • Fresh parsley for garnish (optional)

Full ingredient list with measurements is provided in the printable recipe card below.

How to Make the Recipe

Now, let’s dive into the cooking process! Follow these simple steps to create your creamy chicken fricassée:

  1. In a large skillet, sauté the chopped onion and minced garlic over medium heat until they are soft and fragrant.
  2. Add the shredded chicken to the skillet and stir to combine.
  3. In a separate bowl, mix together the cream of mushroom soup, sour cream, and chicken broth until smooth.
  4. Pour the creamy mixture over the chicken and stir well to coat everything evenly.
  5. Stir in the cooked pasta and half of the grated cheese, mixing until everything is well combined.
  6. Season with salt and pepper to taste.
  7. Sprinkle the remaining cheese on top and cover the skillet. Let it simmer for about 5-10 minutes until heated through and the cheese is melted.
  8. Garnish with fresh parsley if desired, and serve hot!

Pro Tips for Making the Recipe

Here are some of my favorite tips to ensure your Fricassê de Frango turns out perfectly:

  • Feel free to add vegetables like peas or bell peppers for extra nutrition and color.
  • If you want a bit of a kick, add some red pepper flakes or a dash of hot sauce.
  • For a lighter version, you can substitute Greek yogurt for sour cream.
  • Make sure to use leftover chicken or rotisserie chicken to save time!
  • This dish can also be made with turkey for a post-holiday meal!

How to Serve

This creamy chicken fricassée is delicious on its own, but you can elevate your meal by serving it with:

  • Garlic bread for dipping into the creamy sauce.
  • A fresh green salad to balance the richness of the dish.
  • Steamed vegetables like broccoli or green beans for added color and nutrition.
  • For a comforting twist, serve it over rice instead of pasta!

Make Ahead and Storage

This recipe is perfect for meal prep! You can make it ahead of time and store it in the refrigerator for up to 3 days. Just reheat it on the stove or in the microwave before serving. If you want to freeze it, let it cool completely, then transfer it to an airtight container. It will keep well in the freezer for up to 3 months. Just thaw it overnight in the fridge before reheating!

So there you have it! A delightful, creamy chicken fricassée that’s perfect for weeknight dinner ideas. I hope you enjoy making and sharing this dish with your loved ones as much as I do. Happy cooking!

Fricassê de Frango Cremoso e Fácil

Prep Time 15 minutes
Cook Time 30 minutes
Total Time 45 minutes
Servings 4 porções
Calories 450
Uma receita fácil e cremosa de frango, perfeita para um almoço ou jantar saboroso e rápido de preparar.

Ingredients

group

  • 1 lata milho-verde escorrido
  • 1 copo (200 g) requeijão cremoso
  • 1 lata creme de leite com soro
  • 1 xícara (chá) água filtrada
  • 2 peitos de frango cozido e desfiado
  • 100 g azeitonas verdes sem caroço (opcional)
  • 1 pitada sal
  • 200 g muçarela fatiada ou ralada
  • 100 g batata palha

Instructions 

  • Modo de preparo: Em uma panela, coloque o milho, requeijão, creme de leite, água, frango desfiado, azeitonas e sal. Misture bem e cozinhe até ficar cremoso.
  • Montar o fricassê: Em um refratário, coloque o creme de frango, cubra com muçarela e finalize com batata palha.
  • Leve ao forno preaquecido a 200°C por cerca de 15 minutos ou até dourar.
  • Retire do forno e sirva quente.

Notes

Para um sabor mais intenso, adicione queijo parmesão ralado por cima antes de levar ao forno.
Calories: 450kcal
Cost: $15
Course: Prato principal
Cuisine: brasileira
Keyword: frango

Have you ever craved a dessert that’s not only delicious but also incredibly easy to make? Well, let me introduce you to my favorite Brazilian treat: Cuca Cremosa com Leite Condensado. This creamy delight is perfect for satisfying your sweet tooth and is a fantastic addition to any gathering. Plus, it’s a breeze to whip up, making it a great choice for those busy weeknights when you want something special without spending hours in the kitchen. If you’re looking for easy pasta recipes or quick family dinners, this dessert will surely complement your meal perfectly!

Why You’ll Love This Recipe

  • It’s incredibly creamy and rich, thanks to the sweetened condensed milk.
  • Perfect for any occasion, from casual family dinners to festive celebrations.
  • Quick and easy to prepare, making it a go-to for busy weeknights.
  • Can be made ahead of time, so you can enjoy it whenever you like!
  • It’s a unique dessert that will impress your family and friends.

Ingredients

To make this delightful Cuca Cremosa, you’ll need the following ingredients:

  • 1 can of sweetened condensed milk
  • 2 cups of milk
  • 3 eggs
  • 1 cup of all-purpose flour
  • 1 tablespoon of baking powder
  • 1 teaspoon of vanilla extract
  • 1/2 cup of sugar
  • 1/4 cup of unsalted butter, melted
  • 1/2 cup of shredded coconut (optional)

Full ingredient list with measurements is provided in the printable recipe card below.

How to Make the Recipe

Now, let’s dive into the steps to create this creamy masterpiece:

  1. Preheat your oven to 350°F (175°C).
  2. In a large mixing bowl, combine the sweetened condensed milk, milk, eggs, and melted butter. Whisk until well blended.
  3. In another bowl, mix the flour, baking powder, and sugar. Gradually add this dry mixture to the wet ingredients, stirring until smooth.
  4. If you’re using shredded coconut, fold it into the batter now.
  5. Pour the batter into a greased baking dish (about 9×13 inches).
  6. Bake for 30-35 minutes, or until a toothpick inserted in the center comes out clean.
  7. Let it cool for a few minutes before serving. Enjoy it warm or chilled!

Pro Tips for Making the Recipe

Here are some tips to ensure your Cuca Cremosa turns out perfectly:

  • Make sure your ingredients are at room temperature for better mixing.
  • Don’t overmix the batter; a few lumps are okay!
  • For an extra touch, top with whipped cream or fresh fruit before serving.
  • If you want to experiment, try adding chocolate chips or nuts to the batter.

How to Serve

This dessert is versatile and can be served in various ways:

  • Serve it warm with a scoop of vanilla ice cream for a delightful contrast.
  • Top with fresh berries for a refreshing twist.
  • Drizzle with chocolate or caramel sauce for an indulgent treat.
  • Pair it with a cup of coffee or tea for a cozy afternoon snack.

Make Ahead and Storage

If you’re planning a gathering or just want to enjoy this dessert later, here’s how to store it:

  • Allow the Cuca Cremosa to cool completely before covering it with plastic wrap or aluminum foil.
  • Store it in the refrigerator for up to 5 days.
  • You can also freeze it for up to 2 months. Just make sure to wrap it tightly to prevent freezer burn.
  • To serve after freezing, let it thaw in the refrigerator overnight before enjoying.

So there you have it! A delicious and creamy Cuca Cremosa com Leite Condensado that’s sure to become a family favorite. Whether you’re looking for 30-minute meals or simply want to impress your guests with a unique dessert, this recipe is a winner. Don’t forget to check out my other weeknight dinner ideas and creamy garlic pasta recipes for a complete meal experience. Happy cooking!

Cuca Cremosa com Leite Condensado

Prep Time 20 minutes
Cook Time 40 minutes
Total Time 1 hour
Servings 8 pieces
Calories 350
A delicious Brazilian treat combining a creamy filling with a crunchy topping, perfect for sharing.

Ingredients

Creme

  • 1 lata leite condensado (para o creme)
  • 2 medidas da lata leite integral (para o creme)
  • 2 gemas gemas peneiradas (para o creme)
  • 3 colheres de sopa maisena (para o creme)
  • 2 colheres de sopa açúcar (para o creme)
  • 1 colher de sopa margarina (para o creme)
  • 1 caixinha creme de leite (para o creme)

Farofa

  • 3 xícaras de chá farinha de trigo (para a farofa)
  • 1.5 xícaras de chá açúcar (para a farofa)
  • 100 g margarina (para a farofa)
  • 1 ovo ovo (para a farofa)
  • 1 colher de sopa fermento químico em pó (para a farofa)

Instructions 

  • Inicie preparando o creme, misturando leite condensado, leite integral, gemas peneiradas, maisena, açúcar, margarina e creme de leite. Cozinhe até engrossar e reserve.
  • Para a farofa, misture farinha de trigo, açúcar, margarina, ovo e fermento até obter uma massa areada.
  • Em uma panela, misture o creme com cuidado e reserve.
  • Monte a cuca em um refratário, espalhe o creme e cubra com a farofa.
  • Asse em forno preaquecido a 180°C por cerca de 40 minutos ou até dourar.

Notes

Use ingredientes de boa qualidade para um sabor mais intenso.
Calories: 350kcal
Cost: $15
Course: Dessert
Cuisine: Brazilian
Keyword: cuca, leite condensado

Have you ever craved a dish that’s not only delicious but also brings a taste of Brazil right to your kitchen? Well, let me introduce you to Farofa de Ovo com Cebola Úmida e Saborosa! This delightful side dish is perfect for quick family dinners and pairs beautifully with a variety of main courses. Plus, it’s an excellent addition to your repertoire of easy pasta recipes, especially when you want to elevate your weeknight dinner ideas. Let’s dive into this flavorful journey together!

Why You’ll Love This Recipe

  • Quick and easy to prepare, making it ideal for busy weeknights.
  • Rich in flavor with the perfect balance of eggs and onions.
  • Versatile enough to accompany any main dish, from grilled meats to creamy garlic pasta.
  • Great for meal prep, so you can enjoy it throughout the week.
  • A unique Brazilian twist that will impress your family and friends!

Ingredients

To make this scrumptious Farofa de Ovo com Cebola Úmida e Saborosa, you’ll need the following ingredients:

  • 2 cups of manioc flour (farinha de mandioca)
  • 4 large eggs
  • 1 large onion, finely chopped
  • 2 tablespoons of butter
  • Salt and pepper to taste
  • Fresh parsley for garnish (optional)

Full ingredient list with measurements is provided in the printable recipe card below.

How to Make the Recipe

Now, let’s get cooking! Follow these simple steps to create your own Farofa de Ovo com Cebola Úmida e Saborosa:

  1. In a large skillet, melt the butter over medium heat. Add the chopped onion and sauté until it becomes translucent and fragrant, about 5 minutes.
  2. While the onions are cooking, crack the eggs into a bowl and whisk them until well combined. Season with a pinch of salt and pepper.
  3. Push the sautéed onions to one side of the skillet and pour the whisked eggs into the other side. Scramble the eggs until they are just set, then mix them with the onions.
  4. Gradually add the manioc flour to the skillet, stirring continuously to combine everything evenly. Cook for an additional 5-7 minutes, allowing the mixture to toast slightly.
  5. Once the farofa reaches your desired texture, remove it from the heat and garnish with fresh parsley if desired.

Pro Tips for Making the Recipe

Here are some helpful suggestions to ensure your Farofa de Ovo comes out perfectly every time:

  • For added flavor, consider incorporating diced bell peppers or cooked bacon into the mixture.
  • Adjust the amount of manioc flour based on your preferred texture; less flour will yield a creamier consistency.
  • Don’t rush the cooking process; allowing the onions to caramelize will enhance the overall flavor.
  • This dish can be made ahead of time and reheated, making it a fantastic option for meal prep!

How to Serve

Farofa de Ovo is incredibly versatile! Here are some serving suggestions:

  • Serve it alongside grilled chicken or steak for a hearty meal.
  • Pair it with your favorite creamy garlic pasta for a delightful fusion of flavors.
  • Use it as a topping for baked potatoes or as a filling for tacos.
  • Enjoy it as a standalone dish with a fresh salad on the side.

Make Ahead and Storage

This Farofa de Ovo is perfect for meal prep! Here’s how to store it:

  • Allow the farofa to cool completely before transferring it to an airtight container.
  • Store in the refrigerator for up to 4 days.
  • To reheat, simply warm it in a skillet over low heat, adding a splash of water or broth to prevent it from drying out.
  • For longer storage, you can freeze it for up to 3 months. Thaw in the refrigerator before reheating.

So there you have it! A delicious and easy recipe that’s perfect for quick family dinners and can easily fit into your collection of 30-minute meals. I hope you enjoy making and sharing this Farofa de Ovo com Cebola Úmida e Saborosa as much as I do. Happy cooking!

Farofa de Ovo com Cebola Úmida e Saborosa

Prep Time 10 minutes
Cook Time 15 minutes
Total Time 25 minutes
Servings 4 servings
Calories 250
A delicious Brazilian side dish combining eggs, onion, and toasted manioc flour for a flavorful experience.

Ingredients

Main ingredients

  • 4 units ovos
  • 1 large cebola picada
  • 2 cups farinha de mandioca fina torrada
  • 150 g manteiga
  • Sal a gosto sal

Instructions 

  • Descasque a ovos e quebre-os, bata levemente com um garfo e tempere com um pitada de sal.
  • Refogue a cebola picada em uma frigideira grande com manteiga até ficar translúcida.
  • Adicione os ovos batidos na frigideira e mexa até ficarem cozidos e levemente dourados.
  • Acrescente a farinha de mandioca torrada aos poucos, misturando bem para que a farinha absorva a umidade e fique bem tostada.
  • Ajuste o sal e misture bem até obter uma farofa crocante e saborosa.

Notes

Sirva quente como acompanhamento de pratos principais ou petisco.
Calories: 250kcal
Cost: $15
Course: Side Dish
Cuisine: Brazilian
Keyword: egg

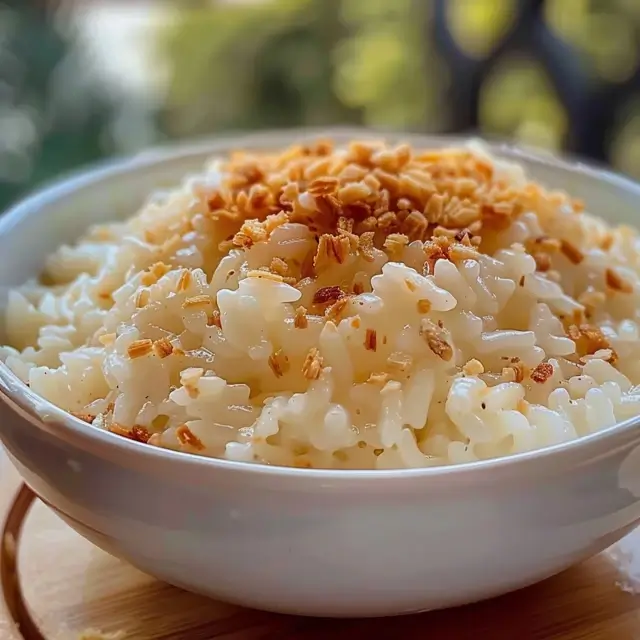
There’s something incredibly comforting about a creamy dessert that warms your heart and soul, isn’t there? Today, I’m excited to share with you my favorite recipe for Arroz Doce Cremoso com Leite Condensado, a delightful Brazilian rice pudding that is not only creamy and delicious but also incredibly easy to make! If you’re looking for a sweet treat that will impress your family and friends, this is it! Plus, it’s a fantastic way to end a meal after one of those quick family dinners or even a busy weeknight. So, let’s dive into this delightful dessert!

Why You’ll Love This Recipe

  • It’s creamy and rich, perfect for satisfying your sweet tooth.
  • Simple ingredients that you probably already have in your pantry.
  • Quick to prepare, making it a great option for 30-minute meals.
  • Perfect for family gatherings or a cozy night in.
  • Can be served warm or chilled, depending on your preference!

Ingredients

To make this delicious Arroz Doce, you will need the following ingredients:

  • 1 cup of rice (preferably short-grain)
  • 4 cups of water
  • 1 can (14 oz) of sweetened condensed milk
  • 1 can (12 oz) of evaporated milk
  • 1 cup of whole milk
  • 1 cinnamon stick
  • 1 teaspoon of vanilla extract
  • Pinch of salt
  • Ground cinnamon for garnish

Full ingredient list with measurements is provided in the printable recipe card below.

How to Make the Recipe

Now, let’s get cooking! Follow these simple steps to create your creamy Arroz Doce:

  1. In a medium saucepan, combine the rice and water. Bring it to a boil over medium heat.
  2. Once boiling, reduce the heat to low, cover, and let it simmer for about 15 minutes, or until the rice is tender and the water is mostly absorbed.
  3. Add the sweetened condensed milk, evaporated milk, whole milk, cinnamon stick, and a pinch of salt to the cooked rice. Stir well to combine.
  4. Continue to cook on low heat, stirring frequently, for about 10-15 minutes until the mixture thickens to your desired creaminess.
  5. Remove from heat and stir in the vanilla extract. Discard the cinnamon stick.
  6. Serve warm or let it cool and refrigerate for a chilled dessert. Sprinkle with ground cinnamon before serving.

Pro Tips for Making the Recipe

Here are some of my favorite tips to ensure your Arroz Doce turns out perfectly:

  • For an extra creamy texture, you can substitute some of the whole milk with coconut milk.
  • Make sure to stir frequently while cooking to prevent the rice from sticking to the bottom of the pan.
  • If you prefer a sweeter dessert, feel free to add more sweetened condensed milk to taste.
  • For a fun twist, try adding some raisins or shredded coconut to the mixture!

How to Serve

This Arroz Doce is versatile and can be served in various ways:

  • Serve it warm in individual bowls topped with a sprinkle of ground cinnamon.
  • For a chilled dessert, refrigerate it for a few hours and serve it cold.
  • Pair it with fresh fruit like berries or mango for a refreshing contrast.
  • It also makes a lovely addition to a dessert table at family gatherings or parties!

Make Ahead and Storage

This dessert is perfect for making ahead of time! Here are some storage tips:

  • Store any leftovers in an airtight container in the refrigerator for up to 3 days.
  • If you want to make it ahead of time, prepare it a day in advance and let it chill overnight.
  • Reheat gently on the stove with a splash of milk if it thickens too much in the fridge.

So there you have it! A delightful recipe for Arroz Doce Cremoso com Leite Condensado that is sure to become a family favorite. Whether you’re enjoying it after a hearty meal or serving it at a gathering, this creamy dessert is bound to bring smiles all around. And if you’re looking for more delicious ideas, don’t forget to check out my collection of easy pasta recipes for those busy weeknights! Happy cooking!

Arroz Doce Cremoso com Leite Condensado

Prep Time 10 minutes
Cook Time 40 minutes
Total Time 50 minutes
Servings 6 servings
Calories 350
Delicie-se com este arroz doce cremoso, enriquecido com leite condensado e essência de baunilha, perfeito para sobremesas aconchegantes.

Ingredients

Main Ingredients

  • 1.5 cups arroz branco cru
  • 2.5 cups água
  • 5 cups leite integral
  • 1 can leite condensado (395 g)
  • 1 can creme de leite com soro (300 g)
  • 2 tablespoons essência de baunilha
  • a gosto Açúcar (opcional) (dependendo da doçura desejada)
  • a gosto Canela em pau ou em pó (para aromatizar e decorar)

Instructions 

  • Comece lavando o arroz e cozinhando-o na água até ficar macio.
  • Adicione o leite integral e cozinhe até o arroz ficar bem cremoso.
  • Incorpore o leite condensado, o creme de leite e a essência de baunilha, mexendo bem.
  • Se desejar, adicione açúcar a gosto e deixe cozinhar por mais alguns minutos.
  • Sirva quente ou frio, decorado com canela em pó ou em pau.

Notes

Para um sabor mais intenso, deixe o arroz descansar na geladeira por algumas horas antes de servir.
Calories: 350kcal
Cost: $15
Course: Dessert
Cuisine: Brazilian
Keyword: dessert, rice, sweet