Author

thomas

Browsing

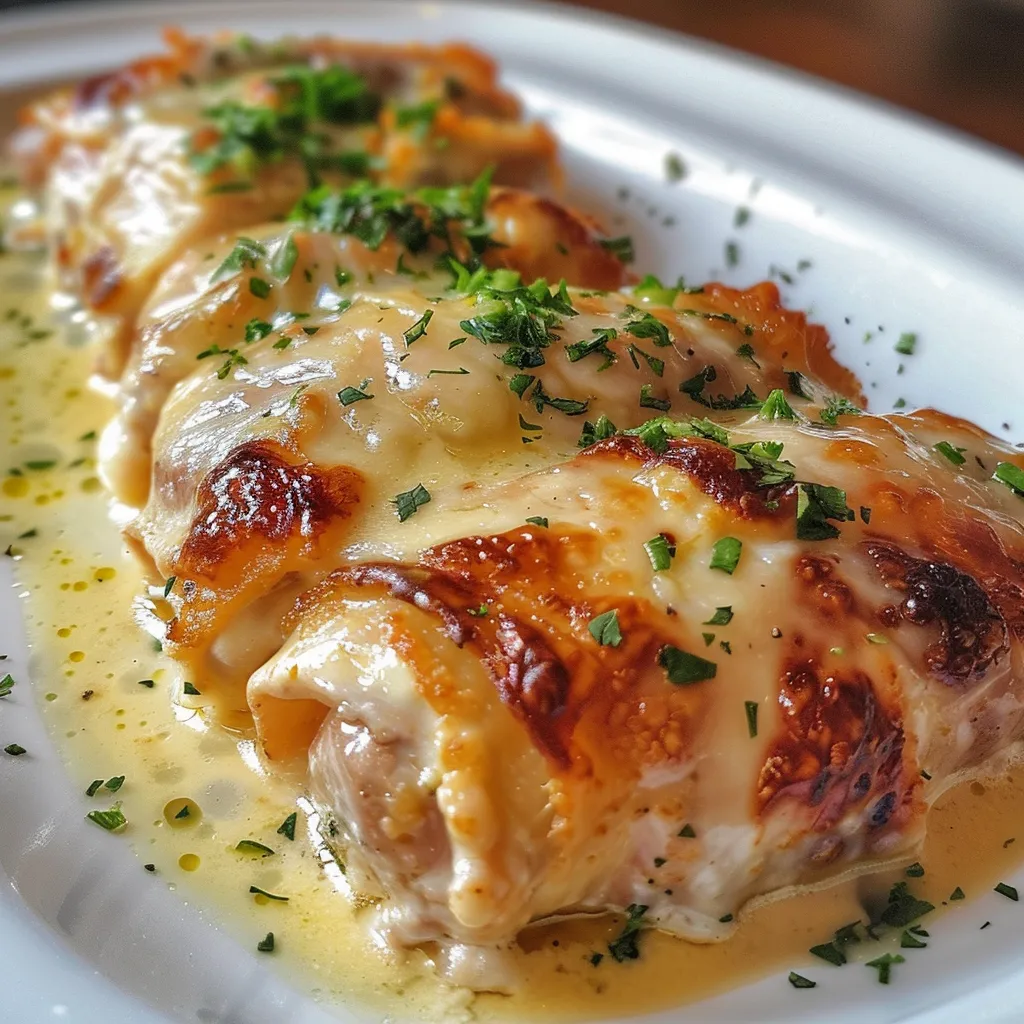
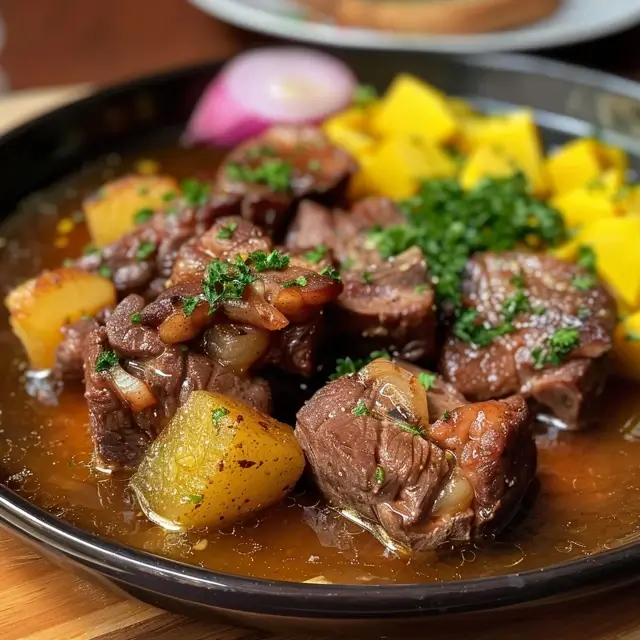
Oh, my goodness! If you’re looking for a dish that will make your taste buds dance and your family ask for seconds, you’ve come to the right place! Today, I’m excited to share my recipe for Cupim com Mandioca, a succulent Brazilian roast that’s perfect for quick family dinners. This dish combines tender beef with creamy cassava, creating a meal that’s not only delicious but also incredibly satisfying. And let me tell you, it’s just as easy to whip up as those easy pasta recipes you love!

Why You’ll Love This Recipe

  • It’s a crowd-pleaser that will impress your family and friends.
  • Perfect for weeknight dinner ideas when you want something hearty.
  • Simple ingredients that you can find at your local grocery store.
  • Great for meal prep and leftovers!
  • It’s a unique dish that brings a taste of Brazil to your kitchen.

Ingredients

To make this delightful Cupim com Mandioca, you’ll need the following ingredients:

  • 2 pounds of cupim (hump meat)
  • 1 pound of cassava (mandioca), peeled and cut into chunks
  • 4 cloves of garlic, minced
  • 1 large onion, chopped
  • 2 cups of beef broth
  • 2 tablespoons of olive oil
  • Salt and pepper to taste
  • Fresh parsley for garnish

Full ingredient list with measurements is provided in the printable recipe card below.

How to Make the Recipe

Now, let’s dive into the cooking process! Making Cupim com Mandioca is easier than you might think:

  1. In a large pot, heat the olive oil over medium heat. Add the chopped onion and minced garlic, sautéing until fragrant and the onion is translucent.
  2. Season the cupim with salt and pepper, then add it to the pot. Brown the meat on all sides for about 5-7 minutes.
  3. Pour in the beef broth, ensuring the meat is mostly submerged. Bring to a boil, then reduce the heat to low, cover, and let it simmer for about 2 hours, or until the meat is tender.
  4. After 1 hour of cooking, add the cassava chunks to the pot. Continue to simmer until both the meat and cassava are fork-tender.
  5. Once done, remove from heat and let it rest for a few minutes. Garnish with fresh parsley before serving.

Pro Tips for Making the Recipe

Here are some of my favorite tips to ensure your Cupim com Mandioca turns out perfectly:

  • For extra flavor, marinate the cupim overnight with garlic, salt, and pepper.
  • If you’re short on time, you can use a pressure cooker to speed up the cooking process.
  • Feel free to add your favorite vegetables, like carrots or bell peppers, for added nutrition.
  • Pair this dish with a side of rice or a fresh salad for a complete meal.

How to Serve

When it comes to serving Cupim com Mandioca, I love to keep it simple. Serve it hot, straight from the pot, with a sprinkle of fresh parsley on top. This dish is perfect for family gatherings or cozy weeknight dinners. You can also serve it alongside some creamy garlic pasta for a delightful twist!

Make Ahead and Storage

This dish is fantastic for meal prep! You can make it ahead of time and store it in the refrigerator for up to 3 days. Just reheat it on the stove or in the microwave when you’re ready to enjoy. If you want to keep it longer, it freezes beautifully! Just make sure to store it in an airtight container, and it will last for up to 3 months.

So there you have it! A delicious and easy recipe for Cupim com Mandioca that’s sure to become a family favorite. Whether you’re looking for quick family dinners or just want to try something new, this dish is a winner. I can’t wait for you to give it a try and share it with your loved ones!

Cupim com Mandioca – Receita Fácil, Suculenta e Muito Saborosa

Prep Time 30 minutes
Cook Time 2 hours
Total Time 2 hours 30 minutes
Servings 6 servings
Calories 850
Descubra como preparar um prato brasileiro tradicional com carne suculenta e mandioca, perfeito para uma refeição reconfortante e cheia de sabor.

Ingredients

Meat

  • 1.5 kg de cupim bovino (peça ou em fatias grossas)
  • 2 tbsp sal grosso
  • 5 cloves alho amassado
  • 0.5 cup cebola picada
  • 2 ramos de alecrim fresco
  • 3 leaves de louro
  • 250 ml vinho branco seco
  • 200 ml manteiga de garrafa (ou manteiga comum)
  • a gosto pimenta-do-reino e cominho

Mandioca

  • 1 kg de mandioca descascada e cortada em pedaços médios
  • 2 cloves de alho inteiros
  • 1 fatia de pimenta dedo-de-moça (opcional)
  • 2 tbsp manteiga de garrafa
  • a gosto salsinha picada

Instructions 

  • Tempere o cupim com sal, alho, cebola, alecrim, louro e vinho branco. Doure na manteiga até ficar bem selado.
  • Cozinhe lentamente até a carne ficar macia, cerca de 2 horas.
  • Enquanto isso, cozinhe a mandioca em água salgada até ficar macia, aproximadamente 30 minutos.
  • Refogue a mandioca com alho, pimenta dedo-de-moça, manteiga e salsinha. Sirva o cupim fatiado acompanhado da mandioca.

Notes

Para um sabor mais intenso, deixe a carne marinar por algumas horas antes de cozinhar.
Calories: 850kcal
Cost: $15
Course: Main Course
Cuisine: Brazilian
Keyword: beef, comfort food, mandioca

Have you ever craved a dish that warms your soul and nourishes your body? Well, let me introduce you to Mocotó Tradicional, a rich and flavorful Brazilian stew that’s not only delicious but also packed with collagen! This dish is perfect for those quick family dinners when you want something hearty and satisfying. Plus, it’s a fantastic alternative to the usual easy pasta recipes we often rely on. So, roll up your sleeves, and let’s dive into this delightful recipe!

Why You’ll Love This Recipe

  • Rich in collagen, promoting healthy skin and joints.
  • Flavorful and comforting, perfect for chilly evenings.
  • Great for meal prep and can be made ahead of time.
  • Versatile – pairs well with rice or crusty bread.
  • A unique dish that will impress your family and friends!

Ingredients

To make this delicious Mocotó Tradicional, you’ll need the following ingredients:

  • 2 pounds of beef trotters (mocotó)
  • 1 large onion, chopped
  • 4 cloves of garlic, minced
  • 2 carrots, diced
  • 2 tomatoes, chopped
  • 1 bell pepper, chopped
  • 1 bunch of fresh parsley, chopped
  • Salt and pepper to taste
  • Water (enough to cover the ingredients)
  • Optional: chili flakes for a spicy kick!

Full ingredient list with measurements is provided in the printable recipe card below.

How to Make the Recipe

Now, let’s get cooking! Follow these simple steps to create your own Mocotó Tradicional:

  1. Start by cleaning the beef trotters thoroughly. Rinse them under cold water and place them in a large pot.
  2. Add enough water to cover the trotters and bring to a boil. Skim off any foam that forms on the surface.
  3. Once the foam is removed, add the chopped onion, minced garlic, diced carrots, chopped tomatoes, and bell pepper to the pot.
  4. Season with salt and pepper, and if you like a bit of heat, sprinkle in some chili flakes.
  5. Cover the pot and let it simmer on low heat for about 3-4 hours, or until the meat is tender and falling off the bone.
  6. Once cooked, remove the trotters from the pot and let them cool slightly. Then, carefully remove the meat from the bones and chop it into bite-sized pieces.
  7. Return the meat to the pot, add the chopped parsley, and stir well. Let it simmer for an additional 10 minutes to meld the flavors.
  8. Serve hot and enjoy your delicious Mocotó Tradicional!

Pro Tips for Making the Recipe

Here are some helpful suggestions to ensure your Mocotó Tradicional turns out perfectly:

  • For a richer flavor, consider adding a splash of white wine during the cooking process.
  • If you’re short on time, you can use a pressure cooker to speed up the cooking process.
  • Feel free to customize the vegetables based on what you have on hand – this stew is very forgiving!
  • Don’t skip the parsley; it adds a fresh touch that brightens the dish.

How to Serve

When it comes to serving your Mocotó Tradicional, there are plenty of delicious options:

  • Serve it over a bed of fluffy white rice for a complete meal.
  • Pair it with crusty bread to soak up all that rich broth.
  • Top with extra parsley or a squeeze of lime for a zesty finish.
  • For a fun twist, serve it with a side of creamy garlic pasta for a fusion experience!

Make Ahead and Storage

This stew is perfect for meal prep! You can make it ahead of time and store it in the refrigerator for up to 3 days. Just reheat on the stove before serving. If you want to keep it longer, consider freezing it in individual portions. It’s a fantastic option for those busy weeknight dinner ideas when you need something quick and satisfying!

So, there you have it! A delightful recipe for Mocotó Tradicional that’s not only easy to make but also packed with flavor and nutrition. I hope you enjoy making this dish as much as I do. Happy cooking!

Mocotó Tradicional – Receita Fácil, Saborosa e Rica em Colágeno

Prep Time 30 minutes
Cook Time 2 hours
Total Time 2 hours 30 minutes
Servings 6 servings
Calories 450
Experience the rich flavors of traditional Brazilian mocotó, a collagen-rich stew that is hearty and flavorful.

Ingredients

Meat

  • 1.5 kg de mocotó (pés de boi em pedaços)
  • 1 each suco de 1 limão
  • 2 tbsp vinagre
  • 2 tbsp óleo
  • 1 medium cebola picada
  • 4 cloves alho picado
  • 2 maduros tomates picados
  • 1 green pimentão picado
  • 1 tbsp colorau
  • 1 tsp cominho
  • 2 folhas de louro
  • 1 tsp pimenta-do-reino
  • 1 malagueta ou dedo-de-moça pimenta-malagueta (opcional)
  • 1 cup extrato de tomate
  • a gosto sal
  • a gosto coentro ou salsinha picada
  • water as needed água suficiente para cozinhar

Instructions 

  • Prepare o mocotó, limpando e temperando com limão, vinagre, alho e sal.
  • Cozinhe o mocotó com água, folhas de louro e água até ficar macio, cerca de 2 horas.
  • Refogue a cebola, alho, tomate, pimentão e temperos em óleo até dourar.
  • Adicione o extrato de tomate, vinagre, colorau, cominho e pimenta, cozinhe por mais 30 minutos.
  • Junte o mocotó cozido ao refogado, ajuste o sal e cozinhe por mais 30 minutos para incorporar os sabores.
  • Finalize com coentro ou salsinha, sirva quente.

Notes

Use ingredientes frescos para melhor sabor e aproveite essa receita tradicional brasileira.
Calories: 450kcal
Cost: $15
Course: Main Course
Cuisine: Brazilian
Keyword: Mocotó

Are you ready to impress your family with a dish that’s not only delicious but also incredibly easy to make? Let me introduce you to my favorite Canelone de Frango com Ricota! This recipe is a delightful blend of flavors that will have everyone asking for seconds. Perfect for those busy weeknights, this dish is one of my go-to easy pasta recipes that can be whipped up in no time. So, grab your apron, and let’s dive into this savory family favorite!

Why You’ll Love This Recipe

  • Quick and easy to prepare, making it perfect for 30-minute meals.
  • Rich and creamy filling that everyone will adore.
  • Great for meal prep and can be made ahead of time.
  • Versatile – you can customize the filling to suit your family’s tastes.
  • A fantastic way to sneak in some veggies if you like!

Ingredients

To make this scrumptious Canelone de Frango com Ricota, you’ll need the following ingredients:

  • 12 cannelloni tubes
  • 2 cups cooked chicken, shredded
  • 1 cup ricotta cheese
  • 1 cup mozzarella cheese, shredded
  • 1/2 cup grated Parmesan cheese
  • 2 cups marinara sauce
  • 2 cloves garlic, minced
  • 1 teaspoon Italian seasoning
  • Salt and pepper to taste
  • Fresh basil for garnish (optional)

Full ingredient list with measurements is provided in the printable recipe card below.

How to Make the Recipe

Now, let’s get cooking! Follow these simple steps to create your Canelone de Frango com Ricota:

  1. Preheat your oven to 375°F (190°C).
  2. In a large bowl, combine the shredded chicken, ricotta cheese, half of the mozzarella, garlic, Italian seasoning, salt, and pepper. Mix well until everything is combined.
  3. Stuff each cannelloni tube with the chicken and ricotta mixture. You can use a piping bag or a spoon to make this easier.
  4. Spread a thin layer of marinara sauce on the bottom of a baking dish.
  5. Place the stuffed cannelloni in the dish and cover with the remaining marinara sauce. Sprinkle the rest of the mozzarella and Parmesan cheese on top.
  6. Cover the dish with aluminum foil and bake for 25 minutes. Remove the foil and bake for an additional 10 minutes, or until the cheese is bubbly and golden.
  7. Let it cool for a few minutes before serving. Garnish with fresh basil if desired.

Pro Tips for Making the Recipe

Here are some of my favorite tips to ensure your Canelone de Frango com Ricota turns out perfectly:

  • For a little extra flavor, sauté some spinach or mushrooms and mix them into the filling.
  • If you’re short on time, you can use store-bought rotisserie chicken.
  • Feel free to experiment with different cheeses, like goat cheese or feta, for a unique twist.
  • Make sure to cover the dish with foil while baking to keep the cannelloni moist.
  • Pair this dish with a side salad for a complete meal!

How to Serve

This Canelone de Frango com Ricota is best served hot out of the oven. I love to pair it with a simple green salad and a glass of white wine for a delightful dinner experience. You can also sprinkle some extra Parmesan cheese on top before serving for that added touch of flavor. It’s a fantastic option for quick family dinners that everyone will enjoy!

Make Ahead and Storage

If you want to prepare this dish in advance, you can assemble the cannelloni and store it in the refrigerator for up to 24 hours before baking. Just cover it tightly with plastic wrap or aluminum foil. If you have leftovers, they can be stored in an airtight container in the fridge for up to 3 days. Reheat in the oven or microwave until warmed through. This makes it a great option for weeknight dinner ideas when you want something comforting and delicious without the fuss!

So there you have it! My Canelone de Frango com Ricota is not just a meal; it’s a way to bring the family together around the dinner table. I hope you enjoy making this dish as much as I do. Happy cooking!

Canelone de Frango com Ricota – Receita Fácil e Saborosa para Toda a Família

Prep Time 30 minutes
Cook Time 45 minutes
Total Time 1 hour 15 minutes
Servings 6 servings
Calories 450
Uma deliciosa receita de canelone recheado com frango e ricota, perfeita para toda a família aproveitar um jantar saboroso e reconfortante.

Ingredients

Main Ingredients

  • 2 pieces peitos de frango cozidos e desfiados (cerca de 500 g)
  • 500 g ricota fresca amassada
  • 2 tablespoons azeite de oliva
  • 1 medium cebola picada
  • 2 cloves dentes de alho picados
  • 2 pieces tomates maduros picados
  • 2 tablespoons salsinha picada
  • to taste sal e pimenta-do-reino
  • 2 tablespoons manteiga
  • 2 tablespoons farinha de trigo
  • 1 liter leite
  • 1 cup molho de tomate pronto
  • 1 pinch noz-moscada (opcional)
  • 12 pieces massas para canelone ou panquecas prontas
  • 200 g queijo mussarela ralado
  • 50 g queijo parmesão ralado

Instructions 

  • Modo de preparar – como fazer canelone de frango com ricota
  • Recheie os canelones com o creme de frango e ricota, enrole e coloque em um refratário untado.
  • Prepare o molho branco com tomate, finalize com mussarela e parmesão, e enfeite com salsinha.
  • Leve ao forno por 30 minutos, gratinar e dourar.

Notes

Dica: Enrole o queijo na massa é uma excelente opção para um sabor mais intenso.
Calories: 450kcal
Cost: $15
Course: Main Course
Cuisine: Brazilian
Keyword: chicken, pasta, ricotta

Are you looking for a delicious and nutritious meal that the whole family will love? Look no further! Today, I’m excited to share my recipe for Filé de Tilápia Assada com Legumes – a delightful dish that’s not only easy to prepare but also packed with flavor and nutrients. This recipe is perfect for those busy weeknights when you want to whip up something quick and satisfying. Plus, it pairs beautifully with easy pasta recipes for a complete meal!

Why You’ll Love This Recipe

  • Quick and easy to prepare, making it ideal for 30-minute meals.
  • Nutritious and packed with vibrant vegetables.
  • Perfect for quick family dinners that everyone will enjoy.
  • Versatile – you can easily swap in your favorite veggies!
  • Great for meal prep and leftovers.

Ingredients

To make this delightful Filé de Tilápia Assada com Legumes, you will need the following ingredients:

  • 4 tilapia fillets
  • 2 cups of mixed vegetables (like bell peppers, zucchini, and carrots)
  • 2 tablespoons olive oil
  • 1 teaspoon garlic powder
  • 1 teaspoon paprika
  • Salt and pepper to taste
  • Fresh lemon juice (from 1 lemon)
  • Fresh parsley for garnish

Full ingredient list with measurements is provided in the printable recipe card below.

How to Make the Recipe

Now, let’s dive into the steps to create this mouthwatering dish:

  1. Preheat your oven to 400°F (200°C).
  2. In a large bowl, combine the mixed vegetables with olive oil, garlic powder, paprika, salt, and pepper. Toss until the veggies are well coated.
  3. Spread the seasoned vegetables on a baking sheet lined with parchment paper.
  4. Place the tilapia fillets on top of the vegetables. Drizzle with fresh lemon juice and season with additional salt and pepper if desired.
  5. Bake in the preheated oven for about 20 minutes, or until the fish flakes easily with a fork and the vegetables are tender.
  6. Garnish with fresh parsley before serving.

Pro Tips for Making the Recipe

Here are some of my favorite tips to ensure your Filé de Tilápia Assada com Legumes turns out perfectly every time:

  • Feel free to use any vegetables you have on hand. Broccoli, asparagus, or even cherry tomatoes work wonderfully!
  • If you love a bit of heat, add a pinch of red pepper flakes to the vegetable mix.
  • For a creamier side, consider pairing this dish with creamy garlic pasta for a delightful contrast.
  • Make sure not to overcrowd the baking sheet; this helps the vegetables roast nicely.

How to Serve

This dish is incredibly versatile! You can serve it as is for a light meal, or pair it with a side of easy pasta recipes for a heartier option. Here are a few serving suggestions:

  • Serve with a side of quinoa or brown rice for added fiber.
  • Top with a dollop of Greek yogurt or a sprinkle of feta cheese for extra flavor.
  • Pair with a fresh garden salad for a complete and balanced meal.

Make Ahead and Storage

This Filé de Tilápia Assada com Legumes is perfect for meal prep! Here’s how to store it:

  • Store any leftovers in an airtight container in the refrigerator for up to 3 days.
  • Reheat in the oven or microwave until warmed through.
  • You can also prepare the vegetables ahead of time and store them in the fridge until you’re ready to bake.

With this recipe, you’ll have a delicious and nutritious meal ready in no time, making it one of my favorite weeknight dinner ideas. I hope you enjoy making and sharing this delightful dish with your loved ones. Happy cooking!

Filé de Tilápia Assada com Legumes – Fácil e Nutritivo

Prep Time 15 minutes
Cook Time 30 minutes
Total Time 45 minutes
Servings 4 people
Calories 350
Uma deliciosa e nutritiva receita de filé de tilápia assada com legumes variados, perfeita para uma refeição leve e saborosa.

Ingredients

Protein

  • 800 g filé de tilápia
  • 1 unit suco de limão
  • 2 dentes alho picados
  • 1 colher chá sal
  • 1 pitada pimenta-do-reino

Vegetables

  • 2 unidades tomates em rodelas
  • 1 unidade cebola grande em rodelas
  • 1 unidade cenoura em rodelas finas
  • 2 unidades batatas médias pré-cozidas em cubos
  • 1 pimentão vermelho em tiras
  • 1 pimentão amarelo em tiras
  • 1 abobrinha em rodelas
  • a gosto azeite de oliva

Final Touch

  • para finalizar cheiro-verde picado

Instructions 

  • Tempere o filé de tilápia com suco de limão, alho, sal e pimenta-do-reino. Deixe descansar por 15 minutos.
  • Preaqueça o forno a 200°C. Monte os legumes em uma assadeira, regue com azeite e tempere a gosto.
  • Asse os legumes por 30 minutos ou até ficarem macios.
  • Enquanto isso, asse o filé de tilápia por cerca de 20 minutos ou até ficar cozido.
  • Retire o papel alumínio e finalize com cheiro-verde picado antes de servir.

Notes

Para um sabor mais intenso, deixe marinar o peixe por mais tempo.
Calories: 350kcal
Cost: $15
Course: Main Course
Cuisine: Brazilian
Keyword: Tilápia

Are you ready to discover a delicious and healthy alternative to traditional rice? I’m so excited to share my recipe for Arroz de Couve-Flor Low Carb – a dish that’s not only low in carbs but also packed with flavor! This recipe is perfect for those busy weeknights when you need quick family dinners that everyone will love. Plus, it’s a fantastic way to sneak in some veggies without anyone noticing! Let’s dive into this easy pasta recipe that will surely become a staple in your home.

Why You’ll Love This Recipe

  • Low carb and healthy, making it perfect for any diet.
  • Quick to prepare, ideal for 30-minute meals.
  • Versatile and can be paired with various proteins.
  • Great for meal prep and leftovers.
  • A delicious way to enjoy cauliflower, a superfood!

Ingredients

To make this delightful Arroz de Couve-Flor Low Carb, you’ll need the following ingredients:

  • 1 medium head of cauliflower, riced
  • 2 tablespoons olive oil
  • 1 small onion, finely chopped
  • 2 cloves garlic, minced
  • 1 bell pepper, diced
  • Salt and pepper to taste
  • Fresh parsley for garnish

Full ingredient list with measurements is provided in the printable recipe card below.

How to Make the Recipe

Making Arroz de Couve-Flor Low Carb is a breeze! Follow these simple steps:

  1. Start by ricing the cauliflower. You can do this by grating it or using a food processor until it resembles rice grains.
  2. In a large skillet, heat the olive oil over medium heat. Add the chopped onion and sauté until translucent.
  3. Stir in the minced garlic and diced bell pepper, cooking for another 2-3 minutes until fragrant.
  4. Add the riced cauliflower to the skillet, mixing well. Season with salt and pepper to taste.
  5. Cook for about 5-7 minutes, stirring occasionally, until the cauliflower is tender but not mushy.
  6. Garnish with fresh parsley before serving.

Pro Tips for Making the Recipe

Here are some of my favorite tips to ensure your Arroz de Couve-Flor Low Carb turns out perfectly:

  • For a creamier texture, consider adding a splash of vegetable broth or a dollop of cream cheese.
  • Feel free to mix in your favorite vegetables or proteins to customize the dish.
  • If you’re short on time, pre-riced cauliflower is available in most grocery stores.
  • Make sure not to overcook the cauliflower; you want it to retain some texture.

How to Serve

This Arroz de Couve-Flor Low Carb is incredibly versatile! Here are some serving suggestions:

  • Pair it with grilled chicken or shrimp for a complete meal.
  • Use it as a base for stir-fries or curries.
  • Top it with a fried egg for a delicious breakfast option.
  • Mix it with your favorite sauces for a quick and easy side dish.

Make Ahead and Storage

If you’re like me and love to meal prep, you’ll be happy to know that this dish stores well! Here are some tips:

  • Store any leftovers in an airtight container in the refrigerator for up to 3 days.
  • You can also freeze the riced cauliflower before cooking for a quick meal later on.
  • Reheat in the microwave or on the stovetop, adding a splash of water to keep it moist.

Now that you have this fantastic recipe for Arroz de Couve-Flor Low Carb, I hope you’re inspired to try it out! It’s a wonderful addition to your collection of weeknight dinner ideas and can easily be adapted to fit your family’s tastes. Whether you’re looking for easy pasta recipes or just a healthy side dish, this recipe is sure to please. Enjoy your cooking adventure!

Arroz de Couve-Flor Low Carb – Fácil e Saudável

Prep Time 10 minutes
Cook Time 15 minutes
Total Time 25 minutes
Servings 4 servings
Calories 150
A healthy low-carb rice alternative made with cauliflower, perfect for a quick and nutritious meal.

Ingredients

Vegetables

  • 700 g couve-flor limpa, separada em buquês
  • 1 tbsp azeite de oliva extravirgem
  • 2 dentes alho picados
  • 1 small cebola picada
  • 0.5 cup salsinha fresca picada
  • 0.75 cup água quente
  • a gosto Sal e pimenta-do-reino

Instructions 

  • Modere o azeite, alho e cebola picados e doure levemente.
  • Coloque o couve-flor em um processador e pulse a textura desejada.
  • Refogue os temperos e o couve-flor processado, misture bem e adicione o caldo de legumes.
  • Deixe cozinhar até ficar macio, mexendo de vez em quando.
  • Acrescente a couve-flor processada, misture, tempere com sal e pimenta a gosto.
  • Finalize com sementes de gergelim ou outros toppings de sua preferência.

Notes

Para uma textura mais rústica, pulse o couve-flor em pequenos pedaços.
Calories: 150kcal
Cost: $15
Course: Main Course
Cuisine: Brazilian
Keyword: cauliflower

Are you looking for a quick and fluffy low carb bread that can elevate your meals? Well, you’re in for a treat! Today, I’m excited to share my recipe for Pão Low Carb de Frigideira – Rápido e Fofinho. This delightful bread is not only easy to make but also perfect for those busy weeknights when you need something delicious and satisfying. Plus, it pairs wonderfully with all your favorite easy pasta recipes!

Why You’ll Love This Recipe

  • Quick and easy to prepare, making it perfect for 30-minute meals.
  • Fluffy texture that complements any dish.
  • Low carb, so it fits perfectly into your healthy eating plan.
  • Versatile enough to be served with soups, salads, or as a sandwich base.
  • Great for family dinners, ensuring everyone leaves the table happy!

Ingredients

To whip up this delightful low carb bread, you’ll need just a few simple ingredients that you probably already have in your pantry. Here’s what you’ll need:

  • 1 cup almond flour
  • 2 tablespoons coconut flour
  • 1 teaspoon baking powder
  • 1/2 teaspoon salt
  • 2 large eggs
  • 1/4 cup water
  • 1 tablespoon olive oil

Full ingredient list with measurements is provided in the printable recipe card below.

How to Make the Recipe

Now, let’s dive into the fun part—making the bread! Follow these simple steps:

  1. In a mixing bowl, combine the almond flour, coconut flour, baking powder, and salt. Mix well.
  2. In another bowl, whisk together the eggs, water, and olive oil until well combined.
  3. Pour the wet ingredients into the dry ingredients and stir until a dough forms.
  4. Heat a non-stick skillet over medium heat. Once hot, scoop the dough into the skillet, forming a round shape.
  5. Cook for about 3-4 minutes on each side, or until golden brown and fluffy.
  6. Remove from the skillet and let it cool slightly before slicing.

Pro Tips for Making the Recipe

Here are some of my favorite tips to ensure your Pão Low Carb de Frigideira turns out perfect every time:

  • Make sure your skillet is hot enough before adding the dough; this helps achieve that lovely golden crust.
  • Don’t skip the resting time after cooking; it allows the bread to firm up a bit.
  • Feel free to add herbs or spices to the dough for extra flavor—garlic powder or Italian seasoning works wonders!
  • If you want to make a larger batch, simply double the ingredients and cook in batches.

How to Serve

This fluffy low carb bread is incredibly versatile! Here are some serving suggestions:

  • Enjoy it warm with a pat of butter or your favorite spread.
  • Use it as a base for sandwiches—think turkey and avocado or a classic BLT!
  • Pair it with a hearty soup or salad for a complete meal.
  • Slice it up and serve it alongside your favorite creamy garlic pasta for a delightful dinner.

Make Ahead and Storage

If you’re like me and love to plan ahead, you’ll be happy to know that this bread can be made in advance! Here are some storage tips:

  • Store any leftover bread in an airtight container in the refrigerator for up to 3 days.
  • To reheat, simply pop it in the toaster or microwave for a few seconds.
  • You can also freeze the bread! Just wrap it tightly in plastic wrap and place it in a freezer bag. It will keep for up to a month.

Now that you have this fantastic recipe in your arsenal, you can easily whip up a batch of Pão Low Carb de Frigideira for your next quick family dinner. It’s a wonderful addition to your collection of weeknight dinner ideas and pairs beautifully with all those easy pasta recipes you love. So, what are you waiting for? Get in the kitchen and start baking!

Pão Low Carb de Frigideira – Rápido e Fofinho

Prep Time 5 minutes
Cook Time 10 minutes
Total Time 15 minutes
Servings 1 serving
Calories 150
Delicious low carb bread made quickly in a skillet, perfect for a healthy snack or meal.

Ingredients

group

  • 1 large egg ovo grande
  • 2 tablespoons farinha de amêndoas
  • 1 tablespoon farinha de coco
  • 0.5 tablespoon psyllium (opcional)
  • 1 teaspoon fermento químico
  • 1 pinch sal
  • 1 tablespoon água (ou até dar ponto)
  • Manteiga, azeite ou óleo de coco para untar

Instructions 

  • Modo de preparo: Misture os ingredientes secos, adicione o ovo e a água até obter uma massa homogênea. Aqueça uma frigideira untada e despeje a massa, formando um pão. Cozinhe até dourar dos dois lados.

Notes

Use uma frigideira antiaderente para melhores resultados.
Calories: 150kcal
Cost: $15
Course: Breakfast
Cuisine: Brazilian
Keyword: low carb

Have you ever felt that mid-afternoon slump, where your energy dips and you just need a little pick-me-up? I know I have! That’s why I absolutely adore making Suco de Couve com Limão e Gengibre – a vibrant, refreshing juice that not only tastes amazing but also supports my detox journey. This juice is packed with nutrients and is a fantastic way to energize your day. Plus, it’s a breeze to whip up, making it perfect for those busy weeks when I’m juggling quick family dinners and looking for easy pasta recipes to keep things interesting!

Why You’ll Love This Recipe

  • Boosts your detox journey with nutrient-rich ingredients.
  • Quick and easy to prepare, perfect for busy lifestyles.
  • Refreshing taste that can be enjoyed any time of the day.
  • Great way to incorporate more greens into your diet.
  • Can be a part of your 30-minute meals rotation!

Ingredients

To make this delightful juice, you’ll need the following ingredients:

  • 1 cup kale (couve)
  • 1 medium lemon, juiced
  • 1-inch piece of fresh ginger, peeled
  • 2 cups water
  • 1 tablespoon honey (optional)
  • Ice cubes (optional)

Full ingredient list with measurements is provided in the printable recipe card below.

How to Make the Recipe

Making Suco de Couve com Limão e Gengibre is as easy as 1-2-3! Here’s how you can do it:

  1. Start by washing the kale thoroughly to remove any dirt or grit.
  2. In a blender, combine the kale, lemon juice, ginger, and water.
  3. Blend on high until smooth and well combined.
  4. If you prefer a smoother juice, strain the mixture through a fine mesh sieve or cheesecloth.
  5. Sweeten with honey if desired, and serve over ice for a refreshing treat!

Pro Tips for Making the Recipe

Here are some of my favorite tips to ensure your juice turns out perfectly every time:

  • Use fresh, organic kale for the best flavor and nutrients.
  • Experiment with adding other fruits like apples or cucumbers for a twist!
  • Make a larger batch and store it in the fridge for up to 2 days.
  • For a creamier texture, consider blending in a banana or avocado.
  • Pair this juice with creamy garlic pasta for a delicious and nutritious meal!

How to Serve

This juice is incredibly versatile! Here are some serving suggestions:

  • Enjoy it as a refreshing morning drink to kickstart your day.
  • Pair it with your favorite weeknight dinner ideas for a nutritious boost.
  • Serve it at brunch alongside light snacks or salads.
  • Mix it into smoothies for an extra nutrient punch.

Make Ahead and Storage

If you’re like me and love to plan ahead, you’ll be happy to know that this juice can be made in advance! Here are some storage tips:

  • Store the juice in an airtight container in the fridge for up to 48 hours.
  • Give it a good shake before serving, as separation may occur.
  • For longer storage, consider freezing in ice cube trays and blending with other ingredients later.

Incorporating Suco de Couve com Limão e Gengibre into your routine is a delightful way to enhance your detox journey while enjoying a delicious drink. Whether you’re looking for quick family dinners or easy pasta recipes, this juice can be a refreshing addition to your meals. So, why not give it a try? I promise you’ll love it!

Suco de Couve com Limão e Gengibre – Detox e Nutritivo

Prep Time 5 minutes
Total Time 5 minutes
Servings 2 glasses
Calories 50
Um suco detox vibrante e nutritivo, perfeito para revitalizar seu corpo com ingredientes naturais e saborosos.

Ingredients

Vegetables

  • 2 leaves couve manteiga lavadas e picadas
  • 1 limão suco de limão (tahiti ou siciliano)
  • 1 rodela gengibre fresco (cerca de 5 g)
  • 300 ml água filtrada ou água de coco
  • Adoçante natural a gosto (mel, xilitol ou stevia – opcional) adoçante natural (a gosto)

Instructions 

  • 1257 data-start="1257" data-end="1328">Faça o suco de couve com limão e gengibre.
  • 1329 data-start="1329" data-end="1396">Higienize bem as 2 folhas de couve e pique em pedacinhos.
  • 1397 data-start="1397" data-end="1428">Esprema o suco de 1 limão.
  • 1429 data-start="1429" data-end="1577">Bata por cerca de 2 minutos a mistura de 2 folhas de couve, suco de limão, gengibre, água e adoçante, se desejar.

Notes

Use o suco imediatamente, sem coar, para aproveitar todas as fibras.
Calories: 50kcal
Cost: $15
Course: Beverage
Cuisine: Brazilian
Keyword: couve, gengibre, limão

Are you ready to indulge in a deliciously creamy and protein-packed treat? I can hardly contain my excitement as I share with you my favorite recipe for Sorvete de Whey de Morango – Proteico e Cremoso. This delightful strawberry whey ice cream is not only a fantastic way to satisfy your sweet tooth, but it’s also a healthy option that you can whip up in no time. Perfect for those busy weeknights when you want something special without spending hours in the kitchen! And speaking of quick meals, if you’re looking for easy pasta recipes or 30-minute meals, I’ve got you covered with some fantastic ideas too!

Why You’ll Love This Recipe

  • It’s a guilt-free dessert that’s rich in protein.
  • Perfect for hot summer days or as a post-workout treat.
  • Quick and easy to make, with minimal ingredients.
  • Kids and adults alike will love the creamy strawberry flavor.
  • Great for meal prep and can be stored for later enjoyment.

Ingredients

To make this scrumptious Sorvete de Whey de Morango, you’ll need the following ingredients:

  • 2 cups fresh strawberries, hulled and sliced
  • 1 cup Greek yogurt
  • 1 scoop vanilla whey protein powder
  • 2 tablespoons honey or maple syrup (adjust to taste)
  • 1 teaspoon vanilla extract
  • Pinch of salt

Full ingredient list with measurements is provided in the printable recipe card below.

How to Make the Recipe

Now, let’s dive into the fun part—making our creamy strawberry whey ice cream!

  1. In a blender, combine the sliced strawberries, Greek yogurt, whey protein powder, honey (or maple syrup), vanilla extract, and a pinch of salt.
  2. Blend until smooth and creamy. You can adjust the sweetness by adding more honey if desired.
  3. Pour the mixture into a freezer-safe container and spread it out evenly.
  4. Cover and freeze for at least 4 hours, or until firm.
  5. When ready to serve, let it sit at room temperature for a few minutes to soften slightly before scooping.

Pro Tips for Making the Recipe

Here are some of my favorite tips to ensure your Sorvete de Whey de Morango turns out perfectly every time:

  • Use ripe strawberries for the best flavor. If they’re in season, even better!
  • Feel free to experiment with other fruits like bananas or blueberries for a different twist.
  • If you prefer a chunkier texture, reserve some chopped strawberries to fold in after blending.
  • For a creamier texture, you can add a splash of coconut milk or almond milk before blending.
  • Don’t skip the resting time before serving; it makes scooping much easier!

How to Serve

This Sorvete de Whey de Morango is perfect on its own, but here are some fun serving suggestions:

  • Top with fresh strawberries or a drizzle of chocolate sauce for an extra treat.
  • Serve it alongside a slice of your favorite cake for a delightful dessert pairing.
  • Use it as a filling for a smoothie bowl topped with granola and nuts.
  • Pair it with creamy garlic pasta for a unique and satisfying meal experience.

Make Ahead and Storage

This ice cream is perfect for meal prep! You can make it ahead of time and store it in the freezer for up to 2 weeks. Just remember to keep it tightly sealed to prevent freezer burn. If it becomes too hard, let it sit out for a few minutes before scooping. It’s a fantastic addition to your list of weeknight dinner ideas when you want to impress your family with a sweet finish!

So, what are you waiting for? Grab those strawberries and let’s make this Sorvete de Whey de Morango together! I promise you’ll love every creamy, delicious bite. And don’t forget to check out my other easy pasta recipes for those busy nights when you need quick family dinners that everyone will enjoy!

Sorvete de Whey de Morango – Proteico e Cremoso

Prep Time 10 minutes
Cook Time 3 minutes
Total Time 13 minutes
Servings 4 servings
Calories 250
Delicie-se com um sorvete proteico, cremoso e refrescante, perfeito para quem busca sabor e nutrição.

Ingredients

Fruits

  • 500 g frozen strawberries
  • 2 medium frozen bananas (sliced)

Protein Powder

  • 2 scoops whey protein (strawberry or vanilla flavor) (about 60g)

Dairy

  • 340 g non-fat natural yogurt or lactose-free yogurt
  • 1 tablespoon honey or natural sweetener (optional)

Instructions 

  • Combine frozen strawberries, bananas, whey protein, yogurt, and honey in a blender.
  • Blend until smooth and creamy, about 3 minutes.
  • Transfer to a container and freeze for at least 3 hours before serving.

Notes

For a creamier texture, blend ingredients thoroughly and freeze for longer if needed.
Calories: 250kcal
Cost: $15
Course: Dessert
Cuisine: Brazilian
Keyword: fruit, protein

Have you ever craved something sweet yet healthy? Well, let me introduce you to Brigadeiro de Ninho Proteico! This creamy Brazilian treat is not only delicious but also packed with whey protein, making it a perfect guilt-free indulgence. As a busy woman juggling family and work, I know how important it is to find quick family dinners and easy pasta recipes that satisfy everyone. But sometimes, we need a little sweetness in our lives, and this recipe is just the ticket!

Why You’ll Love This Recipe

  • Quick and easy to make, perfect for busy weeknights.
  • Healthy alternative to traditional sweets, thanks to the whey protein.
  • Rich, creamy texture that melts in your mouth.
  • Great for satisfying sweet cravings without the guilt.
  • Perfect for sharing with family and friends!

Ingredients

To whip up this delightful Brigadeiro de Ninho Proteico, you’ll need the following ingredients:

  • 1 can of sweetened condensed milk
  • 1 cup of Ninho powdered milk
  • 1/2 cup of whey protein (vanilla or chocolate flavor)
  • 2 tablespoons of unsweetened cocoa powder (optional for a chocolate twist)
  • 1 tablespoon of unsalted butter
  • Chocolate sprinkles for coating

Full ingredient list with measurements is provided in the printable recipe card below.

How to Make the Recipe

Making Brigadeiro de Ninho Proteico is a breeze! Here’s how to do it:

  1. In a medium saucepan, combine the sweetened condensed milk, Ninho powdered milk, whey protein, and butter.
  2. Cook over medium heat, stirring constantly to prevent sticking, until the mixture thickens and starts to pull away from the sides of the pan. This should take about 10-15 minutes.
  3. If you’re adding cocoa powder for a chocolate flavor, mix it in during the last few minutes of cooking.
  4. Once thickened, remove from heat and let it cool for a few minutes.
  5. Once cool enough to handle, grease your hands with a little butter and roll the mixture into small balls.
  6. Roll the balls in chocolate sprinkles until fully coated.
  7. Place the Brigadeiros on a plate and refrigerate for at least 30 minutes to set.

Pro Tips for Making the Recipe

Here are some helpful suggestions to ensure your Brigadeiro de Ninho Proteico turns out perfectly:

  • Make sure to stir constantly while cooking to avoid burning the mixture.
  • Experiment with different flavors of whey protein to customize your Brigadeiros.
  • If you prefer a less sweet treat, reduce the amount of sweetened condensed milk slightly.
  • For a fun twist, try rolling the Brigadeiros in crushed nuts or coconut flakes instead of chocolate sprinkles.

How to Serve

These Brigadeiros are perfect for any occasion! Here are some serving suggestions:

  • Serve them as a sweet treat after a family dinner.
  • Pack them in lunchboxes for a delightful surprise.
  • Bring them to potlucks or gatherings as a unique dessert option.
  • Pair them with a cup of coffee or tea for a delightful afternoon snack.

Make Ahead and Storage

One of the best things about Brigadeiro de Ninho Proteico is that they can be made ahead of time! Here are some storage tips:

  • Store the Brigadeiros in an airtight container in the refrigerator for up to one week.
  • If you want to make them even further in advance, you can freeze them! Just make sure to separate layers with parchment paper to prevent sticking.
  • To thaw, simply leave them in the refrigerator overnight before serving.

So there you have it! A delicious, creamy treat that’s not only easy to make but also healthy. Brigadeiro de Ninho Proteico is a fantastic way to satisfy your sweet tooth without compromising your health goals. And if you’re looking for more quick family dinners or easy pasta recipes, don’t forget to check out my other posts for some fantastic 30-minute meals that will make your weeknight dinner ideas a breeze!

Brigadeiro de Ninho Proteico – Cremoso e Fácil

Prep Time 10 minutes
Cook Time 20 minutes
Total Time 30 minutes
Servings 10 pieces
Calories 250
A creamy and easy-to-make Brazilian-inspired protein treat combining milk powder, whey, and Greek yogurt for a nutritious delight.

Ingredients

Main Ingredients

  • 100 g leite em pó
  • 60 g whey protein (baunilha ou “leite em pó”)
  • 170 g iogurte grego zero (ou 120 ml leite desnatado)
  • 10 g manteiga sem sal ou óleo de coco (opcional)
  • 2 sopa eritritol/xilitol (opcional)
  • 3 sopa leite em pó para empanar

Instructions 

  • Combine leite em pó, whey, iogurte, manteiga, e eritritol em uma panela e misture até obter uma mistura homogênea.
  • Coque em fogo baixo, mexendo sempre, até a mistura engrossar e desgrudar do fundo da panela (aproximadamente 20 minutos).
  • Deixe esfriar, modele em bolinhas e passe no leite em pó para empanar.

Notes

Para um sabor mais intenso, adicione cacau em pó na mistura.
Calories: 250kcal
Cost: $15
Course: Dessert
Cuisine: Brazilian
Keyword: chocolate, protein

Are you looking for a quick and nutritious breakfast that will kickstart your day? Well, look no further! I’m excited to share my favorite recipe for Omelete de Whey Protein – Rápida e Proteica. This delightful omelet is not only packed with protein but is also incredibly easy to whip up, making it perfect for busy mornings. Plus, if you’re a fan of easy pasta recipes, you’ll love how versatile this dish can be!

Why You’ll Love This Recipe

  • Quick to prepare, perfect for busy mornings.
  • High in protein, keeping you full and energized.
  • Customizable with your favorite veggies and spices.
  • Great for meal prep, making it a fantastic option for quick family dinners.
  • Delicious and satisfying, it’s a great way to start your day!

Ingredients

To make this scrumptious omelet, you’ll need the following ingredients:

  • 2 large eggs
  • 1 scoop of whey protein powder (vanilla or unflavored)
  • 1 tablespoon of milk (or a dairy-free alternative)
  • Salt and pepper to taste
  • 1/4 cup of chopped vegetables (like bell peppers, spinach, or onions)
  • 1 tablespoon of olive oil or butter for cooking

Full ingredient list with measurements is provided in the printable recipe card below.

How to Make the Recipe

Making this omelet is a breeze! Follow these simple steps:

  1. In a mixing bowl, whisk together the eggs, whey protein powder, milk, salt, and pepper until well combined.
  2. Heat the olive oil or butter in a non-stick skillet over medium heat.
  3. Add the chopped vegetables to the skillet and sauté for about 2-3 minutes until they are tender.
  4. Pour the egg mixture over the sautéed vegetables, tilting the pan to ensure even coverage.
  5. Cook for about 3-4 minutes, or until the edges start to set. You can gently lift the edges with a spatula to allow uncooked egg to flow underneath.
  6. Once the omelet is mostly set, fold it in half and cook for another minute.
  7. Slide the omelet onto a plate and enjoy!

Pro Tips for Making the Recipe

Here are some tips to ensure your omelet turns out perfectly every time:

  • Use fresh ingredients for the best flavor.
  • Don’t overcook the omelet; it should be fluffy and slightly moist inside.
  • Experiment with different vegetables and spices to find your favorite combination.
  • If you’re short on time, you can prep the veggies the night before.
  • For a creamier texture, add a little cheese before folding the omelet.

How to Serve

This omelet is delicious on its own, but you can elevate your breakfast by serving it with:

  • Whole grain toast or an English muffin.
  • A side of fresh fruit for a sweet contrast.
  • Avocado slices for a creamy addition.
  • Hot sauce or salsa for a spicy kick.

It’s also a fantastic option for 30-minute meals or weeknight dinner ideas when you want something quick yet satisfying!

Make Ahead and Storage

If you want to prepare this omelet in advance, you can whisk the egg mixture and chop the vegetables the night before. Store them in the refrigerator until you’re ready to cook. This makes it a great option for busy mornings or even a quick dinner after a long day.

Leftover omelet can be stored in an airtight container in the fridge for up to 2 days. Simply reheat in the microwave or on the stovetop before serving.

So, what are you waiting for? Grab your ingredients and let’s get cooking! This Omelete de Whey Protein – Rápida e Proteica is sure to become a staple in your breakfast rotation. And remember, if you’re ever in the mood for something different, check out my favorite creamy garlic pasta recipes for a delightful dinner option!

Omelete de Whey Protein – Rápida e Proteica

Prep Time 5 minutes
Cook Time 5 minutes
Total Time 10 minutes
Servings 1 serving
Calories 250
A quick, protein-packed omelette perfect for a nutritious breakfast or snack.

Ingredients

group

  • 1 piece gema ((18 g))
  • 4 pieces claras ((120 g))
  • 30 g whey protein ((baunilha ou neutro))
  • 50 g peito de peru picado
  • 30 g cottage ou ricota
  • 30 ml água
  • to taste sal e pimenta
  • 1 fio azeite

Instructions 

  • Modo de preparar: Misture os ingredientes líquidos e secos, bata até obter uma mistura homogênea. Aqueça uma frigideira com azeite, despeje a mistura e cozinhe até dourar.

Notes

Para deixar mais saboroso, adicione ervas finas ou queijo ralado.
Calories: 250kcal
Cost: $15
Course: Breakfast
Cuisine: Brazilian
Keyword: protein