Author

thomas

Browsing

Oh, the joy of crispy potatoes! If you’re like me, you know that the perfect side dish can elevate any meal, especially during those busy weeknights when quick family dinners are a must. Today, I’m excited to share my recipe for Batata à Milanesa Crocante, a delightful way to enjoy crispy potatoes that pairs beautifully with just about anything. Plus, it’s a fantastic addition to your repertoire of easy pasta recipes, making it a versatile choice for your dinner table!

Why You’ll Love This Recipe

  • Quick and easy to prepare, perfect for busy weeknights.
  • Deliciously crispy texture that everyone will love.
  • Versatile side dish that complements a variety of main courses.
  • Great for meal prep and can be made ahead of time.
  • Perfect for serving alongside creamy garlic pasta or any of your favorite 30-minute meals.

Ingredients

To make these crispy potatoes, you’ll need just a few simple ingredients that you probably already have in your pantry. Here’s what you’ll need:

  • 4 large potatoes, peeled and sliced
  • 1 cup all-purpose flour
  • 2 large eggs, beaten
  • 2 cups breadcrumbs (preferably panko for extra crunch)
  • Salt and pepper to taste
  • Vegetable oil for frying

Full ingredient list with measurements is provided in the printable recipe card below.

How to Make the Recipe

Now, let’s dive into the steps to create these delicious Batata à Milanesa Crocante:

  1. Start by peeling and slicing your potatoes into thin rounds. Aim for about 1/4 inch thick for the best results.
  2. In a large bowl, season the flour with salt and pepper. In another bowl, beat the eggs. In a third bowl, place the breadcrumbs.
  3. Heat about 1 inch of vegetable oil in a large skillet over medium heat.
  4. Coat each potato slice in the flour, shaking off any excess. Then, dip it into the beaten eggs, and finally, coat it with breadcrumbs.
  5. Carefully place the coated potato slices into the hot oil, frying them in batches to avoid overcrowding. Fry until golden brown and crispy, about 3-4 minutes per side.
  6. Once cooked, transfer the crispy potatoes to a paper towel-lined plate to drain any excess oil. Season with a little more salt if desired.

Pro Tips for Making the Recipe

Batata à Milanesa Crocante

Here are some of my favorite tips to ensure your Batata à Milanesa Crocante turns out perfectly every time:

  • For extra flavor, add some garlic powder or paprika to the flour mixture.
  • Make sure the oil is hot enough before adding the potatoes; this helps achieve that perfect crispy texture.
  • If you want to make this a healthier option, consider baking the potatoes instead of frying. Just spray them with a little oil and bake at 425°F until crispy.
  • These crispy potatoes can be made ahead of time and reheated in the oven for a quick side dish.

How to Serve

These crispy potatoes are incredibly versatile! Here are some serving suggestions:

  • Serve them alongside your favorite protein, like grilled chicken or steak.
  • Pair them with a fresh salad for a light meal.
  • They make a fantastic side for any of your easy pasta recipes, especially creamy garlic pasta!
  • Top them with cheese and herbs for a delicious twist.

Make Ahead and Storage

If you’re planning a busy week, you can make these crispy potatoes ahead of time! Here’s how:

  • Prepare the potatoes and coat them as instructed, then store them in the refrigerator for up to 24 hours before frying.
  • Cooked potatoes can be stored in an airtight container in the fridge for up to 3 days. Reheat them in the oven to regain their crispiness.
  • For longer storage, freeze the uncooked, coated potato slices. When you’re ready to enjoy them, fry them straight from the freezer, adding a couple of extra minutes to the cooking time.

So there you have it! My delightful recipe for Batata à Milanesa Crocante is not only easy to make but also a fantastic addition to your collection of weeknight dinner ideas. I hope you enjoy making and sharing these crispy potatoes with your family as much as I do. Happy cooking!

Batata à Milanesa Crocante

Prep Time 15 minutes
Cook Time 20 minutes
Total Time 35 minutes
Servings 4 servings
Calories 250
A crispy and delicious Brazilian-style potato dish, perfect as an appetizer or side.

Ingredients

main

  • 5 medium batatas médias (sliced into rounds)
  • 2 eggs ovos batidos
  • 3 tablespoons farinha de trigo
  • 4 tablespoons farinha de rosca
  • 1 tablespoon sal (for boiling potatoes)
  • to taste sal, pimenta-do-reino e orégano (to season)
  • as needed óleo para fritar (for frying)

Instructions 

  • Cozinhe as batatas em água salgada até ficarem macias, escorra e deixe esfriar.
  • Separe as rodelas de batata, tempere com sal, pimenta-do-reino e orégano.
  • Passe as rodelas na farinha de trigo, depois nos ovos batidos e por último na farinha de rosca.
  • Frite em óleo quente até dourar e crocante, escorra em papel toalha.
Notes

Para uma crocância extra, deixe as batatas empanadas na geladeira por 30 minutos antes de fritar.
Calories: 250kcal
Cost: $15
Course: Side Dish
Cuisine: Brazilian
Keyword: potato

Oh, my goodness! If you’re anything like me, you know that nothing beats the joy of a rich, moist chocolate cake. Today, I’m thrilled to share my favorite recipe for Bolo Nega Maluca Fofinho Molhadinho. This cake is not just a treat; it’s a celebration of flavors that will make your taste buds dance! And let me tell you, it’s perfect for those busy weeknights when you want something sweet but don’t have hours to spend in the kitchen. Plus, it pairs wonderfully with quick family dinners or even as a delightful dessert after one of those easy pasta recipes you whip up in a flash!

Why You’ll Love This Recipe

  • It’s incredibly moist and fudgy, making it a chocolate lover’s dream.
  • Simple ingredients that you probably already have in your pantry.
  • Perfect for any occasion, from casual weeknight dinners to special celebrations.
  • Quick to prepare, so you can enjoy it in no time!
  • It’s a crowd-pleaser that will impress your family and friends.

Ingredients

To make this delightful Bolo Nega Maluca Fofinho Molhadinho, you’ll need the following ingredients:

  • 1 cup of all-purpose flour
  • 1 cup of sugar
  • 1/2 cup of unsweetened cocoa powder
  • 1 teaspoon of baking powder
  • 1/2 teaspoon of baking soda
  • 1/4 teaspoon of salt
  • 1/2 cup of vegetable oil
  • 1 cup of hot water
  • 1 teaspoon of vanilla extract
  • 1 tablespoon of apple cider vinegar

Full ingredient list with measurements is provided in the printable recipe card below.

How to Make the Recipe

Now, let’s dive into the fun part—making this delicious cake!

  1. Preheat your oven to 350°F (175°C) and grease a 9-inch round cake pan.
  2. In a large mixing bowl, combine the flour, sugar, cocoa powder, baking powder, baking soda, and salt. Whisk them together until well blended.
  3. Add the vegetable oil, hot water, vanilla extract, and apple cider vinegar to the dry ingredients. Mix until smooth and well combined.
  4. Pour the batter into the prepared cake pan and bake for about 30-35 minutes, or until a toothpick inserted in the center comes out clean.
  5. Once baked, let the cake cool in the pan for 10 minutes before transferring it to a wire rack to cool completely.

Pro Tips for Making the Recipe

Here are some of my favorite tips to ensure your Bolo Nega Maluca Fofinho Molhadinho turns out perfectly:

  • Make sure your ingredients are at room temperature for better mixing.
  • Don’t skip the apple cider vinegar; it adds moisture and enhances the cake’s texture.
  • For an extra chocolatey experience, consider adding chocolate chips to the batter!
  • Let the cake cool completely before frosting or serving to maintain its moistness.

How to Serve

This cake is delightful on its own, but you can elevate it even further! Here are some serving suggestions:

  • Dust with powdered sugar for a simple yet elegant touch.
  • Serve with a scoop of vanilla ice cream for a classic dessert.
  • Pair it with fresh berries for a refreshing contrast.
  • Drizzle with chocolate sauce or a creamy frosting for an indulgent treat.

Make Ahead and Storage

This cake is perfect for making ahead of time! Here’s how to store it:

  • Store the cooled cake in an airtight container at room temperature for up to 3 days.
  • If you want to keep it longer, wrap it tightly in plastic wrap and freeze for up to 3 months.
  • To serve after freezing, let it thaw in the refrigerator overnight before enjoying.

So there you have it! A deliciously moist and fudgy Bolo Nega Maluca Fofinho Molhadinho that’s perfect for any occasion. Whether you’re looking for a sweet treat after one of your 30-minute meals or a delightful dessert to impress your guests, this cake is sure to be a hit. Enjoy baking, and don’t forget to share your creations with friends and family!

Bolo Nega Maluca Fofinho e Molhadinho

Prep Time 20 minutes
Cook Time 40 minutes
Total Time 1 hour
Servings 8 slices
Calories 350
A delicious, moist chocolate cake perfect for any occasion, combining rich flavors with a soft texture.

Ingredients

group

  • 3 units ovos
  • 1 cup açúcar
  • 1 cup chocolate em pó (ou cacau)
  • 0.5 cup óleo
  • 1 cup água quente
  • 2 cups farinha de trigo peneirada
  • 1 sopa fermento em pó
  • 0.5 cup leite (para cobertura)
  • 1 sopa manteiga (para cobertura)
  • 3 sopa açúcar (para cobertura)
  • 8 sopa chocolate em pó (para cobertura)

Instructions 

  • Preaqueça o forno a 180°C e unte uma forma redonda de 25 cm com manteiga e farinha.
  • Bata os ovos com o açúcar até obter uma mistura homogênea.
  • Adicione o chocolate em pó, o óleo e a água quente, misturando bem.
  • Incorpore a farinha de trigo e o fermento, mexendo delicadamente.
  • Despeje a massa na forma e asse por 40 minutos ou até que um palito saia limpo.
  • Para a cobertura, misture o leite, manteiga, açúcar e chocolate em pó até obter um creme homogêneo.
  • Desenforme o bolo e cubra com a ganache de chocolate ainda quente.

Notes

Para um sabor mais intenso, substitua o cacau por chocolate em barra derretido.
Calories: 350kcal
Cost: $15
Course: Dessert
Cuisine: Brazilian
Keyword: chocolate

Oh, my goodness! If you’re looking for a sweet treat that will make your taste buds dance, you’ve come to the right place! Today, I’m excited to share my recipe for Rosquinha de Colher Fofinha com Coco, a delightful coconut dessert that’s perfect for any occasion. Whether you’re planning a family gathering or just want to indulge in something sweet after a long day, this recipe is sure to impress. And let’s be honest, who doesn’t love a quick and easy dessert that feels like a warm hug? Plus, if you’re in the mood for some easy pasta recipes for dinner, I’ve got you covered there too!

Why You’ll Love This Recipe

  • It’s incredibly easy to make, perfect for busy weeknights.
  • Rich coconut flavor that will transport you to a tropical paradise.
  • Perfect for sharing with family and friends at gatherings.
  • Can be made ahead of time for those last-minute dessert cravings.
  • Pairs wonderfully with coffee or tea for a delightful afternoon treat.

Ingredients

To whip up these irresistible coconut sweets, you’ll need the following ingredients:

  • 1 cup of shredded coconut
  • 1 cup of sweetened condensed milk
  • 1 cup of all-purpose flour
  • 1 teaspoon of baking powder
  • 1/2 cup of unsalted butter, softened
  • 1/2 teaspoon of vanilla extract
  • A pinch of salt

Full ingredient list with measurements is provided in the printable recipe card below.

How to Make the Recipe

Now, let’s get to the fun part—making these delicious Rosquinhas!

  1. Preheat your oven to 350°F (175°C) and line a baking sheet with parchment paper.
  2. In a large mixing bowl, cream together the softened butter and sweetened condensed milk until smooth.
  3. Add in the vanilla extract and mix well.
  4. In another bowl, combine the flour, baking powder, shredded coconut, and salt.
  5. Gradually add the dry ingredients to the wet mixture, stirring until well combined.
  6. Using a spoon, drop dollops of the mixture onto the prepared baking sheet, leaving some space between each.
  7. Bake for 15-20 minutes or until the edges are golden brown.
  8. Let them cool slightly before serving. Enjoy!

Pro Tips for Making the Recipe

Here are some of my favorite tips to ensure your Rosquinha de Colher turns out perfectly:

  • Make sure your butter is softened to room temperature for easy mixing.
  • For an extra coconut kick, feel free to sprinkle some toasted coconut on top before baking.
  • If you prefer a sweeter treat, you can add a bit more sweetened condensed milk to the batter.
  • Don’t skip the cooling step; they’ll be easier to handle and taste even better!

How to Serve

These delightful coconut sweets are perfect for any occasion! Here are some serving suggestions:

  • Serve them warm with a scoop of vanilla ice cream for a decadent dessert.
  • Pair them with a cup of coffee or tea for a delightful afternoon snack.
  • They make a great addition to any dessert table at parties or family gatherings.
  • Wrap them up in a cute box for a thoughtful homemade gift.

Make Ahead and Storage

If you’re like me and love to plan ahead, you’ll be happy to know that these Rosquinhas can be made in advance! Here’s how to store them:

  • Store them in an airtight container at room temperature for up to 3 days.
  • For longer storage, you can freeze them for up to a month. Just make sure to separate layers with parchment paper to prevent sticking.
  • To enjoy them after freezing, simply let them thaw at room temperature for a few hours.

So there you have it! A delightful recipe for Rosquinha de Colher Fofinha com Coco that’s sure to become a family favorite. And while you’re at it, don’t forget to check out my quick family dinners and 30-minute meals for more delicious ideas! If you’re in the mood for something creamy, my creamy garlic pasta is a must-try! Happy baking!

Rosquinha de Colher – Fofinha com Coco

Prep Time 30 minutes
Cook Time 20 minutes
Total Time 50 minutes
Servings 20 pieces
Calories 250
A delicious Brazilian treat, these soft coconut-flavored spoon cookies are perfect for a sweet snack or dessert.

Ingredients

Dough

  • 1 can leite condensado
  • 3 units ovos
  • 1 can leite
  • 50 g fermento biológico
  • 1 can óleo (350ml)
  • 1 can água morna
  • 5 tbsp açúcar
  • 1 kg farinha de trigo
  • 1 pinch sal
  • 1 cup açúcar (para calda)
  • 1/2 cup leite (para calda)
  • Coco ralado para finalizar (para calda)

Instructions 

  • Combine leite condensado, ovos, leite, fermento, óleo, água morna, açúcar, farinha, and salt. Mix until smooth.
  • Pour batter into a greased pan and bake at 180°C (356°F) for about 20 minutes until golden.
  • Prepare the syrup by mixing sugar, milk, and coconut. Pour over hot baked cake and top with shredded coconut.

Notes

Enjoy fresh or chilled for best flavor.
Calories: 250kcal
Cost: $15
Course: Dessert
Cuisine: Brazilian
Keyword: coconut

Have you ever craved a dish that’s both crispy and juicy, yet easy to prepare? Well, let me introduce you to my favorite comfort food: Bife à Milanesa na Airfryer! This delightful recipe is perfect for quick family dinners and is sure to impress everyone at the table. Plus, it’s a fantastic addition to your collection of easy pasta recipes, making it a versatile choice for any weeknight dinner. Let’s dive into this delicious journey together!

Why You’ll Love This Recipe

  • Quick and easy to prepare, perfect for busy weeknights.
  • Deliciously crispy and juicy, satisfying your cravings.
  • Healthier than traditional frying, thanks to the Airfryer.
  • Great for meal prep and can be paired with various sides.
  • Perfect for family gatherings or a cozy dinner at home.

Ingredients

To make this scrumptious Bife à Milanesa na Airfryer, you’ll need the following ingredients:

  • 4 beef cutlets (about 1/2 inch thick)
  • 1 cup breadcrumbs
  • 1/2 cup all-purpose flour
  • 2 large eggs
  • 1 teaspoon garlic powder
  • 1 teaspoon paprika
  • Salt and pepper to taste
  • Cooking spray or olive oil for greasing

Full ingredient list with measurements is provided in the printable recipe card below.

How to Make the Recipe

Now, let’s get cooking! Follow these simple steps to create your own Bife à Milanesa na Airfryer:

  1. Start by seasoning the beef cutlets with salt, pepper, garlic powder, and paprika. Let them marinate for about 15 minutes to absorb all those delicious flavors.
  2. Set up a breading station: Place the flour in one shallow dish, beat the eggs in another, and put the breadcrumbs in a third dish.
  3. Coat each cutlet in flour, shaking off the excess, then dip it into the beaten eggs, and finally, coat it with breadcrumbs. Make sure each piece is well-covered for that perfect crunch!
  4. Preheat your Airfryer to 400°F (200°C) for about 5 minutes. This step is crucial for achieving that crispy texture.
  5. Spray the Airfryer basket with cooking spray or brush it lightly with olive oil. Place the breaded cutlets in a single layer, making sure they don’t touch each other.
  6. Cook for 10-12 minutes, flipping halfway through, until they are golden brown and crispy. You might want to check them a minute or two earlier to ensure they don’t overcook.
  7. Once done, remove them from the Airfryer and let them rest for a couple of minutes before serving.

Pro Tips for Making the Recipe

Here are some of my favorite tips to ensure your Bife à Milanesa na Airfryer turns out perfectly every time:

  • For extra flavor, try adding grated Parmesan cheese to the breadcrumbs.
  • If you prefer a spicier kick, add some cayenne pepper to the seasoning mix.
  • Don’t overcrowd the Airfryer basket; cook in batches if necessary for even cooking.
  • Let the cutlets rest after cooking to keep them juicy.
  • Experiment with different types of meat, like chicken or pork, for a fun twist!

How to Serve

Now that your Bife à Milanesa na Airfryer is ready, it’s time to serve it up! Here are some delicious serving suggestions:

  • Pair it with a fresh salad for a light meal.
  • Serve it alongside creamy garlic pasta for a comforting combination.
  • Top it with a squeeze of lemon juice for a refreshing touch.
  • Enjoy it with roasted vegetables or mashed potatoes for a hearty dinner.
  • Slice it up and use it in sandwiches or wraps for a quick lunch option.

Make Ahead and Storage

If you’re planning ahead, you can easily make this dish in advance! Here are some tips for storing and reheating:

  • Store any leftovers in an airtight container in the refrigerator for up to 3 days.
  • To reheat, place the cutlets back in the Airfryer at 350°F (175°C) for about 5 minutes to regain their crispiness.
  • You can also freeze the breaded cutlets before cooking. Just make sure to separate them with parchment paper to prevent sticking.
  • When you’re ready to cook from frozen, add a few extra minutes to the cooking time.

With this Bife à Milanesa na Airfryer, you’ll have a delicious, crispy, and juicy meal that’s perfect for any occasion. Whether it’s a quick family dinner or a cozy night in, this recipe is sure to become a favorite in your home. So, gather your ingredients, and let’s make some magic in the kitchen!

Bife à Milanesa na Airfryer (Crocante e Suculento)

Prep Time 10 minutes
Cook Time 15 minutes
Total Time 25 minutes
Servings 4 servings
Calories 350
Enjoy a crispy and juicy milanesa-style beef prepared effortlessly in the air fryer, combining traditional flavors with modern convenience.

Ingredients

Meat

  • 4 pieces bifes de alcatra ou coxão mole (aprox. 100g cada)
  • 1 teaspoon alho amassado
  • to taste sal e pimenta-do-reino
  • 0.5 teaspoon páprica doce ou defumada (opcional)
  • 0.5 lemon suco de limão
  • 2 units ovos
  • 1 tablespoon água
  • 1 cup farinha de trigo
  • 1.5 cups farinha de rosca ou panko
  • to spray oil óleo em spray para finalizar

Instructions 

  • Tempere os bifes com alho, sal, pimenta e limão.
  • Em um recipiente, bata os ovos com água.
  • Passe os bifes na farinha de trigo, depois na mistura de ovos e por último na farinha de rosca ou panko.
  • Preaqueça a air fryer a 200°C por 3 minutos.
  • Coloque os bifes na cesta da air fryer, borrife com óleo em spray e cozinhe por 15 minutos, virando na metade do tempo.
  • Sirva quente, acompanhado de sua preferência.

Notes

Para uma crocância extra, borrife óleo em spray generosamente antes de cozinhar.
Calories: 350kcal
Cost: $15
Course: Main Course
Cuisine: Brazilian
Keyword: beef

Oh, my goodness! If you’re looking for a dessert that’s not only delicious but also brings a taste of the tropics right into your kitchen, you’ve come to the right place! Today, I’m excited to share my recipe for Caçarola Italiana Cremosa com Coco e Queijo. This creamy delight is perfect for those busy weeknights when you want something special without spending hours in the kitchen. Plus, it’s a fantastic way to impress your family and friends with minimal effort. Let’s dive into this easy pasta recipe that will surely become a favorite!

Why You’ll Love This Recipe

  • It’s a quick and easy dessert that can be made in under 30 minutes!
  • Perfect for family gatherings or a cozy night in.
  • Combines the rich flavors of coconut and cheese for a unique taste.
  • Great for those who love tropical flavors.
  • Can be served warm or chilled, making it versatile for any occasion.

Ingredients

To make this delightful Caçarola Italiana Cremosa com Coco e Queijo, you’ll need the following ingredients:

  • 1 cup of shredded coconut
  • 1 cup of cream cheese, softened
  • 1 cup of sweetened condensed milk
  • 1 cup of grated Parmesan cheese
  • 1 teaspoon of vanilla extract
  • 1/2 cup of milk
  • 1/4 cup of sugar
  • 1/2 teaspoon of salt
  • 1/2 cup of crushed graham crackers (for topping)

Full ingredient list with measurements is provided in the printable recipe card below.

How to Make the Recipe

Now, let’s get to the fun part—making this creamy dessert!

  1. Preheat your oven to 350°F (175°C).
  2. In a large mixing bowl, combine the softened cream cheese, sweetened condensed milk, and milk. Beat until smooth and creamy.
  3. Add in the shredded coconut, grated Parmesan cheese, vanilla extract, and salt. Mix well until all ingredients are fully incorporated.
  4. Pour the mixture into a greased baking dish.
  5. Sprinkle the crushed graham crackers on top for a delightful crunch.
  6. Bake in the preheated oven for about 25-30 minutes, or until the top is golden brown and the center is set.
  7. Let it cool for a few minutes before serving. You can enjoy it warm or refrigerate it for a chilled treat!

Pro Tips for Making the Recipe

Here are some of my favorite tips to ensure your Caçarola Italiana Cremosa com Coco e Queijo turns out perfectly:

  • Make sure your cream cheese is at room temperature for easier mixing.
  • Feel free to adjust the sweetness by adding more or less sugar according to your taste.
  • If you want a more tropical flavor, consider adding a splash of coconut extract.
  • For a fun twist, try adding some chopped nuts or chocolate chips to the mixture before baking.
  • This dessert can be made ahead of time, making it a great option for quick family dinners or gatherings!

How to Serve

Serving this creamy delight is as easy as pie! Here are some ideas:

  • Serve it warm with a dollop of whipped cream on top.
  • For a refreshing twist, add some fresh fruit like mango or pineapple.
  • Pair it with a scoop of vanilla ice cream for an indulgent treat.
  • It also makes a lovely addition to a dessert table at parties or family gatherings.

Make Ahead and Storage

This Caçarola Italiana Cremosa com Coco e Queijo is perfect for making ahead of time! Here’s how to store it:

  • Once cooled, cover the dish with plastic wrap or aluminum foil and refrigerate for up to 3 days.
  • If you want to freeze it, make sure it’s in an airtight container. It can be frozen for up to a month. Just thaw it in the refrigerator overnight before serving.
  • Reheat in the oven at a low temperature if you prefer it warm again.

So there you have it! A delightful, creamy dessert that’s sure to impress. Whether you’re looking for weeknight dinner ideas or a special treat for a gathering, this Caçarola Italiana Cremosa com Coco e Queijo is a fantastic choice. I can’t wait for you to try it! Happy cooking!

Caçarola Italiana Cremosa com Coco e Queijo

Prep Time 15 minutes
Cook Time 30 minutes
Total Time 45 minutes
Servings 8 pieces
Calories 250
A delicious and creamy Italian casserole infused with coconut and cheese, perfect for a comforting dessert or snack.

Ingredients

group

  • 3 units ovos
  • 2 tablespoons manteiga
  • 2.5 cups leite
  • 1 cups açúcar
  • 0.5 cups coco ralado fino
  • 0.5 cups queijo parmesão ralado
  • 1 cups farinha de trigo
  • 0.5 cups açúcar (para caramelizar) (para forma)
  • um fio água (para forma)

Instructions 

  • Preaqueça o forno a 180°C e unte uma forma com açúcar caramelizado.
  • Bata os ovos, manteiga, leite, açúcar, coco ralado, queijo parmesão e farinha de trigo até obter uma massa homogênea.
  • Despeje a massa na forma caramelizada e leve ao forno por aproximadamente 30 minutos ou até dourar.
  • Deixe esfriar antes de desenformar e servir.

Notes

Para um sabor mais intenso, adicione uma pitada de canela na massa.
Calories: 250kcal
Cost: $15
Course: Dessert
Cuisine: Italian
Keyword: cheese, coconut

Have you ever craved a dish that’s not only comforting but also easy to whip up on a busy weeknight? Well, let me introduce you to my favorite recipe: Escondidinho de Carne Seca na Airfryer! This creamy and gratinated delight is perfect for quick family dinners and will surely impress your loved ones. Plus, it’s a fantastic alternative to those usual easy pasta recipes we often rely on. So, roll up your sleeves, and let’s dive into this delicious adventure!

Why You’ll Love This Recipe

  • Quick and easy to prepare, making it perfect for 30-minute meals.
  • Rich, creamy texture that satisfies your comfort food cravings.
  • Perfect for family gatherings or a cozy weeknight dinner.
  • Can be made in the Airfryer for a healthier twist!
  • Versatile enough to adapt with your favorite ingredients.

Ingredients

To make this scrumptious Escondidinho de Carne Seca na Airfryer, you’ll need the following ingredients:

  • 2 cups shredded carne seca (dried beef)
  • 4 cups mashed potatoes (homemade or store-bought)
  • 1 cup cream cheese
  • 1/2 cup sour cream
  • 1 cup shredded cheese (mozzarella or your favorite)
  • 1 onion, finely chopped
  • 2 cloves garlic, minced
  • Salt and pepper to taste
  • Olive oil for sautéing

Full ingredient list with measurements is provided in the printable recipe card below.

How to Make the Recipe

Now, let’s get cooking! Follow these simple steps to create your own Escondidinho de Carne Seca na Airfryer:

  1. Start by sautéing the chopped onion and minced garlic in a bit of olive oil until they are soft and fragrant.
  2. Add the shredded carne seca to the pan and mix well. Season with salt and pepper to taste.
  3. In a separate bowl, combine the mashed potatoes, cream cheese, and sour cream until smooth and creamy.
  4. In a baking dish that fits your Airfryer, layer half of the mashed potato mixture at the bottom.
  5. Spread the carne seca mixture evenly over the mashed potatoes.
  6. Top with the remaining mashed potatoes and sprinkle shredded cheese on top.
  7. Preheat your Airfryer to 350°F (175°C) and cook for about 15-20 minutes, or until the cheese is bubbly and golden brown.
  8. Let it cool for a few minutes before serving. Enjoy your delicious creation!

Pro Tips for Making the Recipe

Here are some helpful suggestions to ensure your Escondidinho de Carne Seca na Airfryer turns out perfectly:

  • For a richer flavor, consider adding some sautéed bell peppers or spices to the carne seca mixture.
  • If you prefer a bit of heat, sprinkle some red pepper flakes into the mashed potatoes.
  • Make sure your mashed potatoes are creamy enough to spread easily; you can add a bit more sour cream if needed.
  • Experiment with different types of cheese for a unique twist!
  • Don’t skip the resting time after cooking; it helps the layers set and makes serving easier.

How to Serve

This Escondidinho de Carne Seca na Airfryer is best served warm, straight from the Airfryer. Pair it with a fresh salad or some steamed vegetables for a complete meal. It’s also a fantastic option for potlucks or family gatherings, as it can easily be doubled or tripled. If you’re looking for more weeknight dinner ideas, this dish is a winner!

Make Ahead and Storage

If you want to prepare this dish in advance, you can assemble it a day ahead and store it in the refrigerator. Just pop it in the Airfryer when you’re ready to enjoy! Leftovers can be stored in an airtight container in the fridge for up to 3 days. Reheat in the Airfryer for a few minutes to bring back that delicious, crispy top.

So there you have it! A delightful recipe that’s not only easy to make but also a crowd-pleaser. I hope you enjoy making this Escondidinho de Carne Seca na Airfryer as much as I do. It’s perfect for those busy nights when you need something quick yet satisfying. Happy cooking!

Escondidinho de Carne Seca na Airfryer (Cremoso e Gratinado)

Prep Time 20 minutes
Cook Time 30 minutes
Total Time 50 minutes
Servings 6 servings
Calories 450
Delight in this creamy, cheesy Brazilian dish made with dried beef and cassava, perfectly cooked in the air fryer for a crispy top and tender interior.

Ingredients

Meat

  • 500 g de carne seca dessalgada, cozida e desfiada

Butter

  • 2 tbsp de manteiga

Onion

  • 0.5 cup de cebola picadinha

Garlic

  • 2 cloves de alho amassados

Tomato

  • 1 medium de tomate sem sementes, picado

Smoked Paprika

  • 0.5 tsp de páprica defumada (opcional)

Salt and Pepper

  • to taste Sal e pimenta-do-reino a gosto

Chives

  • 2 tbsp de cheiro-verde picado

Cassava

  • 500 g de mandioca cozida e amassada

Warm Milk

  • 0.5 cup de leite quente

Cream of Milk

  • 200 g de creme de leite

Mozzarella Cheese

  • 1 cup de queijo muçarela ralado

Parmesan Cheese

  • 2 tbsp de queijo parmesão ralado (opcional)

Instructions 

  • In a pan, sauté the chopped onion and minced garlic in butter until fragrant.
  • Add the chopped tomato, season with salt, pepper, and smoked paprika if using. Cook for 1 minute.
  • Mix in the shredded dried beef and cook for 3 minutes, stirring occasionally.
  • In a bowl, combine the cooked cassava with warm milk, cream, chopped chives, and the sautéed beef mixture. Mix well.
  • Transfer the mixture to a baking dish, top with mozzarella and Parmesan cheese.
  • Preheat the air fryer to 180°C (356°F). Place the dish inside and cook for 15 minutes until golden and bubbly.
  • Let it rest for 5 minutes before serving.

Notes

For extra flavor, add a dash of hot sauce or chopped fresh herbs before serving.
Calories: 450kcal
Cost: $15
Course: Main Course
Cuisine: Brazilian
Keyword: Carne Seca

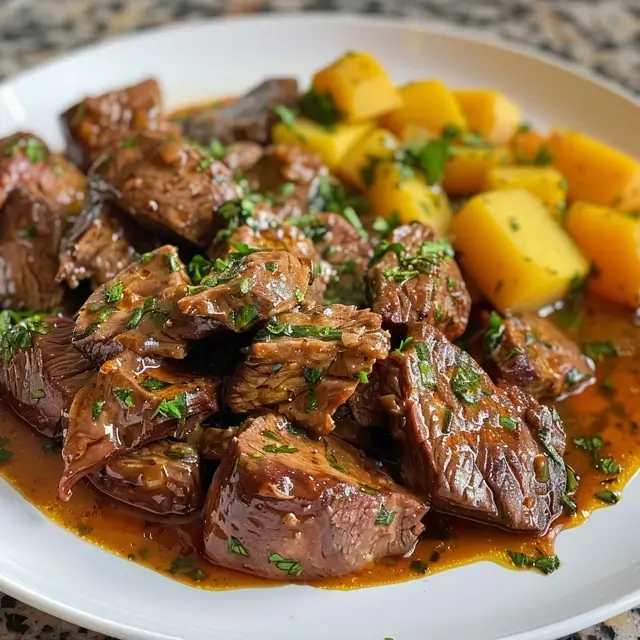
There’s something incredibly comforting about a warm, hearty stew, especially when it’s made with love and a dash of creativity! Today, I’m excited to share my recipe for Carne de Panela com Batata e Cenoura – a juicy and easy stew that’s perfect for quick family dinners. This dish is not only delicious but also a breeze to prepare, making it a fantastic addition to your weeknight dinner ideas. And if you’re looking for easy pasta recipes to complement your meals, I’ve got you covered there too!

Why You’ll Love This Recipe

  • It’s a one-pot wonder that saves on cleanup!
  • Perfect for busy weeknights, ready in under an hour.
  • Rich in flavor and packed with tender meat and veggies.
  • Great for meal prep and leftovers taste even better!
  • Can be easily customized with your favorite vegetables.

Ingredients

To make this delightful Carne de Panela com Batata e Cenoura, you’ll need the following ingredients:

  • 2 pounds beef chuck, cut into chunks
  • 4 medium potatoes, peeled and diced
  • 3 large carrots, sliced
  • 1 large onion, chopped
  • 4 cloves garlic, minced
  • 2 cups beef broth
  • 1 tablespoon olive oil
  • 1 teaspoon paprika
  • Salt and pepper to taste
  • Fresh parsley for garnish

Full ingredient list with measurements is provided in the printable recipe card below.

How to Make the Recipe

Now, let’s dive into the cooking process! Follow these simple steps to create your own delicious stew:

  1. In a pressure cooker, heat the olive oil over medium heat. Add the chopped onion and minced garlic, sautéing until fragrant.
  2. Add the beef chunks to the pot, browning them on all sides. This step is crucial for locking in flavor!
  3. Once the beef is browned, sprinkle in the paprika, salt, and pepper. Stir well to coat the meat.
  4. Pour in the beef broth, ensuring the meat is submerged. This will create a rich base for your stew.
  5. Add the diced potatoes and sliced carrots to the pot. Give everything a gentle stir.
  6. Seal the pressure cooker and cook on high pressure for 30 minutes. If you’re using a stovetop pressure cooker, make sure to follow the manufacturer’s instructions.
  7. Once the cooking time is up, carefully release the pressure. Open the lid and give your stew a good stir.
  8. Garnish with fresh parsley before serving. Enjoy your hearty meal!

Pro Tips for Making the Recipe

Here are some of my favorite tips to ensure your Carne de Panela com Batata e Cenoura turns out perfectly every time:

  • For extra flavor, marinate the beef in the spices for a few hours or overnight.
  • Feel free to add other vegetables like bell peppers or peas for added nutrition.
  • If you prefer a thicker stew, mix a tablespoon of cornstarch with cold water and stir it into the stew before serving.
  • Pair this stew with some creamy garlic pasta for a delightful twist on your meal!

How to Serve

This stew is incredibly versatile! Here are some serving suggestions:

  • Serve it hot with a side of crusty bread to soak up all the delicious juices.
  • Pair it with a fresh salad for a balanced meal.
  • For a comforting twist, serve it over a bed of rice or alongside easy pasta recipes.
  • Top with a dollop of sour cream or a sprinkle of cheese for added richness.

Make Ahead and Storage

This stew is perfect for meal prep! Here’s how to store it:

  • Let the stew cool completely before transferring it to an airtight container.
  • It can be stored in the refrigerator for up to 3 days or frozen for up to 3 months.
  • To reheat, simply warm it on the stove or in the microwave until heated through.
  • Leftovers often taste even better the next day, making it a great option for 30-minute meals!

So there you have it! A delicious, easy recipe for Carne de Panela com Batata e Cenoura that’s sure to become a family favorite. I hope you enjoy making this dish as much as I do. Happy cooking!

Carne de Panela com Batata e Cenoura – Suculenta e Fácil na Pressão

Prep Time 15 minutes
Cook Time 30 minutes
Total Time 45 minutes
Servings 4 people
Calories 450
Uma deliciosa e suculenta carne cozida com batatas e cenouras, perfeita para uma refeição reconfortante e fácil de preparar na panela de pressão.

Ingredients

Meat

  • 1 kg acém ou músculo (em cubos médios)

Oil or Olive Oil

  • 2 tablespoons óleo ou azeite

Vegetables

  • 1 medium cebola (picada)
  • 3 cloves alho (picados)
  • 2 tomatoes tomates maduros (sem pele e sementes, opcional)
  • 1 tablespoon extrato de tomate
  • 2 leaves louros
  • 2 tablespoons vinagre de vinho tinto (ou vinagre comum)
  • 2 teaspoons sal (ajuste a gosto)
  • 1 pinch pimenta-do-reino
  • 1 pinch colorau ou páprica doce

Water

  • 2 cups água fervente (aprox. 400 ml)

Vegetables

  • 3 medium batatas (cortadas em cubos grandes)
  • 2 medium cenouras (cortadas em rodelas grossas)

Garnish

  • to taste salsa picada (para finalizar)

Instructions 

  • Modo de Preparar
  • Refogue a carne com o óleo, cebola, alho, tomate, extrato de tomate, louro, vinagre, sal, pimenta e colorau por 30 minutos na panela de pressão.
  • Adicione a água fervente, as batatas e cenouras. Tampe a panela e cozinhe por 25 minutos após pegar pressão.
  • Finalize com salsa picada e sirva quente.

Notes

Use cortes de carne mais macios e ajuste os temperos ao seu gosto.
Calories: 450kcal
Cost: $15
Course: Main Course
Cuisine: Brazilian
Keyword: beef, pressure cooker, vegetables

There’s something truly magical about the aroma of freshly baked bread wafting through the kitchen, isn’t there? Today, I’m excited to share with you my favorite recipe for Pão Integral com Aveia e Mel (Fofinho e Saudável), a delightful whole grain bread with oats and honey that’s not only fluffy but also packed with nutrients. This bread is perfect for a nutritious breakfast or a quick snack, and it pairs beautifully with your favorite spreads. Plus, it’s a fantastic addition to your repertoire of easy pasta recipes for those busy weeknights!

Why You’ll Love This Recipe

  • It’s fluffy and delicious, making it a hit with the whole family.
  • Packed with wholesome ingredients, it’s a healthy choice for breakfast or snacks.
  • Easy to make, even for beginners!
  • Perfect for meal prep, so you can enjoy it throughout the week.
  • Great for pairing with soups or salads for quick family dinners.

Ingredients

To make this delightful bread, you’ll need the following ingredients:

  • 2 cups whole wheat flour
  • 1 cup rolled oats
  • 1/4 cup honey
  • 1 1/2 cups warm water
  • 2 teaspoons active dry yeast
  • 1 teaspoon salt
  • 2 tablespoons olive oil

Full ingredient list with measurements is provided in the printable recipe card below.

How to Make the Recipe

Now, let’s dive into the steps to create this fluffy bread:

  1. In a small bowl, combine the warm water and yeast. Let it sit for about 5 minutes until it becomes frothy.
  2. In a large mixing bowl, combine the whole wheat flour, rolled oats, and salt.
  3. Add the frothy yeast mixture and honey to the dry ingredients. Mix until a dough forms.
  4. Knead the dough on a floured surface for about 10 minutes until it’s smooth and elastic.
  5. Place the dough in a greased bowl, cover it with a damp cloth, and let it rise in a warm place for about 1 hour or until it doubles in size.
  6. Preheat your oven to 375°F (190°C).
  7. Punch down the risen dough and shape it into a loaf. Place it in a greased loaf pan.
  8. Let it rise again for about 30 minutes.
  9. Bake for 30-35 minutes or until the bread is golden brown and sounds hollow when tapped.
  10. Allow it to cool before slicing. Enjoy!

Pro Tips for Making the Recipe

Here are some tips to ensure your bread turns out perfect every time:

  • Make sure your water is warm, not hot, to activate the yeast without killing it.
  • For added flavor, consider mixing in seeds or nuts.
  • If you want a sweeter bread, you can increase the honey to 1/3 cup.
  • Don’t rush the rising process; it’s essential for achieving that fluffy texture.

How to Serve

This Pão Integral com Aveia e Mel is incredibly versatile! Here are some serving suggestions:

  • Spread with butter or your favorite nut butter for a quick breakfast.
  • Top with avocado and a sprinkle of salt for a healthy snack.
  • Pair it with soups or salads for 30-minute meals that are satisfying and nutritious.
  • Use it for sandwiches filled with your favorite ingredients for a delightful lunch.

Make Ahead and Storage

This bread is perfect for meal prep! Here’s how to store it:

  • Once cooled, wrap the bread tightly in plastic wrap or aluminum foil.
  • Store it at room temperature for up to 3 days or in the refrigerator for up to a week.
  • For longer storage, slice the bread and freeze it. Just pop a slice in the toaster when you’re ready to enjoy!

Now that you have this delightful recipe in your arsenal, you can easily whip up a loaf of Pão Integral com Aveia e Mel whenever you want. It’s a fantastic addition to your collection of weeknight dinner ideas and will surely impress your family and friends. Happy baking!

Pão Integral com Aveia e Mel (Fofinho e Saudável)

Prep Time 20 minutes
Cook Time 30 minutes
Total Time 50 minutes
Servings 12 slices
Calories 250
A healthy and soft whole grain bread with oats and honey, perfect for breakfast or snacks.

Ingredients

Flours

  • 375 g farinha de trigo branca
  • 125 g farinha de trigo integral
  • 82 g aveia em flocos finos

Liquids

  • 312 ml água morna
  • 90 ml leite integral morno
  • 38 g mel
  • 38 g azeite
  • 10 g sal
  • 4 g fermento biológico seco

Instructions 

  • Modo de preparo: Misture os ingredientes secos e líquidos, sove até obter uma massa homogênea, deixe crescer por 1 hora, modele e deixe crescer por mais 30 minutos, asse a 250°C por 25 minutos.

Notes

Para um pão mais macio, deixe a massa descansar por 30 minutos antes de assar.
Calories: 250kcal
Cost: $15
Course: bread
Cuisine: Brazilian
Keyword: whole grain

Have you ever craved a cake that’s not only fluffy but also incredibly versatile? Well, let me introduce you to my favorite recipe: Pão de Ló Fofinho – Base Perfeita para Bolos e Sobremesas. This delightful cake base is perfect for all your baking needs, whether you’re whipping up a quick family dinner dessert or planning a special occasion treat. Plus, it’s so easy to make that you’ll find yourself reaching for it time and time again, especially when you’re in the mood for some easy pasta recipes to pair with your meal!

Why You’ll Love This Recipe

  • Fluffy texture that melts in your mouth
  • Perfect base for layered cakes and desserts
  • Quick and easy to prepare, making it ideal for 30-minute meals
  • Versatile enough to pair with various flavors and fillings
  • Great for both novice and experienced bakers

Ingredients

To create this fluffy masterpiece, you’ll need the following ingredients:

  • 4 large eggs
  • 1 cup granulated sugar
  • 1 cup all-purpose flour
  • 1 teaspoon baking powder
  • 1/4 cup milk
  • 1 teaspoon vanilla extract
  • Pinch of salt

Full ingredient list with measurements is provided in the printable recipe card below.

How to Make the Recipe

Now, let’s dive into the steps to create this delightful cake base:

  1. Preheat your oven to 350°F (175°C) and grease a round cake pan.
  2. In a large mixing bowl, beat the eggs and sugar together until the mixture is pale and fluffy.
  3. Gently fold in the flour, baking powder, and salt until just combined.
  4. Add the milk and vanilla extract, mixing until smooth.
  5. Pour the batter into the prepared cake pan and smooth the top.
  6. Bake for 25-30 minutes or until a toothpick inserted in the center comes out clean.
  7. Let the cake cool in the pan for 10 minutes before transferring it to a wire rack to cool completely.

Pro Tips for Making the Recipe

Here are some of my favorite tips to ensure your Pão de Ló Fofinho turns out perfectly every time:

  • Make sure your eggs are at room temperature for better volume.
  • Don’t overmix the batter; gently fold in the dry ingredients to keep the cake light and airy.
  • For added flavor, consider incorporating lemon zest or almond extract.
  • If you want to make this cake ahead of time, it freezes beautifully! Just wrap it tightly in plastic wrap.
  • Experiment with different fillings and frostings to create your own signature dessert!

How to Serve

This cake is incredibly versatile! Here are some serving suggestions:

  • Layer it with fresh berries and whipped cream for a light dessert.
  • Use it as a base for a decadent chocolate mousse.
  • Pair it with a scoop of ice cream for a delightful treat.
  • Drizzle with a creamy sauce, like creamy garlic pasta, for a unique twist!
  • Serve it plain with a dusting of powdered sugar for a simple yet elegant presentation.

Make Ahead and Storage

If you’re planning ahead, this cake can be made a day in advance. Just store it in an airtight container at room temperature. If you have leftovers, you can keep them in the fridge for up to three days. For longer storage, wrap the cake tightly in plastic wrap and freeze it for up to three months. When you’re ready to enjoy it, simply thaw it at room temperature and serve!

So, whether you’re looking for a delightful dessert to accompany your weeknight dinner ideas or a special treat for a gathering, this Pão de Ló Fofinho is sure to impress. Happy baking!

Pão de Ló Fofinho – Base Perfeita para Bolos e Sobremesas

Prep Time 15 minutes
Cook Time 30 minutes
Total Time 45 minutes
Servings 8 pieces
Calories 150
This light and fluffy sponge cake serves as the perfect base for a variety of desserts and cakes, offering a delicate texture and subtle sweetness.

Ingredients

Eggs

  • 4 pieces eggs (separated)

Liquid

  • 1 cup hot milk

Sugar

  • 2 cups sugar

Flour

  • 2 cups wheat flour

Leavening

  • 1 tbsp baking powder

Salt

  • 1 pinch salt

Instructions 

  • Separate 4 eggs into whites and yolks.
  • Prepare the eggs.
  • In a bowl, beat the egg whites until stiff peaks form.
  • In another bowl, beat the egg yolks with sugar until creamy.
  • Mix the hot milk with the egg yolk mixture.
  • Gradually add the flour, baking powder, and salt to the mixture.
  • Gently fold the beaten egg whites into the batter.
  • Pour the batter into a greased and floured baking pan.
  • Bake at 180°C (356°F) for 30 minutes or until a toothpick inserted comes out clean.

Notes

Use fresh eggs for best results. Let the cake cool before removing from the pan.
Calories: 150kcal
Cost: $15
Course: Dessert
Cuisine: Brazilian
Keyword: sponge cake

Are you looking for a quick and delicious meal that the whole family will love? Look no further! Today, I’m excited to share my recipe for Miojo Cremoso com Queijo Cheddar – a creamy, cheesy delight that’s perfect for those busy weeknights. This dish is not only a fantastic option for quick family dinners, but it also falls under the category of easy pasta recipes that can be whipped up in no time. Let’s dive into this mouthwatering recipe that will have everyone asking for seconds!

Why You’ll Love This Recipe

  • Quick to prepare, making it ideal for 30-minute meals.
  • Rich and creamy flavor that satisfies even the pickiest eaters.
  • Perfect for busy weeknights when you need something fast and tasty.
  • Versatile – you can add your favorite proteins or veggies!
  • Great for meal prep or leftovers, making it a smart choice for any weeknight dinner.

Ingredients

To make this delightful Miojo Cremoso com Queijo Cheddar, you’ll need the following ingredients:

  • 2 packs of instant noodles (Miojo)
  • 1 cup of shredded cheddar cheese
  • 2 tablespoons of butter
  • 2 cloves of garlic, minced
  • 1 cup of milk
  • Salt and pepper to taste
  • Optional: chopped parsley for garnish

Full ingredient list with measurements is provided in the printable recipe card below.

How to Make the Recipe

Now, let’s get cooking! Follow these simple steps to create your creamy garlic pasta:

  1. Start by boiling water in a medium-sized pot. Once boiling, add the Miojo noodles and cook according to the package instructions, usually about 3-4 minutes.
  2. While the noodles are cooking, melt the butter in a separate pan over medium heat. Add the minced garlic and sauté for about 1 minute until fragrant.
  3. Once the noodles are cooked, drain them and add them to the pan with the garlic butter. Stir well to combine.
  4. Pour in the milk and stir until the noodles are well coated. Add the shredded cheddar cheese and mix until melted and creamy.
  5. Season with salt and pepper to taste. If you like, sprinkle some chopped parsley on top for a fresh touch.
  6. Serve immediately and enjoy your delicious Miojo Cremoso com Queijo Cheddar!

Pro Tips for Making the Recipe

Here are some of my favorite tips to ensure your Miojo Cremoso turns out perfectly every time:

  • For an extra kick, consider adding a pinch of red pepper flakes when sautéing the garlic.
  • If you want to make it a complete meal, feel free to toss in some cooked chicken, shrimp, or your favorite vegetables.
  • Don’t skimp on the cheese! The more cheddar, the creamier and more delicious your dish will be.
  • For a richer flavor, try using half-and-half instead of milk.
  • Make sure to stir continuously after adding the cheese to prevent it from clumping.

How to Serve

This creamy pasta dish is best served hot and fresh. Here are some serving suggestions:

  • Pair it with a simple side salad for a balanced meal.
  • Serve with garlic bread for a comforting dinner experience.
  • Top with additional cheese or fresh herbs for an extra pop of flavor.
  • Consider serving it in individual bowls for a fun, family-style dinner.

Make Ahead and Storage

If you’re looking to save time, you can prepare this dish ahead of time! Here’s how:

  • Cook the noodles and prepare the creamy sauce, then store them separately in the fridge for up to 2 days.
  • When ready to eat, simply reheat the noodles and sauce together in a pan, adding a splash of milk to loosen it up if needed.
  • This dish is best enjoyed fresh, but if you have leftovers, store them in an airtight container in the fridge for up to 3 days.

In conclusion, Miojo Cremoso com Queijo Cheddar is a fantastic addition to your collection of weeknight dinner ideas. It’s quick, easy, and oh-so-delicious! I hope you give this recipe a try and enjoy every creamy bite. Happy cooking!

Miojo Cremoso com Queijo Cheddar – Rápido e Saboroso

Prep Time 5 minutes
Cook Time 10 minutes
Total Time 15 minutes
Servings 2 servings
Calories 450
Uma receita rápida e deliciosa de miojo cremoso com queijo cheddar, perfeita para uma refeição saborosa em poucos minutos.

Ingredients

group

  • 1 package macarrão instantâneo (Miojo)
  • 1 tablespoon manteiga
  • 1 small cebola picada
  • 2 cloves alho picado
  • 0.5 cup leite
  • 1 cup queijo cheddar cremoso
  • to taste sal e pimenta
  • as needed salsinha picada e tomate-cereja (para decorar)

Instructions 

  • Inicie o preparo do miojo conforme as instruções da embalagem.
  • Em uma panela, derreta a manteiga e refogue a cebola e o alho até ficarem macios.
  • Adicione o leite e o queijo cheddar cremoso, mexa até obter um molho cremoso e homogêneo.
  • Misture o molho ao macarrão cozido, tempere com sal e pimenta a gosto.
  • Decore com salsinha picada e tomate-cereja antes de servir.

Notes

Use queijo cheddar light para uma versão mais saudável.
Calories: 450kcal
Cost: $15
Course: Main Course
Cuisine: Brazilian
Keyword: cheddar cheese, instant noodles