Author

thomas

Browsing

Have you ever craved a snack that’s not only delicious but also brings back fond memories of family gatherings? Well, let me introduce you to my favorite treat: Bolinho de Arroz com Queijo e Calabresa! These crispy and flavorful rice balls are perfect for any occasion, and they’re a fantastic way to use up leftover rice. Plus, they’re a delightful addition to your repertoire of easy pasta recipes and quick family dinners. Let’s dive into this mouthwatering recipe that’s sure to become a staple in your kitchen!

Why You’ll Love This Recipe

  • Quick and easy to prepare, making it perfect for 30-minute meals.
  • Deliciously crispy on the outside and cheesy on the inside.
  • Great for using up leftover rice, reducing food waste.
  • Perfect for family gatherings or as a snack for movie night.
  • Can be customized with your favorite ingredients!

Ingredients

To make these delightful Bolinho de Arroz, you’ll need the following ingredients:

  • 2 cups of cooked rice
  • 1 cup of shredded cheese (I love using mozzarella for its meltiness!)
  • 1/2 cup of diced calabresa sausage (or any sausage you prefer)
  • 1/4 cup of chopped green onions
  • 1/4 cup of all-purpose flour
  • 2 large eggs
  • Salt and pepper to taste
  • Oil for frying

Full ingredient list with measurements is provided in the printable recipe card below.

How to Make the Recipe

Now, let’s get cooking! Follow these simple steps to create your own Bolinho de Arroz:

  1. In a large mixing bowl, combine the cooked rice, shredded cheese, diced calabresa, and chopped green onions.
  2. Add the flour, eggs, salt, and pepper. Mix everything together until well combined. The mixture should be sticky but manageable.
  3. Heat oil in a deep frying pan over medium heat. You want enough oil to submerge the balls halfway.
  4. Using your hands, form small balls (about the size of a golf ball) from the mixture and carefully drop them into the hot oil.
  5. Fry the balls for about 3-4 minutes on each side or until they are golden brown and crispy.
  6. Remove them from the oil and place them on a paper towel to drain excess oil.
  7. Serve warm and enjoy!

Pro Tips for Making the Recipe

Here are some of my favorite tips to ensure your Bolinho de Arroz turns out perfectly every time:

  • Make sure your rice is cold; leftover rice works best!
  • Don’t overcrowd the frying pan; fry in batches to maintain the oil temperature.
  • Experiment with different cheeses or add herbs for extra flavor.
  • If you want a healthier version, try baking them in the oven at 400°F for about 20 minutes, flipping halfway through.

How to Serve

These crispy rice balls are incredibly versatile! Here are some serving suggestions:

  • Pair them with a tangy dipping sauce, like marinara or a spicy aioli.
  • Serve them as a side dish with your favorite creamy garlic pasta for a delightful meal.
  • They make a fantastic appetizer for parties or family gatherings.
  • Enjoy them as a snack while watching your favorite movie!

Make Ahead and Storage

If you want to prepare these Bolinho de Arroz in advance, you can easily do so! Here are some tips:

  • Form the balls and place them on a baking sheet lined with parchment paper. Freeze them for about an hour, then transfer to a freezer bag for longer storage.
  • When you’re ready to enjoy, simply fry them straight from the freezer; just add a couple of extra minutes to the cooking time.
  • Store any leftovers in an airtight container in the fridge for up to 3 days. Reheat in the oven for the best texture.

So there you have it! My delightful recipe for Bolinho de Arroz com Queijo e Calabresa is not only easy to make but also a fantastic addition to your collection of weeknight dinner ideas. Whether you’re whipping them up for a quick family dinner or serving them at a gathering, these crispy rice balls are sure to impress. Try them today, and I promise you’ll be smiling with every bite!

Bolinho de Arroz com Queijo e Calabresa – Crocante e Saboroso

Prep Time 20 minutes
Cook Time 30 minutes
Total Time 50 minutes
Servings 4 pieces
Calories 250
Delight in these crispy, flavorful rice balls filled with cheese and calabresa, perfect as an appetizer or snack.

Ingredients

group

  • 3 cups cooked rice
  • 2 eggs eggs
  • 0.5 cup milk
  • 0.25 cup oil
  • 0.5 cup flour of wheat
  • 1 teaspoon baking powder
  • 0.5 cup mozzarella cheese grated
  • 0.5 cup calabresa sausage chopped
  • to taste salt and black pepper
  • as needed oil for frying

Instructions 

  • Prepare the mass: Mix cooked rice, eggs, milk, oil, flour, baking powder, cheese, calabresa, salt, and pepper until well combined.
  • Shape the mixture into small balls.
  • Fry the balls in hot oil until golden and crispy.
  • Remove from oil and drain excess oil on paper towel.
Notes

Use fresh ingredients for best flavor and crispy texture.
Calories: 250kcal
Cost: $15
Course: Appetizer
Cuisine: Brazilian
Keyword: calabresa, cheese, rice

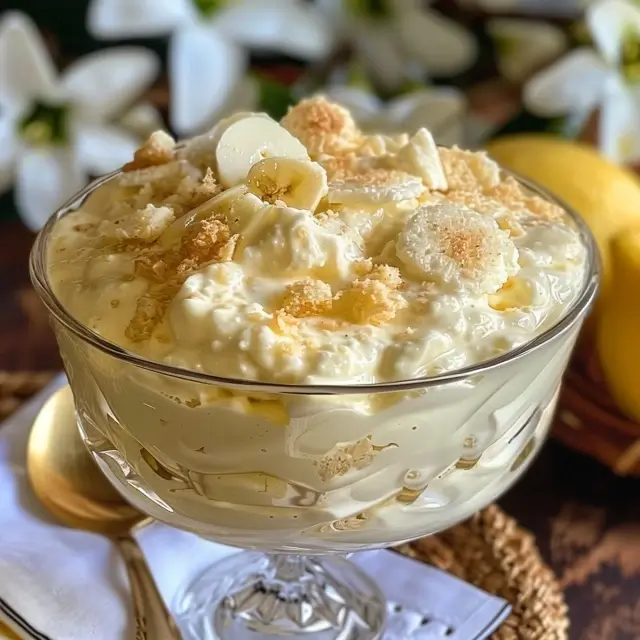
There’s something truly magical about desserts that bring back fond memories, and today, I’m excited to share my take on a classic treat: Ambrosia Caseira! This creamy, flavorful dessert is not only a delightful way to end a meal but also a fantastic addition to any gathering. If you’re looking for a sweet escape that’s reminiscent of family gatherings and warm summer days, you’ve come to the right place! Plus, it’s a breeze to whip up, making it one of those easy pasta recipes that can be enjoyed alongside your favorite dishes.

Why You’ll Love This Recipe

  • Rich, creamy texture that melts in your mouth.
  • Perfect for family gatherings or a cozy weeknight dinner.
  • Simple ingredients that you probably already have at home.
  • Can be made ahead of time, making it a great option for busy schedules.
  • Versatile enough to customize with your favorite fruits and nuts!

Ingredients

To create this delicious Ambrosia Caseira, you’ll need the following ingredients:

  • 1 can of sweetened condensed milk
  • 1 cup of heavy cream
  • 1 cup of shredded coconut
  • 1 cup of mini marshmallows
  • 1 cup of diced pineapple (fresh or canned)
  • 1 cup of mandarin oranges (drained)
  • 1/2 cup of chopped nuts (optional)
  • 1 teaspoon of vanilla extract

Full ingredient list with measurements is provided in the printable recipe card below.

How to Make the Recipe

Now, let’s dive into the delightful process of making this Ambrosia Caseira:

  1. In a large mixing bowl, combine the sweetened condensed milk and heavy cream. Whisk until well blended and creamy.
  2. Add the shredded coconut, mini marshmallows, diced pineapple, and mandarin oranges. If you’re using nuts, toss them in as well!
  3. Stir in the vanilla extract, mixing everything until it’s evenly coated.
  4. Cover the bowl with plastic wrap and refrigerate for at least 2 hours, allowing the flavors to meld beautifully.
  5. Once chilled, give it a gentle stir before serving. Enjoy this creamy delight!

Pro Tips for Making the Recipe

Here are some of my favorite tips to ensure your Ambrosia Caseira turns out perfectly:

  • For a richer flavor, consider using homemade whipped cream instead of heavy cream.
  • Feel free to experiment with different fruits like strawberries or bananas for a unique twist.
  • If you prefer a less sweet version, reduce the amount of sweetened condensed milk.
  • Make sure to chill the dessert for at least 2 hours; this helps the flavors develop and the texture to set.
  • For a fun presentation, serve in individual cups or jars!

How to Serve

This Ambrosia Caseira is perfect for any occasion! Here are some serving suggestions:

  • Serve it as a refreshing dessert after a hearty meal, especially with 30-minute meals or quick family dinners.
  • Pair it with creamy garlic pasta for a delightful contrast of flavors.
  • Top with additional shredded coconut or a sprinkle of cinnamon for an extra touch.
  • It’s also a fantastic addition to potlucks or family gatherings!

Make Ahead and Storage

This dessert is not only delicious but also practical! Here’s how to make it ahead of time:

  • You can prepare Ambrosia Caseira up to 2 days in advance. Just keep it covered in the refrigerator.
  • Store leftovers in an airtight container in the fridge for up to 3 days. Just be aware that the texture may change slightly over time.
  • Do not freeze, as the cream and fruits may not thaw well.

So there you have it! A delightful, creamy Ambrosia Caseira that’s sure to impress your family and friends. Whether you’re looking for weeknight dinner ideas or a sweet treat to share, this recipe is a winner. I hope you enjoy making and sharing this delicious dessert as much as I do. Happy cooking!

Ambrosia Caseira – Receita Tradicional, Cremosa e Saborosa

Prep Time 20 minutes
Cook Time 40 minutes
Total Time 1 hour
Servings 8 porções
Calories 250
Uma deliciosa sobremesa brasileira cremosa, feita com ingredientes simples e um sabor irresistível.

Ingredients

group

  • 1 litro leite integral
  • 6 unidades ovos
  • 2 xícaras (chá) açúcar
  • 1 xícara (chá) água
  • 4 cravos-da-índia cravos-da-índia
  • 1 pau de canela pau de canela
  • 1 casca de limão casca de limão
  • 1 suco de limão pequeno suco de limão

Instructions 

  • Prepare a calda aromatizada com água, açúcar, cravos, canela, casca de limão e suco de limão.
  • Leve ao fogo médio por 15 minutos, mexendo suavemente.
  • Enquanto isso, aqueça o leite até ficar quente, sem ferver.
  • Acrescente o leite aos poucos na calda, mexendo para incorporar.
  • Deixe o fogo baixo por cerca de 30 a 40 minutos, sem mexer, até a mistura ficar mais firme e com pouco líquido.
  • Retire a ambrosia com um escumador e coloque em uma compoteira ou pote de vidro esterilizado.

Notes

Use leite fresco para um sabor mais intenso.
Calories: 250kcal
Cost: $15
Course: sobremesa
Cuisine: brasileira
Keyword: leite

There’s something incredibly comforting about a slice of cake that takes you back to your childhood, isn’t there? Today, I’m excited to share with you my recipe for Bolo de Fubá com Goiabada – a fofo, caseiro cake that’s bursting with nostalgia and flavor. This delightful cake is not only a treat for the taste buds but also a wonderful way to bring the family together. And if you’re looking for easy pasta recipes for quick family dinners, don’t worry! I have plenty of those up my sleeve too. But today, let’s dive into this sweet, soft cake that will surely become a favorite in your home!

Why You’ll Love This Recipe

  • It’s a nostalgic treat that reminds you of childhood.
  • Simple ingredients make it easy to whip up.
  • Perfect for any occasion, from casual weeknight dinners to special celebrations.
  • Pairs beautifully with coffee or tea.
  • Can be made ahead and stored for later enjoyment.

Ingredients

To make this delightful Bolo de Fubá com Goiabada, you’ll need the following ingredients:

  • 1 cup of cornmeal (fubá)
  • 1 cup of sugar
  • 1 cup of milk
  • 1/2 cup of vegetable oil
  • 3 eggs
  • 1 tablespoon of baking powder
  • 1 cup of goiabada (guava paste), cut into small pieces
  • Pinch of salt

Full ingredient list with measurements is provided in the printable recipe card below.

How to Make the Recipe

Now, let’s get to the fun part – making this delicious cake!

  1. Preheat your oven to 350°F (175°C) and grease a 9-inch round cake pan.
  2. In a large mixing bowl, combine the cornmeal, sugar, milk, vegetable oil, and eggs. Mix well until smooth.
  3. Add the baking powder and a pinch of salt, and mix until fully incorporated.
  4. Gently fold in the pieces of goiabada, ensuring they are evenly distributed throughout the batter.
  5. Pour the batter into the prepared cake pan and smooth the top with a spatula.
  6. Bake in the preheated oven for about 30-35 minutes, or until a toothpick inserted into the center comes out clean.
  7. Once baked, let the cake cool in the pan for 10 minutes before transferring it to a wire rack to cool completely.

Pro Tips for Making the Recipe

Here are some of my favorite tips to ensure your Bolo de Fubá com Goiabada turns out perfectly:

  • Make sure your ingredients are at room temperature for a smoother batter.
  • Don’t overmix the batter; a few lumps are okay!
  • For an extra touch, sprinkle some powdered sugar on top before serving.
  • If you want to add a twist, try incorporating some grated coconut into the batter.
  • Serve it warm for a delightful experience!

How to Serve

This cake is incredibly versatile! Here are some serving suggestions:

  • Enjoy a slice with your morning coffee or tea.
  • Pair it with fresh fruit for a light dessert.
  • Serve it as a sweet treat during family gatherings or celebrations.
  • For a fun twist, top it with whipped cream or a scoop of vanilla ice cream.

Make Ahead and Storage

If you’re planning ahead, this cake is perfect for making in advance! Here’s how to store it:

  • Once cooled, wrap the cake tightly in plastic wrap or aluminum foil.
  • Store it at room temperature for up to 3 days, or in the refrigerator for up to a week.
  • You can also freeze the cake for up to 3 months. Just make sure to wrap it well!

And there you have it! A delightful recipe for Bolo de Fubá com Goiabada that’s sure to bring smiles to your family’s faces. Whether you’re enjoying it as part of a cozy weeknight dinner or as a sweet treat on the weekend, this cake is a wonderful addition to your dessert repertoire. And if you’re ever in need of 30-minute meals or weeknight dinner ideas, don’t forget to check out my collection of creamy garlic pasta recipes that are just as easy and delicious!

Bolo de Fubá com Goiabada – Fofo, Caseiro e com Sabor de Infância

Prep Time 20 minutes
Cook Time 40 minutes
Total Time 1 hour
Servings 8 pieces
Calories 350
Delicie-se com este bolo fofinho de fubá com goiabada, trazendo o sabor de infância em cada mordida.

Ingredients

dry ingredients

  • 2 cups fubá
  • 1 cup farinha de trigo
  • 1 cup açúcar
  • 1 cup leite
  • 1/2 cup óleo

wet ingredients

  • 3 units ovos
  • 1 sopa fermento químico em pó
  • 1 pitada sal
  • 150 g goiabada cortada em cubinhos (passados na farinha de trigo)

Instructions 

  • Pré-aqueça o forno a 180°C (350°F). Misture os ingredientes secos: fubá, farinha, açúcar, sal e fermento. Em outra tigela, bata os ovos, adicione o leite, óleo e misture bem. Incorpore aos ingredientes secos até obter uma massa homogênea. Envolva delicadamente a goiabada na massa. Despeje em uma forma untada e asse por aproximadamente 40 minutos ou até dourar e passar no teste do palito.

Notes

Para um sabor mais intenso, adicione uma colher de essência de baunilha na massa.
Calories: 350kcal
Cost: $15
Course: Dessert
Cuisine: Brazilian
Keyword: fubá, goiabada

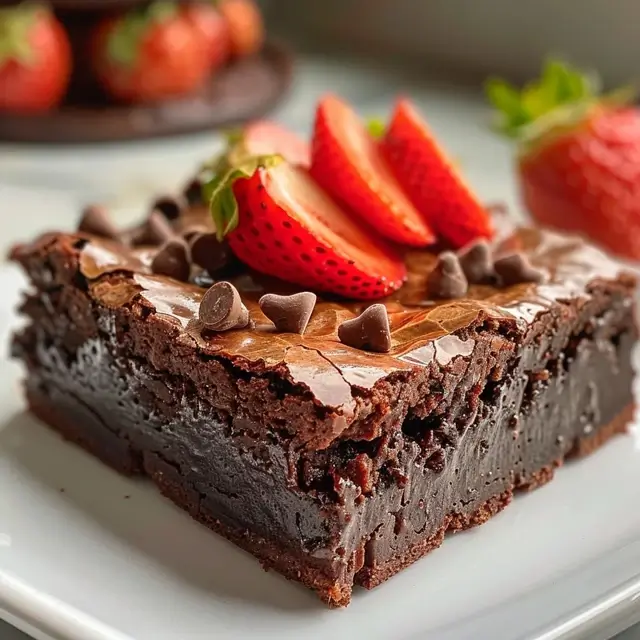
Oh, my goodness! If you’re anything like me, you know that sometimes, nothing satisfies a sweet tooth quite like a rich, fudgy brownie. And when you add fresh strawberries on top? Well, that’s just a match made in dessert heaven! Today, I’m excited to share my recipe for Brownie Gourmet com Morango, or as I like to call it, Irresistible Strawberry Topped Brownies. This delightful treat is perfect for any occasion, whether you’re hosting a gathering or just indulging after a long day. Plus, it’s a fantastic way to impress your family and friends with minimal effort. So, let’s dive in!

Why You’ll Love This Recipe

  • Decadent chocolate flavor paired with fresh strawberries for a delightful contrast.
  • Quick and easy to make, perfect for busy weeknights.
  • Great for gatherings, potlucks, or just a cozy night in.
  • Can be made ahead of time and stored for later enjoyment.
  • Perfect for satisfying those sweet cravings without a lot of fuss!

Ingredients

To whip up these delicious brownies, you’ll need the following ingredients:

  • 1 cup unsalted butter
  • 2 cups granulated sugar
  • 4 large eggs
  • 1 teaspoon vanilla extract
  • 1 cup all-purpose flour
  • 1 cup unsweetened cocoa powder
  • 1/2 teaspoon salt
  • 1 cup fresh strawberries, hulled and sliced
  • Powdered sugar for dusting (optional)

Full ingredient list with measurements is provided in the printable recipe card below.

How to Make the Recipe

Now, let’s get to the fun part—making these brownies! Follow these simple steps:

  1. Preheat your oven to 350°F (175°C) and grease a 9×13 inch baking pan.
  2. In a medium saucepan, melt the butter over low heat. Once melted, remove from heat and stir in the sugar until well combined.
  3. Add the eggs one at a time, mixing well after each addition. Stir in the vanilla extract.
  4. In a separate bowl, whisk together the flour, cocoa powder, and salt. Gradually add this dry mixture to the wet ingredients, stirring until just combined.
  5. Pour the brownie batter into the prepared baking pan and spread it evenly.
  6. Bake for 25-30 minutes, or until a toothpick inserted into the center comes out with a few moist crumbs.
  7. Allow the brownies to cool completely in the pan on a wire rack.
  8. Once cooled, top with sliced strawberries and dust with powdered sugar if desired.

Pro Tips for Making the Recipe

Here are some of my favorite tips to ensure your brownies turn out perfectly:

  • For an extra fudgy texture, don’t overbake the brownies. They should be soft in the center.
  • Feel free to mix in chocolate chips or nuts for added flavor and texture.
  • Let the brownies cool completely before adding the strawberries to prevent them from becoming mushy.
  • If you’re short on time, you can make these brownies as part of your quick family dinners or even as a sweet treat after one of your 30-minute meals.

How to Serve

These brownies are delightful on their own, but here are some serving suggestions to elevate your dessert experience:

  • Serve warm with a scoop of vanilla ice cream on top for a delicious contrast.
  • Pair with a dollop of whipped cream and a sprig of mint for a fresh touch.
  • Enjoy with a cup of coffee or tea for a cozy afternoon treat.
  • For a fun twist, try serving them alongside a creamy garlic pasta dish for a unique flavor combination!

Make Ahead and Storage

If you want to prepare these brownies in advance, you can easily make them a day or two ahead of time. Just store them in an airtight container at room temperature. If you have leftovers (which is rare!), they can be stored in the fridge for up to a week. Just remember to add the strawberries right before serving to keep them fresh and vibrant!

So there you have it! My Brownie Gourmet com Morango recipe is not only easy to make but also a guaranteed crowd-pleaser. Whether you’re looking for a sweet treat after one of your easy pasta recipes or a delightful dessert for a special occasion, these brownies will not disappoint. I hope you enjoy making and sharing them as much as I do!

Brownie Gourmet com Morango

Prep Time 20 minutes
Cook Time 30 minutes
Total Time 50 minutes
Servings 8 pieces
Calories 350
A decadent brownie topped with fresh strawberries and chocolate brigadeiro, perfect for a special treat.

Ingredients

Chocolate and Butter

  • 2 eggs eggs
  • 1 cup sugar ((200 g))
  • 1 cup melted butter ((200 g))
  • 200 g chocolate semi-sweet chopped
  • 1 cup flour ((120 g))
  • 1 pinch salt

Strawberries

  • 1 cup fresh sliced strawberries

Chocolate Brigadeiro

  • 2 cups brigadeiro ready

Chocolate Sprinkles

  • to taste chocolate sprinkles for decoration

Instructions 

  • Preheat oven to 180°C (356°F). Prepare a baking pan.
  • Mix eggs, sugar, and melted butter until smooth.
  • Add chopped chocolate and mix well.
  • Incorporate flour and salt, mixing gently.
  • Pour batter into the prepared pan and bake for 30 minutes.
  • Let the brownie cool, then top with brigadeiro and sliced strawberries.
  • Decorate with chocolate sprinkles and serve.

Notes

Use high-quality chocolate for best flavor. Chill before serving for easier slicing.
Calories: 350kcal
Cost: $15
Course: Dessert
Cuisine: Brazilian
Keyword: brownie

Are you ready to whip up a delightful dish that will have your family asking for seconds? I’m excited to share my recipe for Torta Salgada de Liquidificador com Frango e Legumes! This savory pie is not only delicious but also incredibly easy to make, making it a perfect choice for quick family dinners. If you love easy pasta recipes, you’re going to adore this dish that combines the heartiness of chicken and vegetables in a creamy, flavorful batter. Let’s dive into this culinary adventure!

Why You’ll Love This Recipe

  • Quick and easy to prepare, perfect for busy weeknights.
  • Packed with protein and veggies, making it a nutritious choice.
  • Versatile – you can customize it with your favorite ingredients!
  • Great for meal prep and leftovers taste even better!
  • A crowd-pleaser that will impress your family and friends.

Ingredients

To make this scrumptious Torta Salgada, you’ll need the following ingredients:

  • 2 cups cooked chicken, shredded
  • 1 cup mixed vegetables (carrots, peas, corn)
  • 1 cup milk
  • 1 cup flour
  • 3 large eggs
  • 1/2 cup vegetable oil
  • 1 tablespoon baking powder
  • Salt and pepper to taste
  • 1 cup grated cheese (optional)

Full ingredient list with measurements is provided in the printable recipe card below.

How to Make the Recipe

Now, let’s get cooking! Follow these simple steps to create your Torta Salgada:

  1. Preheat your oven to 350°F (175°C).
  2. In a blender, combine the milk, eggs, and vegetable oil. Blend until smooth.
  3. Add the flour, baking powder, salt, and pepper to the blender. Blend again until you have a smooth batter.
  4. In a large mixing bowl, combine the shredded chicken and mixed vegetables.
  5. Pour the batter over the chicken and vegetables, mixing well to combine.
  6. If you’re using cheese, fold it into the mixture now.
  7. Pour the mixture into a greased baking dish.
  8. Bake for 30-35 minutes or until the top is golden brown and a toothpick inserted in the center comes out clean.
  9. Let it cool for a few minutes before slicing and serving.

Pro Tips for Making the Recipe

Here are some of my favorite tips to ensure your Torta Salgada turns out perfectly:

  • Feel free to use leftover chicken or rotisserie chicken to save time.
  • Experiment with different vegetables based on what you have on hand – bell peppers, spinach, or zucchini work great!
  • If you want to add a little kick, consider adding some spices like paprika or chili flakes.
  • For a creamier texture, you can substitute half of the milk with sour cream or Greek yogurt.
  • This dish is also a fantastic way to use up any leftover pasta – just mix it in with the chicken and veggies!

How to Serve

This Torta Salgada is delicious on its own, but you can elevate your meal with some simple sides. Here are a few serving suggestions:

  • Pair it with a fresh garden salad for a light and healthy meal.
  • Serve with a dollop of sour cream or a drizzle of your favorite sauce for added flavor.
  • For a comforting touch, serve it alongside a warm bowl of creamy garlic pasta.
  • It also makes a great addition to a brunch spread!

Make Ahead and Storage

This Torta Salgada is perfect for meal prep! Here’s how to store it:

  • Store any leftovers in an airtight container in the refrigerator for up to 3 days.
  • You can also freeze individual slices for quick 30-minute meals later on. Just thaw in the fridge overnight before reheating.
  • To reheat, simply pop it in the oven at 350°F (175°C) for about 15-20 minutes or until heated through.

Now that you have this delightful recipe in your arsenal, you’re all set for your next weeknight dinner ideas! I hope you enjoy making and sharing this Torta Salgada de Liquidificador com Frango e Legumes as much as I do. Happy cooking!

Torta Salgada de Liquidificador com Frango e Legumes

Prep Time 20 minutes
Cook Time 40 minutes
Total Time 1 hour
Servings 8 pieces
Calories 350
A savory Brazilian-style cake made with chicken, vegetables, and cheese, perfect for a hearty meal or snack.

Ingredients

Dough

  • 3 units eggs
  • 2 cups leite (milk)
  • 0.5 cup óleo (oil)
  • 2 cups farinha de trigo (flour)
  • 1 tbsp fermento em pó (baking powder)
  • 1 tsp sal (salt)
  • 3 tbsp queijo parmesão ralado (parmesan cheese) (optional)

Filling

  • 2.5 cups frango cozido e desfiado (cooked shredded chicken)
  • 1.7 cups milho verde (corn) (1 lata)
  • 1.7 cups ervilha (peas) (1 lata)
  • 1 unit cebola em rodelas (onion slices)
  • 3 units ovos cozidos em rodelas (boiled eggs slices)
  • 0.5 cup azeitonas verdes picadas (chopped green olives)

Seasonings

  • to taste sal, pimenta-do-reino e cheiro-verde
  • optional queijo muçarela ralado

Instructions 

  • Prepare a mass: beat 3 eggs, add 2 cups milk, ½ cup oil, 2 cups flour, 1 tbsp baking powder, 1 tsp salt, 3 tbsp grated Parmesan cheese (optional), and mix well. Add 2.5 cups cooked shredded chicken, 1.7 cups corn, 1.7 cups peas, season with salt, pepper, and chopped green herbs. Pour into a greased baking dish (30x20 cm). Top with onion slices, boiled egg slices, chopped olives, and grated mozzarella (optional). Bake at 180°C (356°F) for 40 minutes or until golden. Let cool slightly before serving.

Notes

For extra flavor, add herbs or spices as desired. Can be frozen and reheated.
Calories: 350kcal
Cost: $15
Course: Main Course
Cuisine: Brazilian
Keyword: chicken, savory cake, vegetables

Have you ever tasted the sweet, luscious delight of Goiabada Caseira? This homemade guava paste is a treasure from Brazilian cuisine that I absolutely adore! It’s not just a treat; it’s a nostalgic journey back to my childhood, where every bite brings back memories of family gatherings and sunny afternoons. And the best part? It’s incredibly easy to make! If you’re looking for a delightful addition to your quick family dinners or a sweet treat to enjoy with your favorite easy pasta recipes, you’re in the right place. Let’s dive into the world of Goiabada Caseira!

Why You’ll Love This Recipe

  • Simple ingredients: Just ripe goiabas and sugar!
  • Perfect for spreading on toast or pairing with cheese.
  • Great for meal prep and can be stored for weeks.
  • Brings a taste of Brazil to your kitchen.
  • Ideal for quick family dinners or as a sweet treat after a creamy garlic pasta dish.

Ingredients

To make this delicious Goiabada Caseira, you will need:

  • 2 pounds of ripe goiabas (guavas)
  • 1 pound of granulated sugar
  • 1 tablespoon of lemon juice (optional, for added flavor)

Full ingredient list with measurements is provided in the printable recipe card below.

How to Make the Recipe

Making Goiabada Caseira is a delightful process that fills your kitchen with the sweet aroma of guavas. Here’s how to do it:

  1. Start by washing the goiabas thoroughly. Cut them in half and scoop out the seeds. You can also peel them if you prefer a smoother texture.
  2. Place the goiabas in a large pot and add the sugar. Stir well to combine.
  3. Cook over medium heat, stirring occasionally, until the mixture starts to thicken. This usually takes about 30 minutes.
  4. Once it reaches a thick, paste-like consistency, add the lemon juice if you’re using it. Stir well.
  5. Pour the mixture into a greased dish or mold and let it cool completely. Once set, cut it into squares or rectangles.

And there you have it! A delicious homemade Goiabada that’s perfect for snacking or serving at your next gathering.

Pro Tips for Making the Recipe

Here are some of my favorite tips to ensure your Goiabada Caseira turns out perfectly:

  • Use ripe goiabas for the best flavor. They should be soft to the touch.
  • Don’t rush the cooking process; let it simmer to develop that rich flavor.
  • For a unique twist, try adding spices like cinnamon or cloves for a warm flavor.
  • Make sure to store it in an airtight container to keep it fresh.

How to Serve

Goiabada Caseira is incredibly versatile! Here are some delightful ways to enjoy it:

  • Spread it on warm toast for a delicious breakfast.
  • Pair it with cheese for a sweet and savory snack.
  • Use it as a filling for pastries or cakes.
  • Serve it alongside your favorite creamy garlic pasta for a unique flavor combination.
  • Enjoy it as a sweet treat after a hearty meal or as part of your weeknight dinner ideas.

Make Ahead and Storage

This Goiabada Caseira is perfect for making ahead of time! Here’s how to store it:

  • Once cooled, cut it into pieces and store in an airtight container.
  • It can be kept in the refrigerator for up to 2 weeks.
  • You can also freeze it for longer storage; just make sure to wrap it tightly.

Now that you know how to make this delightful Goiabada Caseira, I encourage you to give it a try! It’s a wonderful addition to your collection of easy pasta recipes and will surely impress your family and friends. Enjoy the sweet taste of homemade guava paste, and let it bring a little bit of Brazil into your home!

Goiabada Caseira

Prep Time 30 minutes
Cook Time 1 hour
Total Time 1 hour 30 minutes
Servings 10 pieces
Calories 250
A homemade guava paste recipe that yields a sweet, dense treat perfect for spreading or slicing.

Ingredients

Main ingredients

  • 1 kg ripe guavas (preferably red)
  • 700 g sugar
  • 1 unit lemon juice (optional)

Instructions 

  • Wash and peel the guavas, then remove seeds and cut into pieces.
  • Cook the guava pieces in a pot until soft, about 30 minutes.
  • Puree the cooked guavas until smooth.
  • Add sugar and lemon juice, then cook over low heat, stirring constantly, until thickened (about 60 minutes).
  • Pour the mixture into a greased pan and let cool before slicing.

Notes

Use ripe guavas for best flavor and texture.
Calories: 250kcal
Cost: $15
Course: Dessert
Cuisine: Brazilian
Keyword: guava

There’s something truly magical about desserts that not only look beautiful but also taste divine! Today, I’m excited to share with you my favorite recipe for Gelatina com Creme Branco, a delightful layered dessert that combines creamy and fruity flavors in a way that will make your taste buds dance. This recipe is perfect for those busy weeknights when you want to impress your family without spending hours in the kitchen. Plus, it’s a fantastic addition to any gathering or celebration! So, let’s dive into this fun and tasty recipe that’s sure to become a family favorite.

Why You’ll Love This Recipe

  • It’s visually stunning with its colorful layers!
  • Perfect for any occasion, from casual weeknight dinners to festive celebrations.
  • Quick and easy to prepare, making it a great choice for busy evenings.
  • Can be made ahead of time, freeing you up for other tasks.
  • It’s a crowd-pleaser that will have everyone asking for seconds!

Ingredients

To create this delightful dessert, you’ll need a few simple ingredients that you might already have in your pantry. Here’s what you’ll need:

  • 1 package of flavored gelatin (your choice of flavor)
  • 1 cup of boiling water
  • 1 cup of cold water
  • 1 can of sweetened condensed milk
  • 1 cup of heavy cream
  • 1 teaspoon of vanilla extract
  • 1/2 cup of sugar (optional, depending on your taste)

Full ingredient list with measurements is provided in the printable recipe card below.

How to Make the Recipe

Now, let’s get to the fun part—making this delicious layered dessert! Follow these simple steps:

  1. In a mixing bowl, dissolve the flavored gelatin in 1 cup of boiling water. Stir until completely dissolved.
  2. Add 1 cup of cold water to the gelatin mixture and stir well. Pour the mixture into a clear glass dish or individual cups for a beautiful presentation.
  3. Refrigerate the gelatin for about 2 hours or until it’s set.
  4. While the gelatin is setting, prepare the creamy layer. In a separate bowl, whip the heavy cream until soft peaks form.
  5. In another bowl, mix the sweetened condensed milk, vanilla extract, and sugar (if using) until smooth. Gently fold in the whipped cream until well combined.
  6. Once the gelatin is set, pour the creamy mixture over the top of the gelatin layer. Return to the refrigerator and let it chill for another 2 hours.
  7. For an extra touch, you can add fresh fruit or berries on top before serving!

Pro Tips for Making the Recipe

Here are some helpful suggestions to ensure your Gelatina com Creme Branco turns out perfectly:

  • Make sure the gelatin is completely dissolved before adding cold water for the best texture.
  • For a fun twist, try using different flavored gelatins to create a rainbow effect!
  • Don’t rush the chilling process; letting it set properly is key to achieving those beautiful layers.
  • If you’re short on time, you can use store-bought whipped cream instead of making your own.
  • Feel free to experiment with different fruits or toppings to customize your dessert!

How to Serve

When it comes to serving your Gelatina com Creme Branco, presentation is everything! Here are some ideas:

  • Serve in individual cups for a charming touch at parties.
  • Garnish with fresh berries or mint leaves for a pop of color.
  • Pair it with a light, refreshing drink for a delightful dessert experience.
  • It’s also a great addition to a potluck or family gathering!

Make Ahead and Storage

This dessert is perfect for making ahead of time! You can prepare it a day in advance and store it in the refrigerator until you’re ready to serve. Just make sure to cover it with plastic wrap to keep it fresh. If you have leftovers (which is rare because it’s so delicious!), you can store them in the fridge for up to 3 days. Just remember to keep it covered!

In conclusion, this Gelatina com Creme Branco is not only a feast for the eyes but also a delightful treat for the taste buds. It’s a fantastic option for quick family dinners or as a sweet ending to your favorite 30-minute meals. Whether you’re looking for a fun dessert to impress your guests or a simple treat for your family, this layered dessert is sure to please. So, gather your ingredients and get ready to create a dessert that will have everyone smiling!

Gelatina com Creme Branco

Prep Time 30 minutes
Cook Time 1 hour
Total Time 1 hour 30 minutes
Servings 8 pieces
Calories 250
A colorful and creamy dessert combining vibrant gelatins with a smooth white cream, perfect for special occasions or a refreshing treat.

Ingredients

Gelatins

  • 3 flavors 3 sabores diferentes de gelatina
  • 2 envelopes gelatina incolor (incolor)
  • 3 cups água quente (para gelatinas coloridas)
  • 3 cups água fria (para gelatinas coloridas)
  • 1 lata leite condensado (395 g)
  • 1 lata creme de leite sem soro (200 g)
  • 4 tablespoons água (para hidratar a gelatina incolor)

Instructions 

  • Inicie preparando as gelatinas coloridas: dissolva cada sabor em água quente e fria, leve à geladeira até firmar, e depois corte em cubos.
  • Hidrate a gelatina incolor com a água quente, dissolva completamente e deixe esfriar.
  • Em um recipiente, misture o leite condensado, o creme de leite e a gelatina incolor já fria, até obter um creme homogêneo.
  • Monte a sobremesa: coloque as gelatinas coloridas em um refratário, cubra com o creme branco e leve à geladeira por pelo menos 4 horas para firmar.

Notes

Para um visual mais elegante, monte em taças individuais e decore com frutas frescas.
Calories: 250kcal
Cost: $15
Course: Dessert
Cuisine: Brazilian
Keyword: creme, gelatina

Are you ready to indulge in a delightful snack that’s both crispy and cheesy? I can’t wait to share my favorite recipe for Biscoito de Queijo de Liquidificador! These cheesy cookies are not only incredibly easy to make, but they also come together in a flash, making them perfect for quick family dinners or as a delightful addition to your next gathering. If you’re looking for something to pair with your easy pasta recipes, these cookies will be a hit!

Why You’ll Love This Recipe

  • Quick and easy to prepare, perfect for busy weeknights.
  • Made with simple ingredients you probably already have at home.
  • Great for parties, snacks, or even as a side for your favorite 30-minute meals.
  • Deliciously cheesy and crispy, a treat for all ages!
  • Versatile enough to customize with your favorite herbs and spices.

Ingredients

To make these scrumptious Biscoito de Queijo, you’ll need the following ingredients:

  • 1 cup of grated cheese (Parmesan or cheddar work wonderfully)
  • 1 cup of milk
  • 1/2 cup of vegetable oil
  • 2 cups of all-purpose flour
  • 1 teaspoon of baking powder
  • 1 teaspoon of salt
  • Optional: herbs like oregano or thyme for added flavor

Full ingredient list with measurements is provided in the printable recipe card below.

How to Make the Recipe

Making Biscoito de Queijo de Liquidificador is a breeze! Here’s how you can whip them up:

  1. Preheat your oven to 375°F (190°C).
  2. In a blender, combine the milk, vegetable oil, and grated cheese. Blend until smooth.
  3. In a large mixing bowl, combine the flour, baking powder, and salt.
  4. Pour the blended mixture into the dry ingredients and mix until a dough forms. If you’re adding herbs, now’s the time!
  5. Shape the dough into small balls and place them on a baking sheet lined with parchment paper.
  6. Bake for 15-20 minutes or until golden brown and crispy.
  7. Let them cool slightly before serving. Enjoy!

Pro Tips for Making the Recipe

Here are some of my favorite tips to ensure your Biscoito de Queijo turn out perfectly every time:

  • For an extra cheesy flavor, try mixing different types of cheese.
  • Don’t skip the cooling step; it helps them crisp up even more!
  • If you want to make these ahead of time, you can freeze the dough and bake them fresh when you’re ready.
  • Experiment with spices! A pinch of paprika or garlic powder can elevate the flavor.

How to Serve

These cheesy cookies are incredibly versatile! Here are some serving suggestions:

  • Serve them warm as a snack with your favorite dip.
  • Pair them with a creamy garlic pasta for a delightful meal.
  • Use them as a crunchy side for soups or salads.
  • They also make a fantastic appetizer at parties!

Make Ahead and Storage

If you’re planning for a busy week, these cookies can be made ahead of time! Here’s how to store them:

  • Store baked cookies in an airtight container at room temperature for up to 3 days.
  • For longer storage, freeze the baked cookies in a single layer, then transfer to a freezer bag. They can last up to 2 months!
  • To reheat, simply pop them in the oven for a few minutes until warm and crispy again.

Now that you have this delightful recipe in your arsenal, you can easily impress your family and friends with your culinary skills! Whether you’re looking for weeknight dinner ideas or a fun snack for movie night, these Biscoito de Queijo de Liquidificador are sure to be a crowd-pleaser. So, roll up your sleeves, gather your ingredients, and let’s get baking!

Biscoito de Queijo de Liquidificador

Prep Time 10 minutes
Cook Time 15 minutes
Total Time 25 minutes
Servings 12 cookies
Calories 150
Delicious, cheesy cookies made effortlessly in a blender, perfect for snacks or appetizers.

Ingredients

group

  • 2 eggs eggs
  • 0.5 cup milk
  • 0.25 cup oil
  • 2 cups polvilho doce
  • 1 cup queijo parmesão ralado (or meia cura)
  • 1 teaspoon fermento químico
  • sal a gosto salt

Instructions 

  • Preaqueça o forno a 180°C e unte uma assadeira com manteiga ou óleo.
  • No liquidificador, adicione os ovos, leite, óleo, polvilho, queijo ralado, fermento e sal. Bata até obter uma massa homogênea.
  • Com uma colher, modele pequenas porções da massa e coloque na assadeira preparada.
  • Asse por aproximadamente 15 minutos ou até que fiquem dourados.

Notes

Para um sabor mais intenso, adicione um pouco mais de queijo ou ervas finas à massa.
Calories: 150kcal
Cost: $15
Course: Snack
Cuisine: Brazilian
Keyword: cheese

Have you ever craved a light and crispy treat that pairs perfectly with your afternoon coffee or tea? Well, let me introduce you to my favorite indulgence: Biscoito Champagne Leve Crocante! This delightful recipe is not only easy to make, but it also brings a touch of elegance to your snack time. Plus, it’s a fantastic way to impress your friends and family without spending hours in the kitchen. If you’re looking for something to complement your quick family dinners or even a sweet treat after one of those easy pasta recipes, you’re in for a real treat!

Why You’ll Love This Recipe

  • Light and crispy texture that melts in your mouth.
  • Perfect for pairing with coffee, tea, or even dessert wine.
  • Quick and easy to prepare, making it ideal for busy weeknights.
  • Great for sharing at gatherings or enjoying solo!
  • Versatile enough to be dressed up with toppings or enjoyed plain.

Ingredients

To make these delightful Biscoito Champagne cookies, you’ll need the following ingredients:

  • 2 cups all-purpose flour
  • 1 cup sugar
  • 1 cup unsalted butter, softened
  • 2 large eggs
  • 1 teaspoon vanilla extract
  • 1 teaspoon baking powder
  • 1/2 teaspoon salt
  • Powdered sugar for dusting (optional)

Full ingredient list with measurements is provided in the printable recipe card below.

How to Make the Recipe

Now, let’s dive into the fun part—making these delicious cookies!

  1. Preheat your oven to 350°F (175°C) and line a baking sheet with parchment paper.
  2. In a large mixing bowl, cream together the softened butter and sugar until light and fluffy.
  3. Add the eggs one at a time, mixing well after each addition. Stir in the vanilla extract.
  4. In a separate bowl, whisk together the flour, baking powder, and salt.
  5. Gradually add the dry ingredients to the wet mixture, mixing until just combined.
  6. Using a spoon or cookie scoop, drop rounded tablespoons of dough onto the prepared baking sheet, spacing them about 2 inches apart.
  7. Bake for 12-15 minutes or until the edges are lightly golden.
  8. Allow the cookies to cool on the baking sheet for a few minutes before transferring them to a wire rack to cool completely.
  9. If desired, dust with powdered sugar before serving.

Pro Tips for Making the Recipe

Here are some of my favorite tips to ensure your Biscoito Champagne cookies turn out perfectly every time:

  • Make sure your butter is at room temperature for easy creaming.
  • Don’t overmix the dough; it should be just combined for the best texture.
  • Experiment with different extracts like almond or lemon for a unique twist.
  • For a fun variation, add chocolate chips or nuts to the dough!
  • Keep an eye on the cookies while baking; they can go from perfect to overdone quickly!

How to Serve

These cookies are incredibly versatile! Here are some serving suggestions:

  • Pair them with a cup of your favorite coffee or tea for a delightful afternoon treat.
  • Serve them at your next gathering as a light dessert option.
  • Try them with a scoop of ice cream for a delicious sundae.
  • Use them as a base for a dessert charcuterie board, alongside fruits and cheeses.

Make Ahead and Storage

If you’re planning ahead, these cookies can be made in advance! Here’s how to store them:

  • Store the cooled cookies in an airtight container at room temperature for up to a week.
  • For longer storage, freeze the cookies in a single layer, then transfer them to a freezer bag for up to three months.
  • To enjoy frozen cookies, simply let them thaw at room temperature or warm them in the oven for a few minutes.

So there you have it! A delightful recipe for Biscoito Champagne Leve Crocante that’s sure to become a favorite in your home. Whether you’re enjoying them with a cup of coffee or serving them at a gathering, these cookies are a hit every time. And if you’re looking for more quick and easy ideas for your weeknight dinners, don’t forget to check out my collection of 30-minute meals and creamy garlic pasta recipes. Happy baking!

Biscoito Champagne – Leve e Crocante

Prep Time 20 minutes
Cook Time 15 minutes
Total Time 35 minutes
Servings 10 pieces
Calories 150
A light and crispy Brazilian-style champagne biscuit, perfect for tea or coffee.

Ingredients

Dough

  • 5 pieces claras
  • 150 g açúcar cristal
  • 1 pinch sal
  • 10 pieces gemas
  • 300 g farinha de trigo peneirada
  • 200 g açúcar cristal para polvilhar

Instructions 

  • Preheat oven to 180°C (356°F). Beat egg whites until stiff peaks form. Gradually add sugar, then fold in egg yolks and sifted flour. Shape dough into small balls, place on baking sheet, and sprinkle with sugar. Bake for 15 minutes until golden and crispy.

Notes

Keep biscuits in an airtight container to maintain crispness.
Calories: 150kcal
Cost: $15
Course: Dessert
Cuisine: Brazilian
Keyword: biscuit

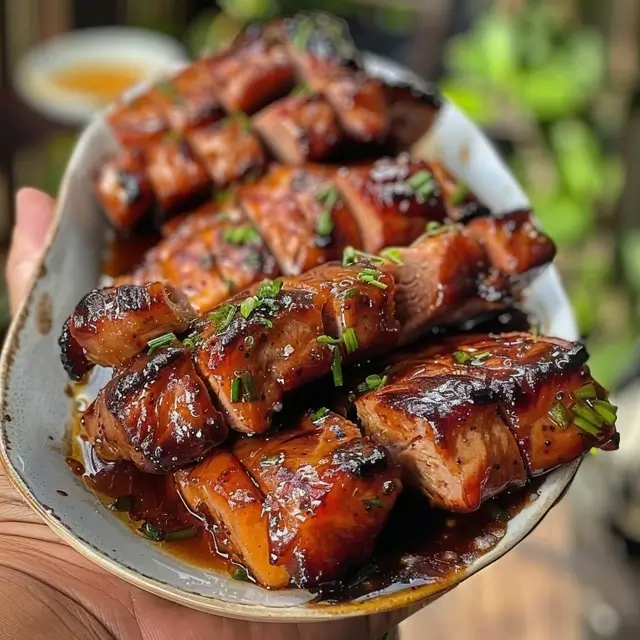
There’s something truly magical about the aroma of a roast wafting through the kitchen, isn’t there? Today, I’m excited to share with you my favorite recipe for Lombo de Porco ao Molho Churrasco com Toque de Laranja. This juicy, flavorful roast is not only a feast for the senses but also a fantastic option for quick family dinners. With a delightful citrus twist, it’s sure to become a staple in your weeknight dinner ideas. And if you’re looking for something to pair it with, don’t forget to check out my easy pasta recipes for a complete meal!

Why You’ll Love This Recipe

  • Quick and easy to prepare, perfect for busy weeknights.
  • Deliciously tender pork that melts in your mouth.
  • A unique citrus flavor that elevates the dish.
  • Great for family gatherings or special occasions.
  • Pairs wonderfully with a variety of sides, including creamy garlic pasta.

Ingredients

To make this mouthwatering roast, you’ll need the following ingredients:

  • 2 lbs pork loin
  • 1 cup orange juice
  • 1/4 cup soy sauce
  • 1/4 cup olive oil
  • 4 cloves garlic, minced
  • 1 tablespoon smoked paprika
  • 1 teaspoon cumin
  • Salt and pepper to taste
  • Fresh parsley for garnish

Full ingredient list with measurements is provided in the printable recipe card below.

How to Make the Recipe

Now, let’s dive into the steps to create this delicious roast:

  1. Preheat your oven to 375°F (190°C).
  2. In a bowl, whisk together the orange juice, soy sauce, olive oil, minced garlic, smoked paprika, cumin, salt, and pepper.
  3. Place the pork loin in a roasting pan and pour the marinade over it, ensuring it’s well coated.
  4. Cover the pan with aluminum foil and roast in the preheated oven for 1 hour.
  5. After an hour, remove the foil and continue roasting for an additional 30 minutes, or until the internal temperature reaches 145°F (63°C).
  6. Let the roast rest for 10 minutes before slicing. This helps keep it juicy!
  7. Garnish with fresh parsley and serve.

Pro Tips for Making the Recipe

Here are some of my favorite tips to ensure your roast turns out perfectly:

  • Marinate the pork overnight for even more flavor.
  • Use a meat thermometer to check for doneness.
  • Let the roast rest before slicing to retain its juices.
  • Pair with roasted vegetables or a fresh salad for a complete meal.
  • If you have leftovers, they make a great filling for sandwiches!

How to Serve

This roast is incredibly versatile! Here are some serving suggestions:

  • Serve with creamy garlic pasta for a comforting meal.
  • Pair with a side of roasted potatoes and steamed green beans.
  • Top with a fresh salsa or chutney for an extra kick.
  • Slice thinly for sandwiches or wraps the next day.

Make Ahead and Storage

If you’re planning ahead, this roast can be made in advance:

  • Prepare the marinade and marinate the pork up to 24 hours ahead of time.
  • Cooked pork can be stored in the refrigerator for up to 3 days.
  • Reheat in the oven or microwave, but be careful not to dry it out.
  • Leftovers can be frozen for up to 3 months; just make sure to wrap them tightly!

So there you have it! A delicious, juicy roast that’s perfect for any occasion. I hope you enjoy making this Lombo de Porco ao Molho Churrasco com Toque de Laranja as much as I do. It’s a fantastic addition to your collection of 30-minute meals and will surely impress your family and friends. Happy cooking!

Lombo de Porco ao Molho Churrasco com Toque de Laranja

Prep Time 15 minutes
Cook Time 30 minutes
Total Time 45 minutes
Servings 4 servings
Calories 450
Delight in this flavorful pork loin recipe with a tangy orange twist and smoky barbecue sauce, perfect for a hearty meal.

Ingredients

Meat

  • 500 g lombo de porco
  • 1 cup molho barbecue (churrasco)
  • 0.5 cup suco de laranja natural
  • 1 tbsp óleo vegetal
  • 1 tsp alho em pó (ou 1 dente de alho amassado)
  • Sal e pimenta-do-reino a gosto Sal e pimenta-do-reino (a gosto)
  • Flocos de pimenta (opcional) Flocos de pimenta (opcional)
  • 1 tbsp mel

Instructions 

  • Marinar a carne: misture o suco de laranja, óleo, alho, sal, pimenta e mel. Cubra o lombo e deixe marinar por pelo menos 30 minutos.
  • Preaqueça o forno a 200°C (392°F). Grelhe o lombo até dourar, cerca de 10 minutos de cada lado.
  • Asse o lombo no forno por aproximadamente 20 minutos ou até atingir o ponto desejado.
  • Enquanto isso, aqueça o molho barbecue e adicione o suco de laranja restante para criar o molho final.
  • Fatie o lombo, sirva com o molho de barbecue com toque de laranja e aproveite!

Notes

Para um sabor mais intenso, deixe marinar por mais tempo ou use um defumador para um toque defumado extra.
Calories: 450kcal
Cost: $15
Course: Main Course
Cuisine: Brazilian
Keyword: barbecue, orange, pork